I hope you all had a wonderful weekend! I am loving the slightly cooler days that we are enjoying in Southwest Ohio…..
This super easy industrial bookcase came together because I was in desperate need of some storage. When we were having our floors done last May, I had the bright idea to give our desk and credenza away!
To my credit, I did have a desk all ready to go……..
……but with only 3 teeny tiny drawers, it lacked the storage that the desk and credenza gave us.
New floors, new desk (new to me) meant that it was the perfect time to revamp my office. I originally wanted to do built- ins around the window with a window seat in between. I could totally see myself curling up with a good book on the weekends letting the afternoon sun lull me to sleep.
{SIGH}
That fantastic dream could not be my reality!
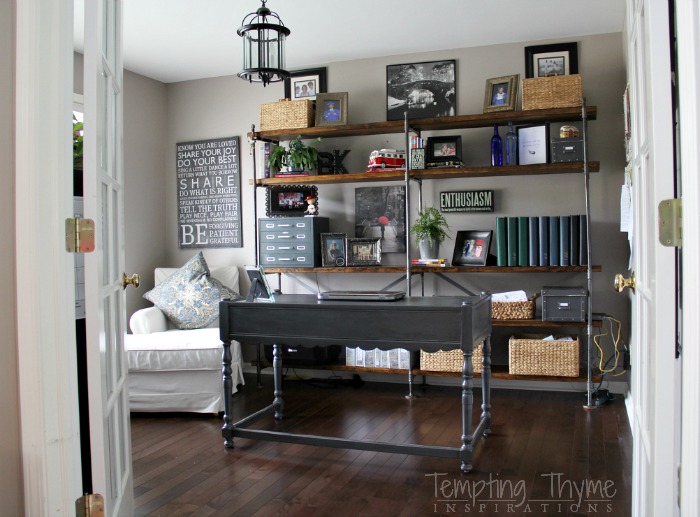
Those built-ins would have taken up too much ‘real estate’ and I think they may have overpowered the room. Plus they would have taken time for me to build, and time was not on my side. I needed a functional office! Quickly!
If you follow me on Instagram, then you have seen a little of what I have finished in the office………and alot of what I have NOT gotten done yet! 😉
I searched all over for a “before” shot of the office, and all I could come up with is this…..
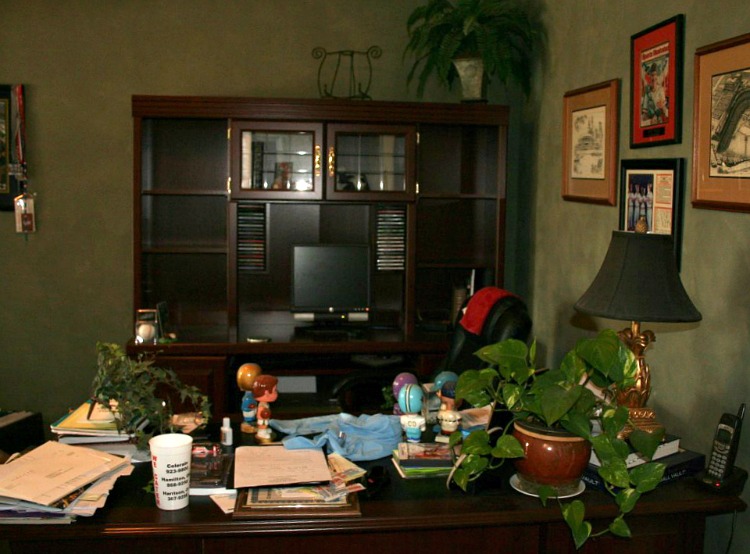
Obviously this room is not staged, annndddd I hope that my photography skills have improved some, but you get the drift on the small space, and the huge executive desk and credenza that although it was perfect for storage….. shrunk the room tremendously.
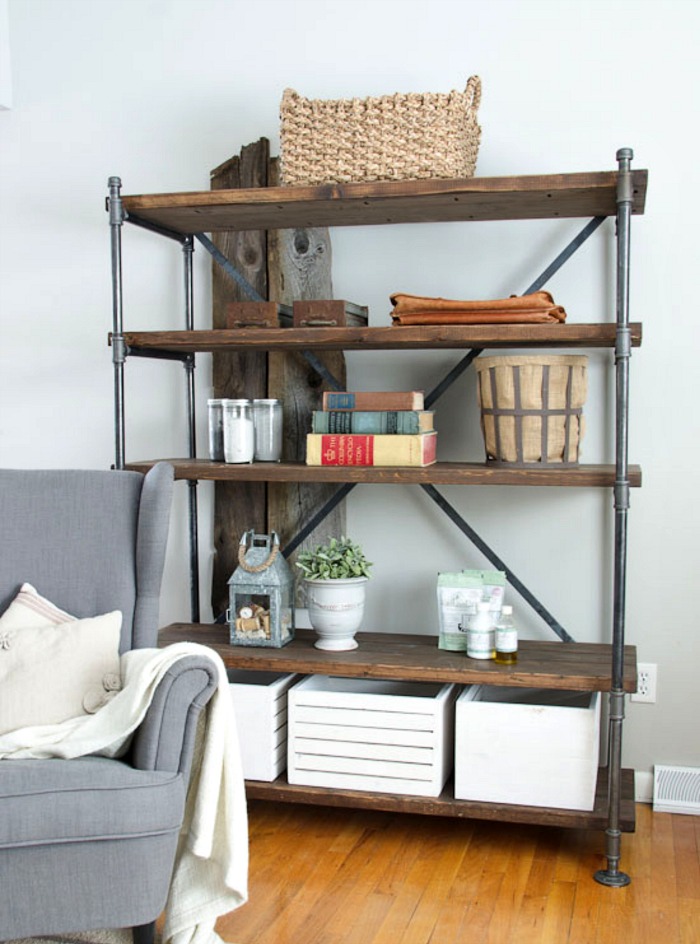 Source: The Golden Sycamore
This beautiful bookcase was built by Allison’s husband over at The Golden Sycamore. I couldn’t find any instructions or dimensions on the site, but I did just a little bit of drooling over the pipes and chunky stained wood.
If I wasn’t going to get gleaming white bookcases and a window seat, I might as well get the industrial look that has been finding its way in just about every room in our house. If you want to check those industrial projects out you can go here, here, here and even here.
Can you tell that I love the industrial pipe look? 😉
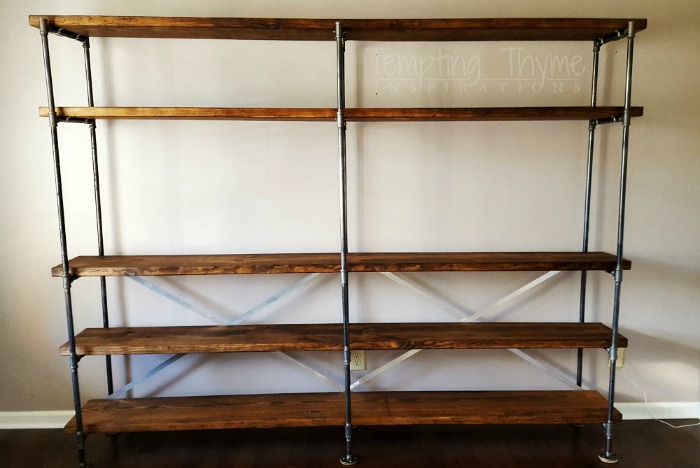
Here is a glimpse of my almost finished bookcase!
Now let me show you how I built it……
I am going to list out all of the products that I used to make this bookcase. Please keep in mind that my bookcase is 6 feet long x 6 feet high. Actually it is a little higher once I added in the top board, but you get my drift. If you make a bookcase to my exact dimensions, GREAT….this list is for you. If you are custom fitting yours to a specific size and space, please just use the list below as a guide…….
Industrial Shelves Supply List:
Note- All of the black pipes and fittings are 1/2″ in diameter
- (5) 2″x12″x72″ Pine Board
- (6) Floor Flanges
- (30) Tees
- (6) 4″ Nipples
- (6) 2″ Nipples
- (30) 12″ Nipples
- (6) 24″ Poles
- (6) Caps
- (30) 1/2″ ‘C’ Brackets
- (4) 8 ft aluminum metal flat bar
- (60) 1 1/2″ Wood Screws
- (8) 2″ Wood Screws
- Leveler
- Drill and appropriate bits for wood and aluminum
- Jigsaw with metal blades (this was used to cut the aluminum flat bar to size)
- Felt or Cork Circles
- Stain (I used Minwax in Walnut)
- Brushes for stain and polyurethane
- Polyurethane
- Optional: Black spray paint OR Folk Art Gun Metal paint to darken up the aluminum rails
After you have cleaned all of your pipes and fittings the fun begins!
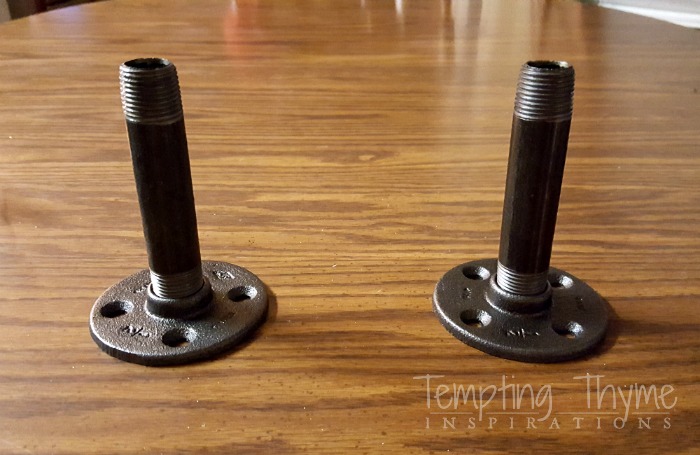 Start with 2 floor flanges on a level surface and screw in 2 of the 4″ pipes. You can repeat this 4 more times, but I built one set of support brackets at a time.
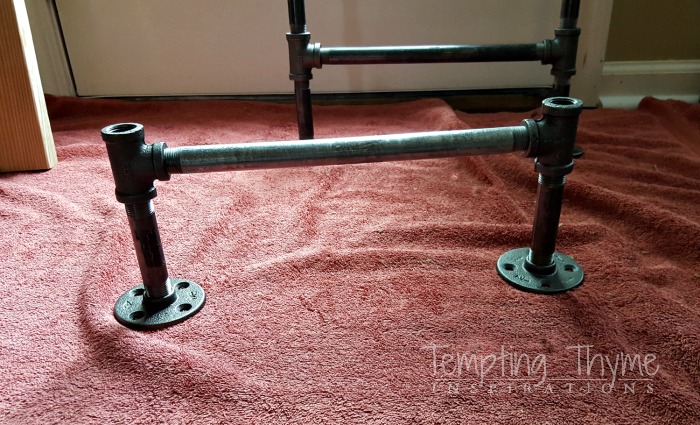
On each of the 4″ pipes you are going to screw on a tee. You will then take a 12″ pipe and connect the 2 tees together. I didn’t make the pipes super tight just in case I needed to make some adjustments down the road.
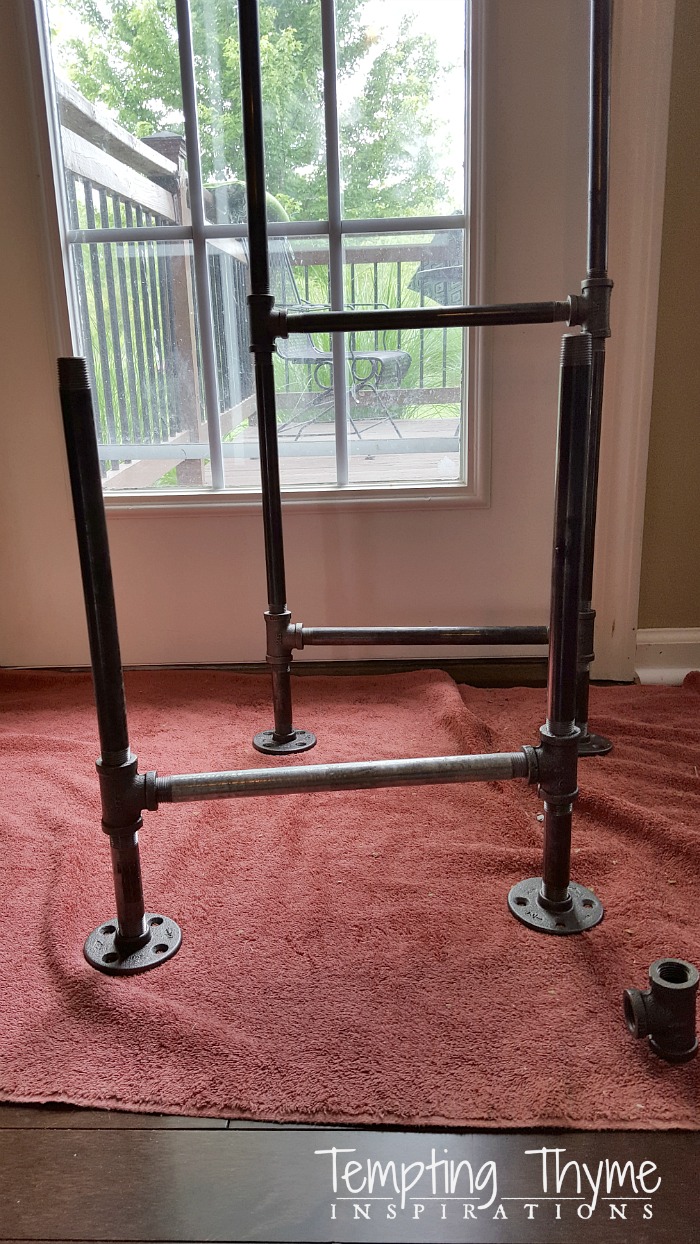
Now that you have your base layer, you are going to repeat these steps until you have your desired number of shelves.
My bottom shelf is 12″, the second shelf is 24″, and then the third and fourth shelves are back to being 12″. I had originally planned out the second shelf to hold a large printer, but I changed my mind and ended up putting the printer on top of the filing cabinet behind the doors.
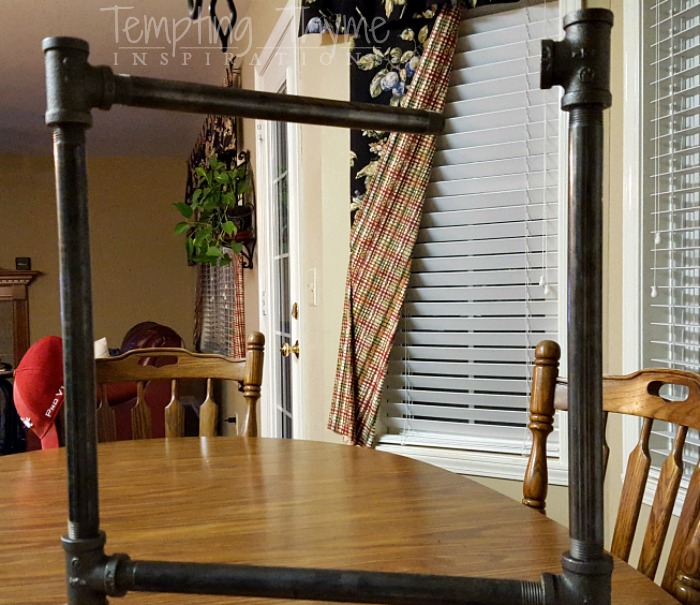
I found that connecting the center pipe could be a little tricky. What worked for me was to tighten the 12″pipe as far as I could on the left side, and then pulling the right side out just a little so that I could swing the pipe in to meet up with the threads on the right tee.
Once I made that thread connection I loosened up the pipe on the left side so that the thread could start to make that secure connection with the other tee. Sounds a little complicated and I know that I am probably not using the proper terminology, but with patience….. a little bit of muscle you will have 2 strong connections on each tee.
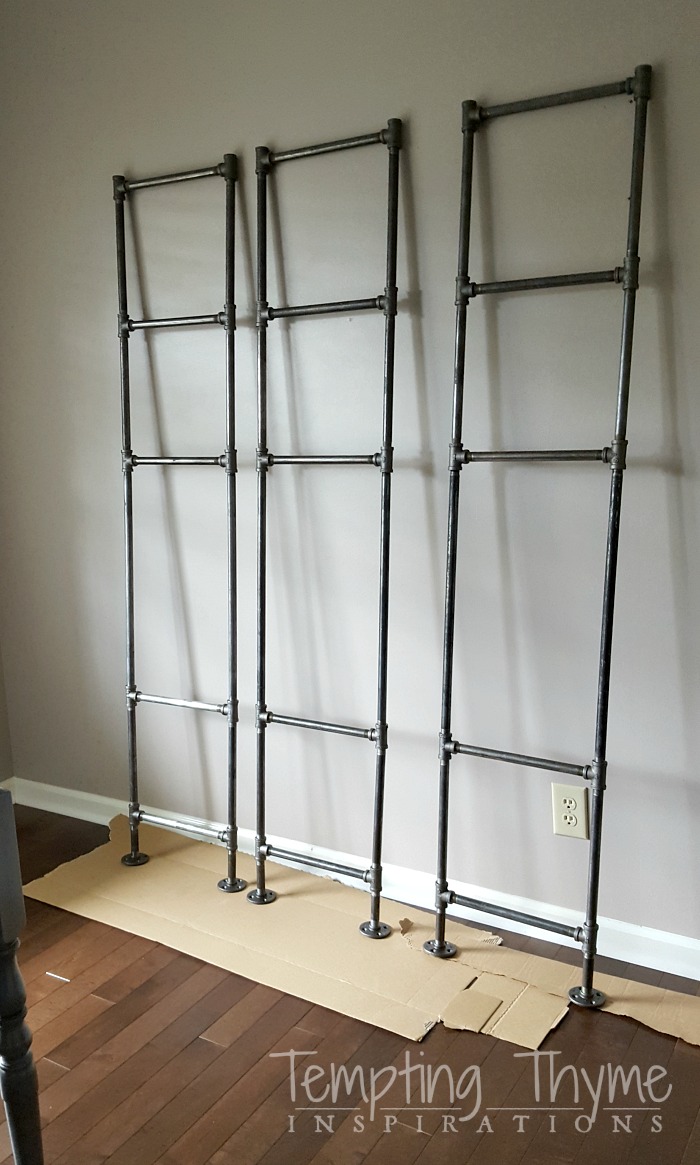
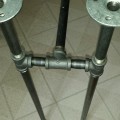
Here are my 3 support brackets side by side. This will give you a better idea of each component and the distance between my shelves. The only thing missing are the 2″ pipes on the top with the caps finishing it off. I installed these after the project was complete.
At this time I took a breath and turned my attention to the 2″x12″x72″ boards. B happened to be home that weekend and wanted to test out my sander so I let him go to town on sanding the boards smooth. I wiped them down to get rid of all the dust particles and then stained them. Each of these boards only has 1 coat of stain.
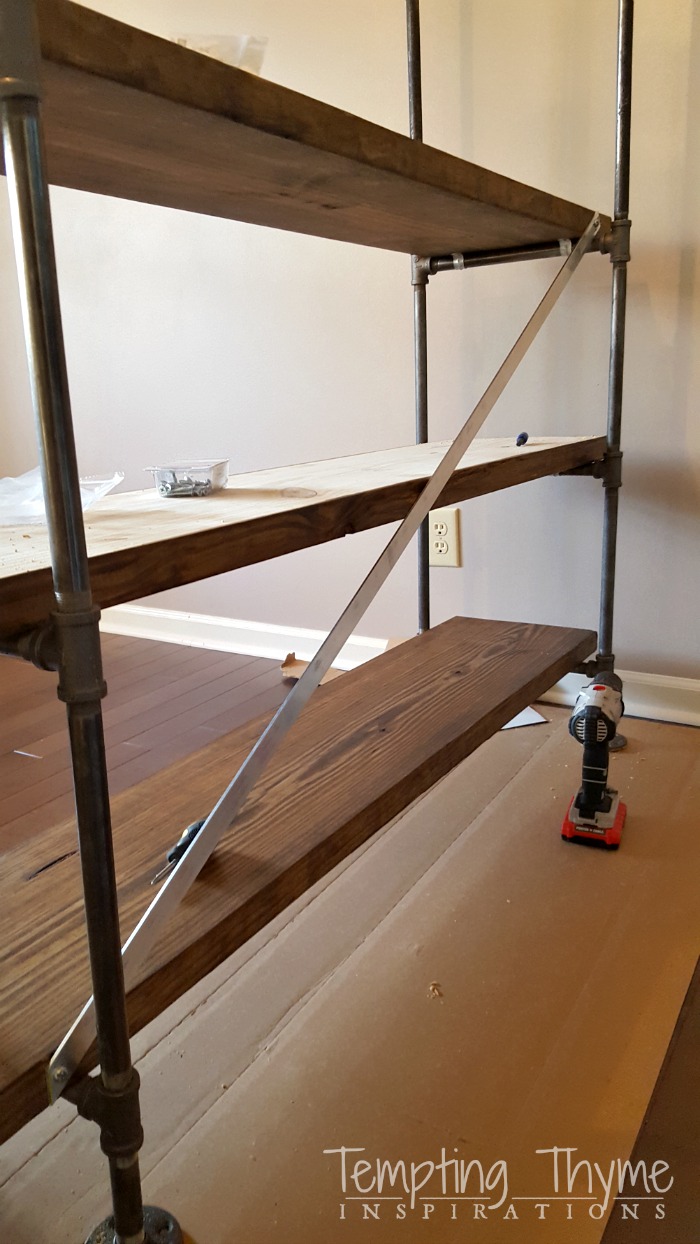
I am not going to lie on this next part, assembling this bookcase was a beast. Thank God I had the help of my youngest son K……
……. I could not have assembled this 6 foot bookcase alone.
Needless to say, I have no pictures of it being assembled!
It was a balancing act initially, as one of us was drilling holes and using the ‘C’ Brackets (clamps) to secure the pipe to the wood with 1 and 1/2″ inch wood screws, while the other was trying to keep everything level.
It wasn’t until we added the flat aluminum bars to the back in an “X” pattern that I was convinced that it would actually stand up on its own!
Funny!
Not Funny!
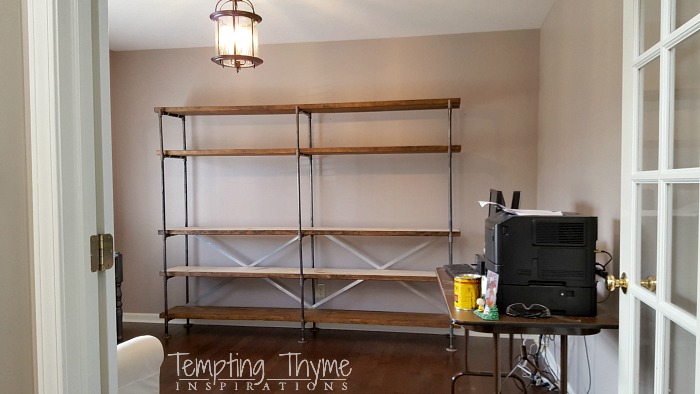
Just a few notes before I leave you with pretty pictures:
- There are 2 “C” brackets on each 12″ horizontal pipe.
- We cut down the aluminum flat bar I used for support with a simple jigsaw with a blade specific to cutting metal. Same goes for the drill bit used on the flat bar.
- The aluminum flat bars were too shiny, so I painted them in Gun Metal. This is the same paint that I used to do this…..
- I ended up purchasing some anti-tip straps for furniture and televisions. Even though my brain told me that the bookcase was not going anywhere, my heart told me that I couldn’t take any chances of it tipping forward. There are 3 straps anchoring the top shelf to the wall. I found mine on Amazon for under $20, but I am positive that any hardware store would carry them.
- I was impatient to get it all put together so I initially stained only the bottom and sides of each board. Once it was assembled I finished staining the tops.
- I cut 6 pieces of cork into circles to go under the flanges. Hopefully this helps protect our new maple flooring.
- I will tell you again, this bookcase is a heavy beast. It took 3 of us to move it into place.
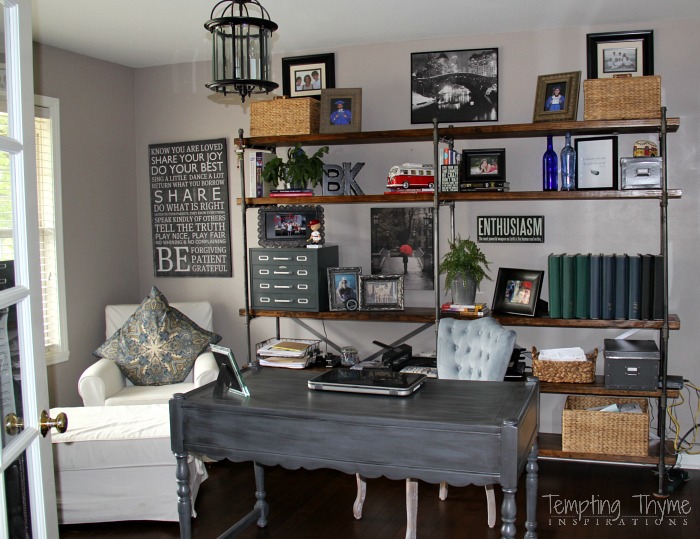
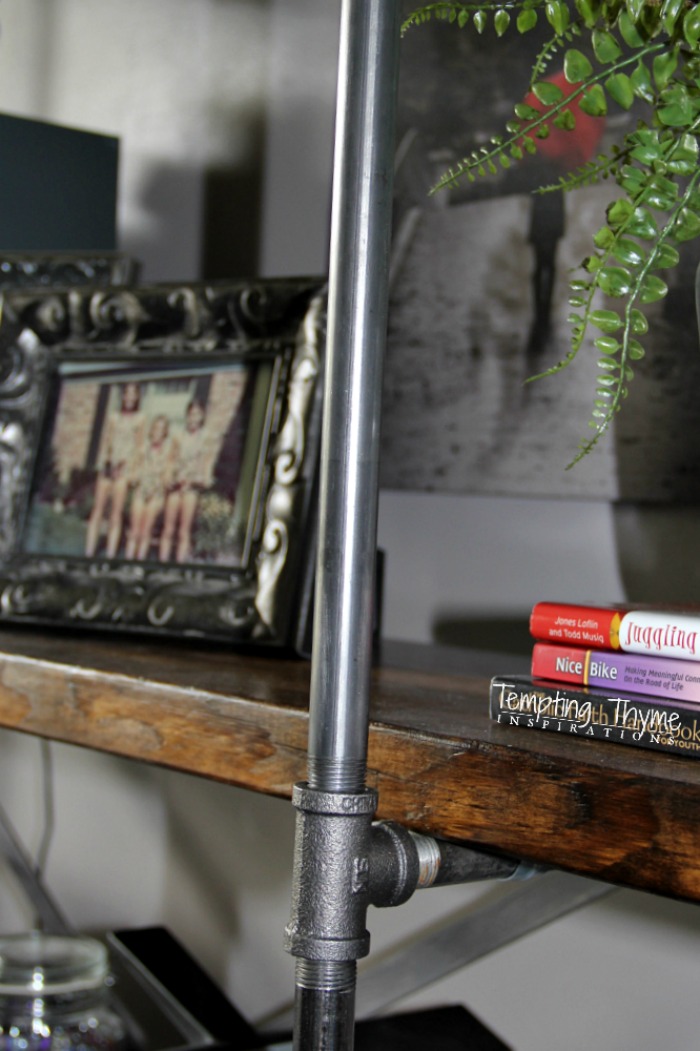

Now all I have to do is figure out how to hide the router cords. 😉
Linking up to Thrifty Decor Chick’s Before and After……..

excellent work my friend from Ireland!
I love the clean lines and simplicity of it all – the desk as well as the bookcase. Nicely done!
Thank you Dad!! 😉