
Hi All! I hope you had a great 4th of July weekend! Did you end up making some of that fantastic Pulled Pork with Whiskey Barbecue Sauce? I hope you loved it just as much as I do.
Some of you may or may not care about this topic, but today we are going to talk Butcher Block! I am in the midst of trying to revamp our kitchen…… let me tell you it is slow going…..seriously thought I would have it all done by now. I guess the older I get the slower I move. LOL! Oh well, it is what it is.
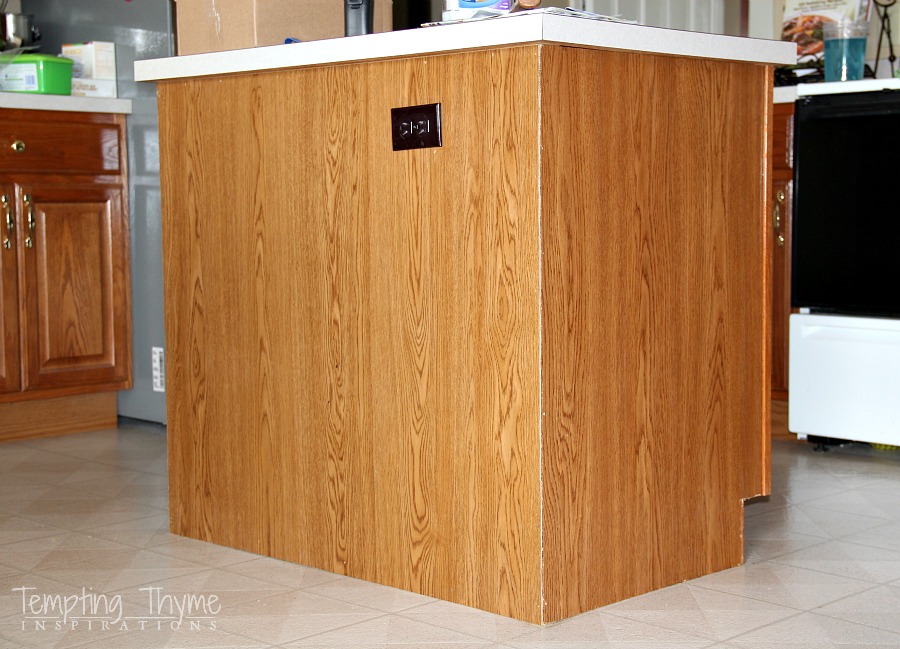
You all know that I just finished our kitchen island! Woo Hoo!!! Still so pumped up about it … (can you tell) … smile ear to ear whenever I walk by it!! 😉
If you have no idea what I am talking about you can get a recap on it you can go here and here.
 When I first started planning ‘out’ the cabinets, I knew I was going to have to do something about the countertop. It only extended past the cabinets by about an inch all around. I thought about going to a local warehouse and seeing if they had any granite remnants that I could use, but this is the material I hope to use for the rest of my kitchen. I would hate to have 2 different varieties, or colors of granite in my kitchen!! I thought about concrete for a very short time, but don’t know very much about it, and it made me a little uncomfortable to go totally with an unknown (at least for me) material.
 This back and forth discussion with myself only took a matter of 15-20 minutes, and I came to the conclusion that butcher block would be the answer for our island. Don’t give me any crap for having a discussion with myself, I know you all do it too! LOL!! Some benefits to butcher block …… other than the cost …. is that it is anti-bacterial, biodegradable, and it is really pretty to look at! But it does require care and maintenance, which I will be getting into shortly! Just hang with me a little longer!!!!
I actually thought it would be cool to build my own, and I spent hours researching how to do this online. Although I was comfortable with the idea, I was not totally sold on the idea. I knew I would have to be patient, and that there were a lot of steps involved. When I say a lot….. I mean A LOT! Sometimes I just don’t want to be patient. Sometimes it is good to have instant gratification. Know what I mean? If you think you want to give it a try, you might start with Nick and Kristen. They both offer up some great tutorials.
Anyway, B and I headed to Menards to take a look at prefab butcher block counters. I also found what I needed at IKEA, but Menards was so much closer and about $20 cheaper. At this point in time I didn’t know if I would be buying the supplies to make my own, or heading home with the already made countertop. I don’t remember why B was with me, but as we were eye balling the 36″ x 72″ slab of butcher block I asked him what I should do. Go home with it, or head on over to the lumber section and try my hand at making my own?? So glad I listened to him!!!!
As it was larger than I needed, B helped me cut it down to size. Okay…… let me rephrase that. I held the countertop while he did the slow and precise cutting with a circular saw. This saw freaks me out people! If I was being totally honest, I would have to also tell you that we had to borrow our neighbors circular saw, as ours is old and totally SUCKS, and died halfway into the job (even with a full battery charge)! {SIGH} Absolutely no pictures of this process. Sorry!
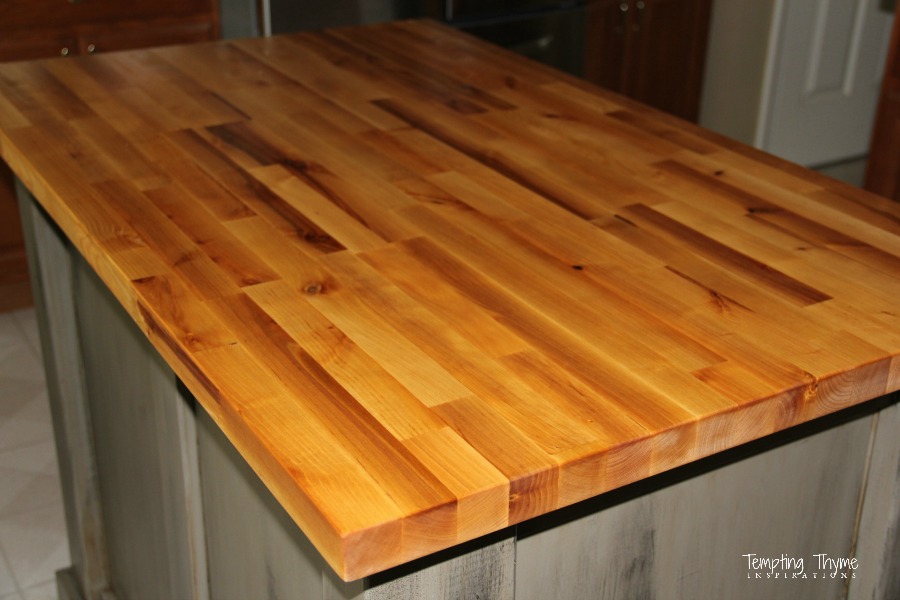 I had to sand down, especially on the 2 edges that were cut with the circular saw, all the edges to get everything smooth as butter. I also had to sand the top and bottom of the block, as there is a ‘factory seal’ on both sides. There was so much dust!! As I mentioned earlier if you have a tack cloth, use it! As I couldn’t find mine, I just washed mine with water several times to get all the dust off.
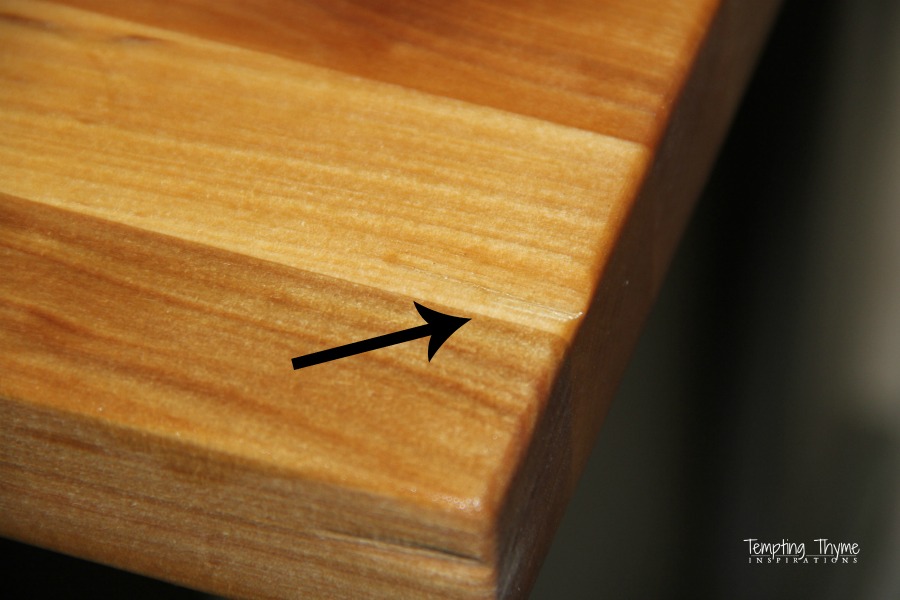
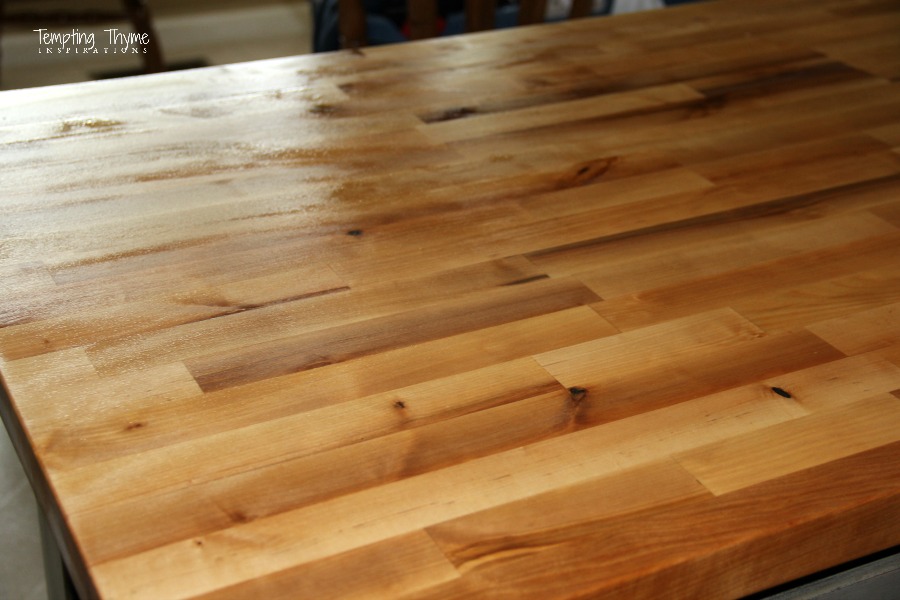
Our butcher block has one flaw in it……a 2 inch divet that no amount of sanding was getting out. I say it adds a little character!!
I did a lot of reading on how to care for our butcher block, and thought that I wanted to stain it ….. the lighter color sort of bothers me. 😉 I was thinking that I would stain it, and then seal it with a product called Waterlox. Only problem was that I couldn’t find Waterlox in our area, and I really didn’t feel like paying shipping and handling and having it mailed to me. Not when I wasn’t totally convinced this was the route I wanted to go. It seemed kind of permanent to me, and I was not in the permanent kind of mood!!
 Instead I decided to go with the ”natural” way of treating it……MINERAL OIL! Now I am going to give you a tip that can save you $$$$$. Go to your local grocery store, head on over to the laxative aisle (you did not hear me wrong) and buy your mineral oil for as little as $1.59. Do not go to your local hardware store and buy name brand mineral oil for $10.99! Shame on me!! I bought 1 bottle of Howard’s mineral oil at my local Ace, and then realizing I would need tons of the stuff the first month, I went to Kroger’s to see if I could find a generic version. I was in the beauty/hardware section and couldn’t find it! I actually had to ask someone where it was. When they told me the laxative aisle I was absolutely BUG-EYED!
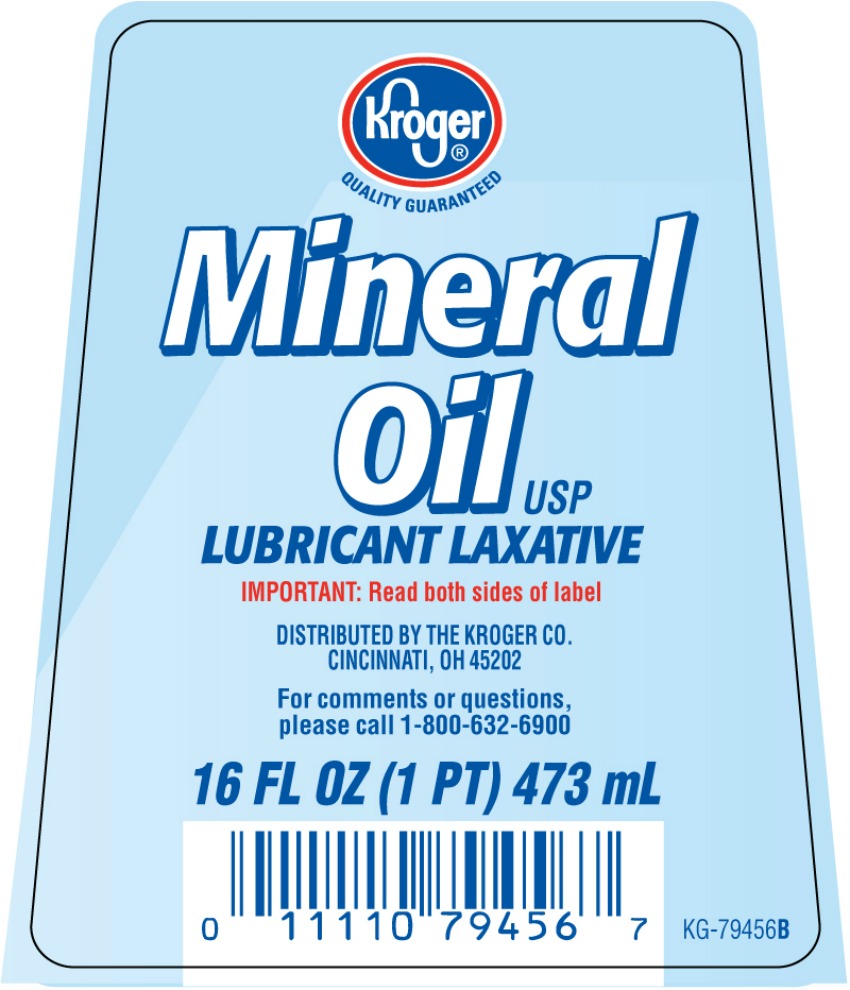 Little constipated while you are building up a nice barrier on your butcher block? Drink a little mineral oil! OMG, I still think it is a crack up that we are using a natural laxative on our countertop!!!! Sorry, couldn’t resist!
 This is how I treated our butcher block, as well as caring and maintaining it:
- Lightly sand to remove the factory installed seal. You can’t see or feel this, but it is there. I used a very fine sanding grit. Using a wet rag, make sure you remove all of the dust.
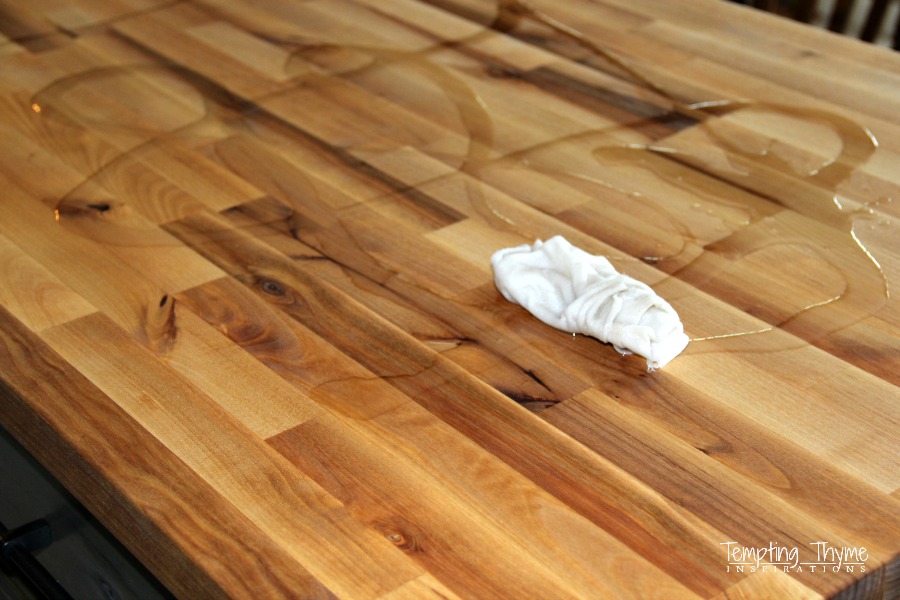
- Pour mineral oil all over your countertop…. I did it in an ‘S’ pattern. Take a 100% lint free cotton towel and spread it around. Make sure you also get the edges. I treated the underside of the counter before I installed it, as I really didn’t feel like laying inside the cabinet to oil it up. That would have been messy, messy, messy!
- Let the oil sit. Some say to do it for 15-20 minutes and then wipe any remaining oil off. After doing it this way once, I stopped listening and decided to let it sit longer. When I say longer, I mean overnight! During this prep time, no one was allowed to use it, and I would pour the oil on right before bed and then wipe any remaining off before leaving for work. I did this every night for 7 days!
- After the first week of everyday treatment, I swapped it out for once a week, and now I am to the point that I will do it when it looks a little dry…..I am thinking at least once a month.
- Clean your butcher block with simple water and mild dish soap. I have no idea what 409, or other cleaning sprays, would do to it……but I am not taking any chances!
 Here are some of my personal tips:
1. Don’t put anything on the countertop when it is soaking up the oil. This is why it is easy to do right before going to bed!
2. Make sure you do the edges, and even the underneath section that is exposed. The wood is very thirsty!
3. Don’t use it as a cutting board. I know, I know……it is a butcher block……you are supposed to be able to cut on it! This is my personal choice, and we will still be using a cutting board. I want to baby this butcher block, and also think it will be easy to maintain if there are not cut marks that need to be sanded down occasionally. Just my opinion!!
4. Do not use Olive Oil to condition your wood, it will go rancid. You can use other oils like linseed, tung and walnut oil ….. but I didn’t know how these would affect K who is allergic to ALL nuts. You can also use paraffin or beeswax, but I don’t really know anything about these, so can’t say one way or another if they are better than mineral oil.
5. Store your used mineral oil towel in a ziploc bag for future use. Folded up it won’t take up any room at all, and will save you from finding 100% lint free cotton towels every time you want to oil your butcher block.
6. Save yourself some $$$, buy your mineral oil at your local grocery store. Do not buy it at your hardware store. You know what aisle to find it in now!! 😉
If you stuck around with me for this post, THANK YOU! Will I keep the natural look of our butcher block? I don’t know ….. I really like the dark wood look, and if I can’t achieve it via constant mineral oil treatments, I might bite the bullet and stain it. Definitely not in any hurry for this though!
Do you have any butcher block in your house? How do you take care of it? Tips and Tricks you can offer me?

I am also deciding between an IKEA top and the menards top. Is the menards top solid wood throughout? or is it like the ikea top where the inside is particle board with a sheet of solid wood on the oustide. Thanks
My Menards butcher block is solid wood throughout, and is holding up great! I didn’t know about the particle board with Ikea’s butcher block! If that is the case I strongly recommend the one I bought.
Hi there i just love your awesome site very helpful content thanks a lot.