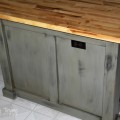
Now that you have seen our remodeled kitchen island, how about I show you how I did it!
This project has been on my mind for some time now. Although I love the additional storage (who doesn’t need more storage…..right?) I have never been a fan of our kitchen island. Generic, boring, non-descript…..the list can go on and on.
My original intent had been to pull the entire cabinet out and use it in the basement. I saw some really cool carts that looked easy enough to build, and with the addition of wheels could have been used in any part of our house. The drawback would have been the storage…..everything would have been out in the open. This truly would have been a problem for me!!!
I am not the neat and tidy person you all think I am! Be quiet Mom!!! I already know that you are laughing and agreeing with me. 😉
Open storage would have been beautiful, but it would also equal me being organized, neat and tidy……..and I know my limitations at the moment!
When I saw the tutorials over at Remodelaholic and Down to Earth Style, I knew that I could take some simple wood trim and molding and create something special with the existing cabinet. If it didn’t turn out the way I planned it, it was only my time and a few dollars spent. I swear to god this is my motto for most of my projects around the house!!
Once you see how easy it is I know that you all are going to head out to the lumber store and start working over your builder grade kitchen island. If you missed the first part of this story you can head on over here and get a quick recap…..
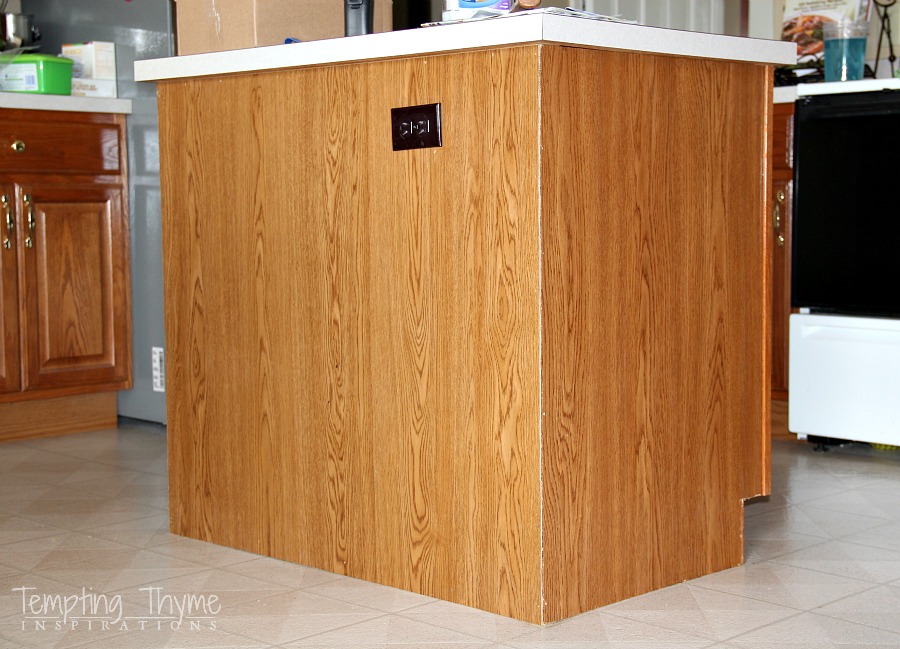
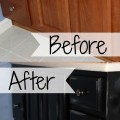
Let me refresh your memory……. Here is the BEFORE……
 …… and here is my final inspiration piece…….
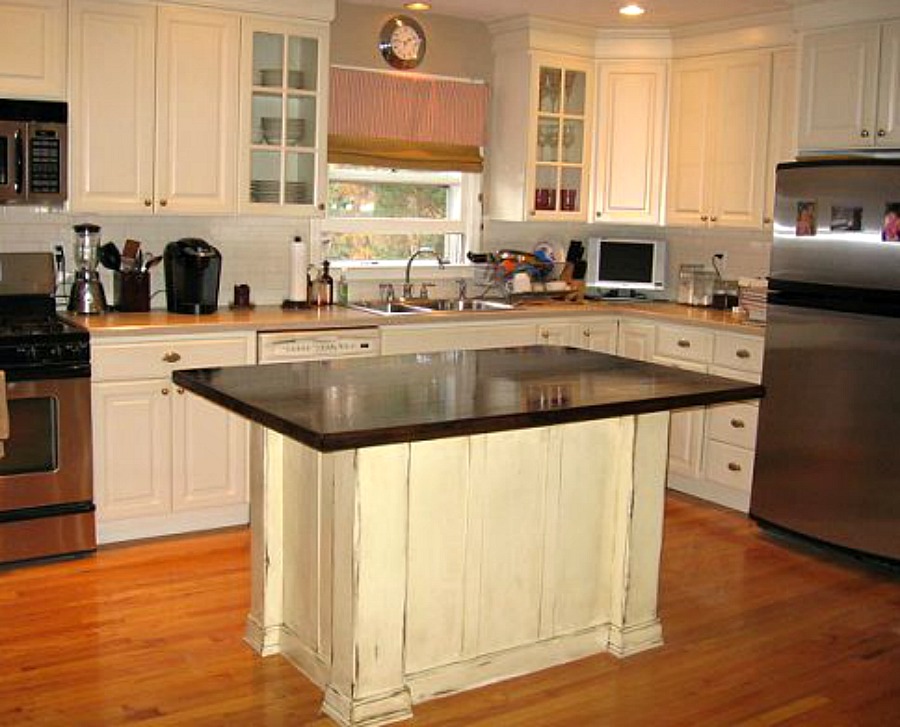
Source: Down to Earth Style Blog
It was the chunky legs and feet that finally won me over! Definitely a fashion statement I wanted to make in our kitchen.
I had already taken down the oak bumper on either back end when I decided I needed a “before” photo. You know that little piece of ‘V’ shaped wood that hides the imperfections of seams…..
If you remember, I started this project on Mother’s Day weekend as PT would be out of the house for a hockey weekend with K. Projects like this one tend to stress PT out …… I have no idea why as I never ask him to help me ….. so it is always best to start when he is not around.
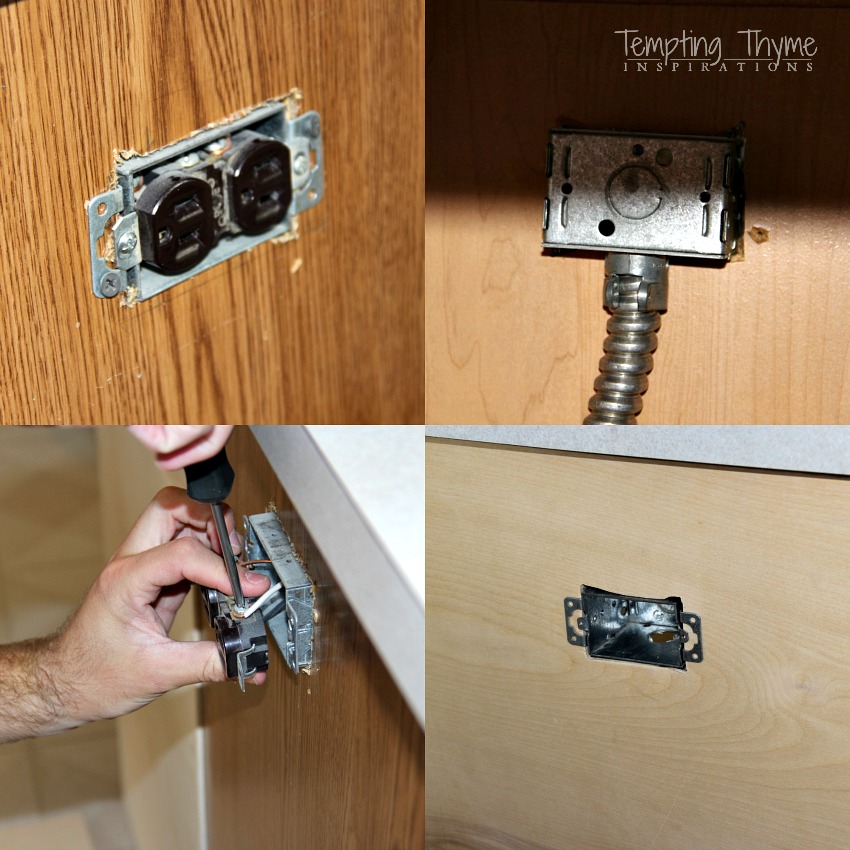 First on the list was moving the electrical outlet an inch south of its original location. I originally bought some electrical plastic expander’s, thinking I could just bump out the outlet once the plywood was installed, but the top piece for the ‘wainscoting’ was definitely going to get in the way. The easiest solution was to just have B move it a little for me. Removing the electrical box, and cutting out the hole with a jigsaw meant I was back in business.
I wrapped three sides of the island in birch 1/4″ plywood, as I didn’t want to paint over laminate wood. I bought a 4′ x 8′ of it at Lowe’s for $27.99, and they were kind enough to cut the three sections for me.
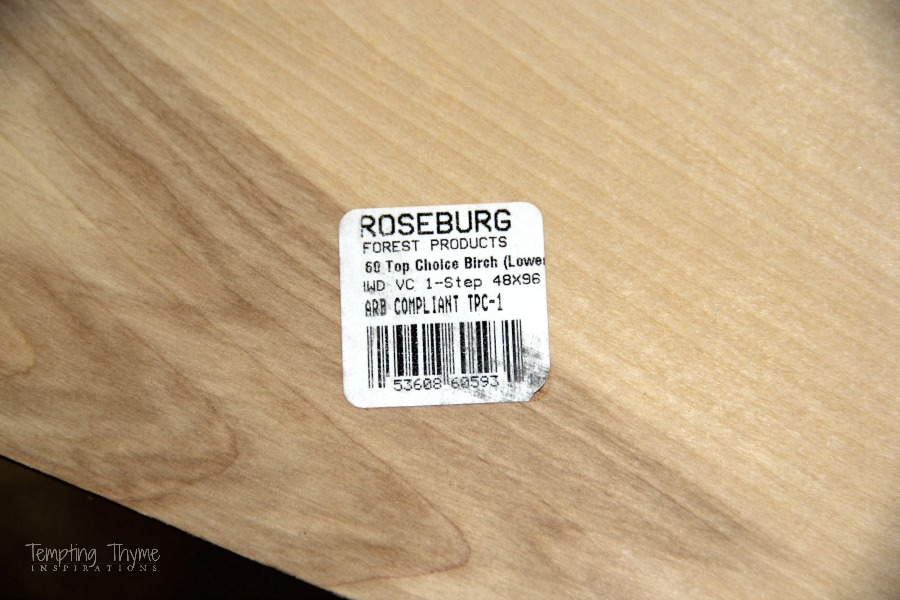 Not only would it be easier to paint, but I also thought it would give the 1 x 4 lumber something to grab on to……
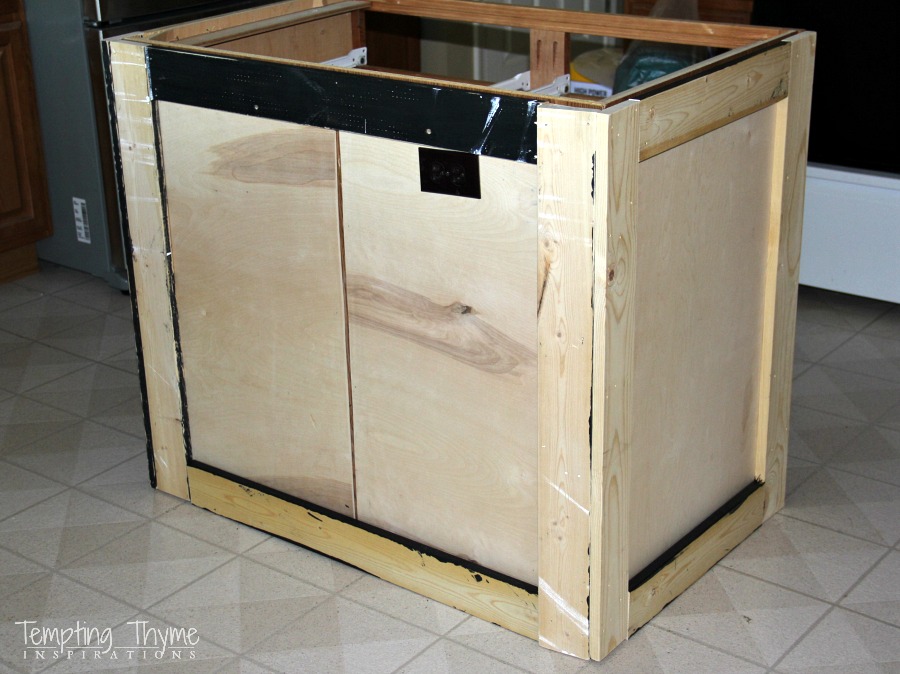 Do you see that gaping hole down the back center? How can you miss it, right?
It was supposed to be 1 long board (and Lowe’s even cut it that way for me), but it turns out that I accidentally ended up cutting it for the one last ‘kick plate/riser’ I needed for the stair project!
OMG…..I was devastated, as I did not want to go back to Lowe’s and spend more money. After a few minutes …. okay… more like a half hour …. of kicking myself, I thought I could salvage it by using the 2 leftover pieces, as the middle was going to get covered up anyway with a 1×4. {Pat myself on the back!!} Sometimes it truly does pay to have a tantrum……it gives you time to think of a solution! After the birch plywood installation, the rest of the 1×4’s went in pretty quickly with some finishing nails.
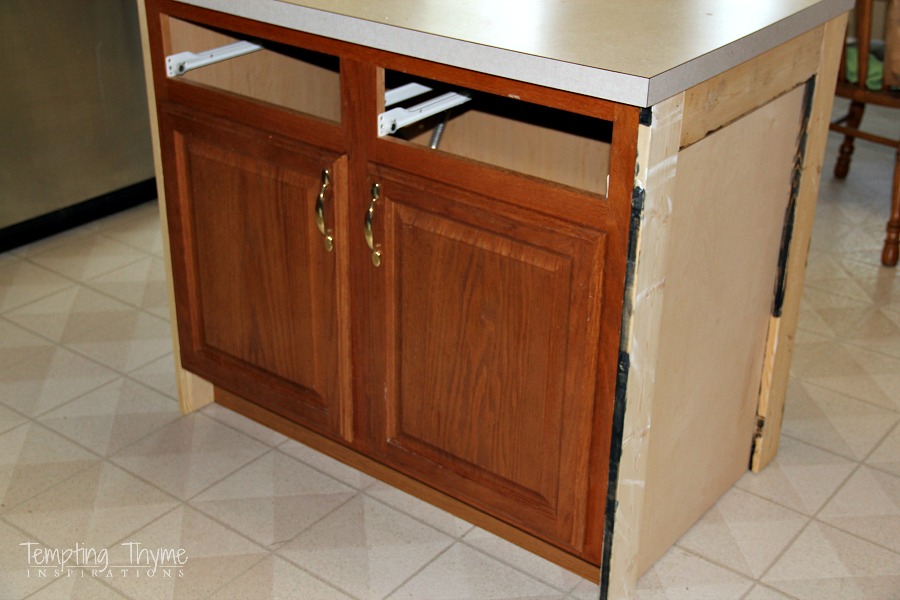 We lived with this setup for a few weeks. This is one time that my ‘analyzing things to death’ paid off, as each day passed I became a little more disappointed with it. It was boring….no pizzazz! Not the chunky legs that I was envisioning in my head.
By the way, the reason you see a lot of black on the 1×4’s is that they were salvaged from these god awful doors….
Totally salvaged the framework. I have no idea what kind of wood the high school class used. I wonder if B can remember? I know that they have a lot of screw holes (1 door was nailed together and still resides behind the shed), but I had no problem filling them in with spackle. By turning them inward I reduced the amount of holes I had to fill in.
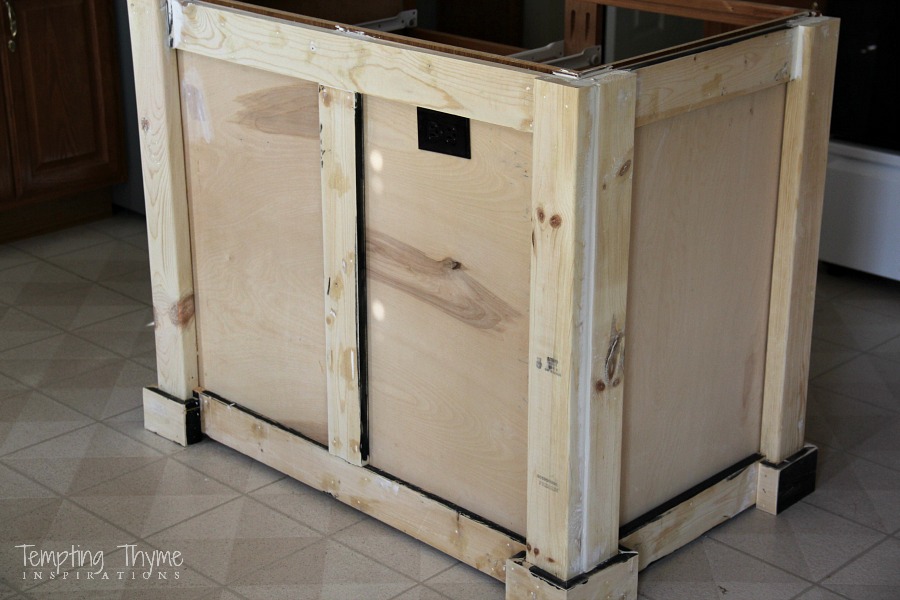 Anyway, I wanted thick, chunky legs…..and these 1×4’s weren’t giving it to me. Memorial weekend was my chance to get this problem fixed and to start sanding and painting this bad boy!
Some of you may know, Memorial weekend not only stands for us honoring the 1000’s who have paid the ultimate sacrifice for our freedom, but also for the Indianapolis 500. This year marked PT’s 30th year attending this race. I used to spend this weekend carting K to baseball tournaments, but now that he is older he is attending the 500 as well. What does that mean for me? FREEDOM to start any project my heart desires. Usually it means pulling a ton of weeds and relaxing outside with a few cocktails!! Actually, that is not entirely true… as I once ripped out the deck railings and attempted to install new ones. Long story for another day! This year, it meant that I could finish the island in piece and quiet.
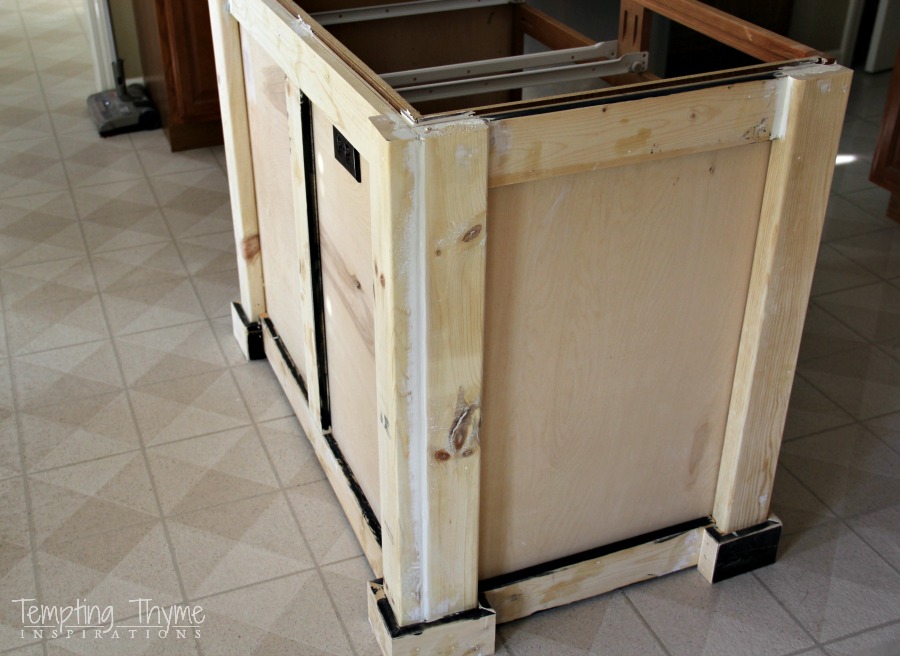 To get ready for the “redo on top of the redo”, I sent B to pick up a couple 2×4’s while I was at work. Honest to god, I need to give him a lesson in picking out the straightest, not warped, boards. A few areas were already starting to ‘cup’, but figured I could work around most of the issues.
I ended up having to pull all of the 1×4’s off, as the addition of the 2×4’s were messing up the measurements of the wainscoting panels. I still used finishing nails to attach everything…..I just used longer ones. Hammering all of these in left me dreaming of using the electric nail gun that is sitting in my garage……too afraid to try it out without anyone else in the house but Rudy. Until I teach him how to dial 911, I will not be using it solo!!
With the 2×4 additions, the cabinet now exceeded the dimensions of the countertop. I wasn’t too worried about it, as I knew that I would be installing a new butcher block and could make the dimensions any that I needed.
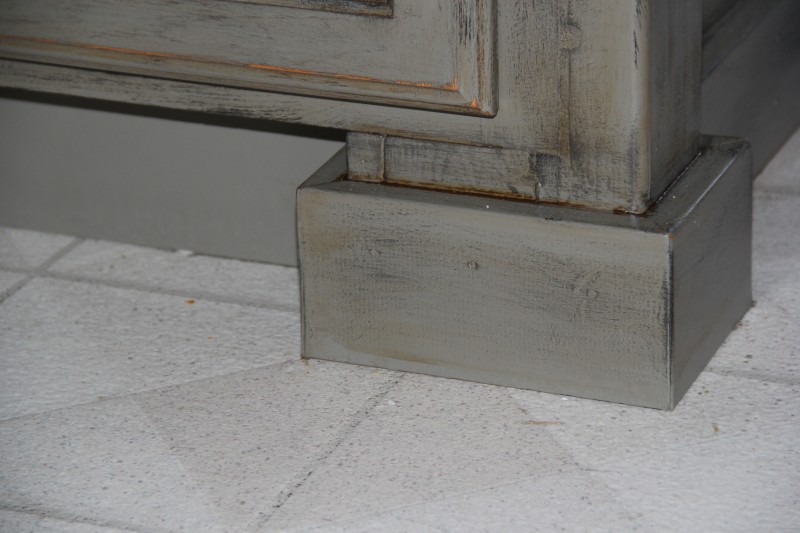
I created the “feet” with the 1×4’s that I had pulled off, mitering them to the measurement and angle that I needed.
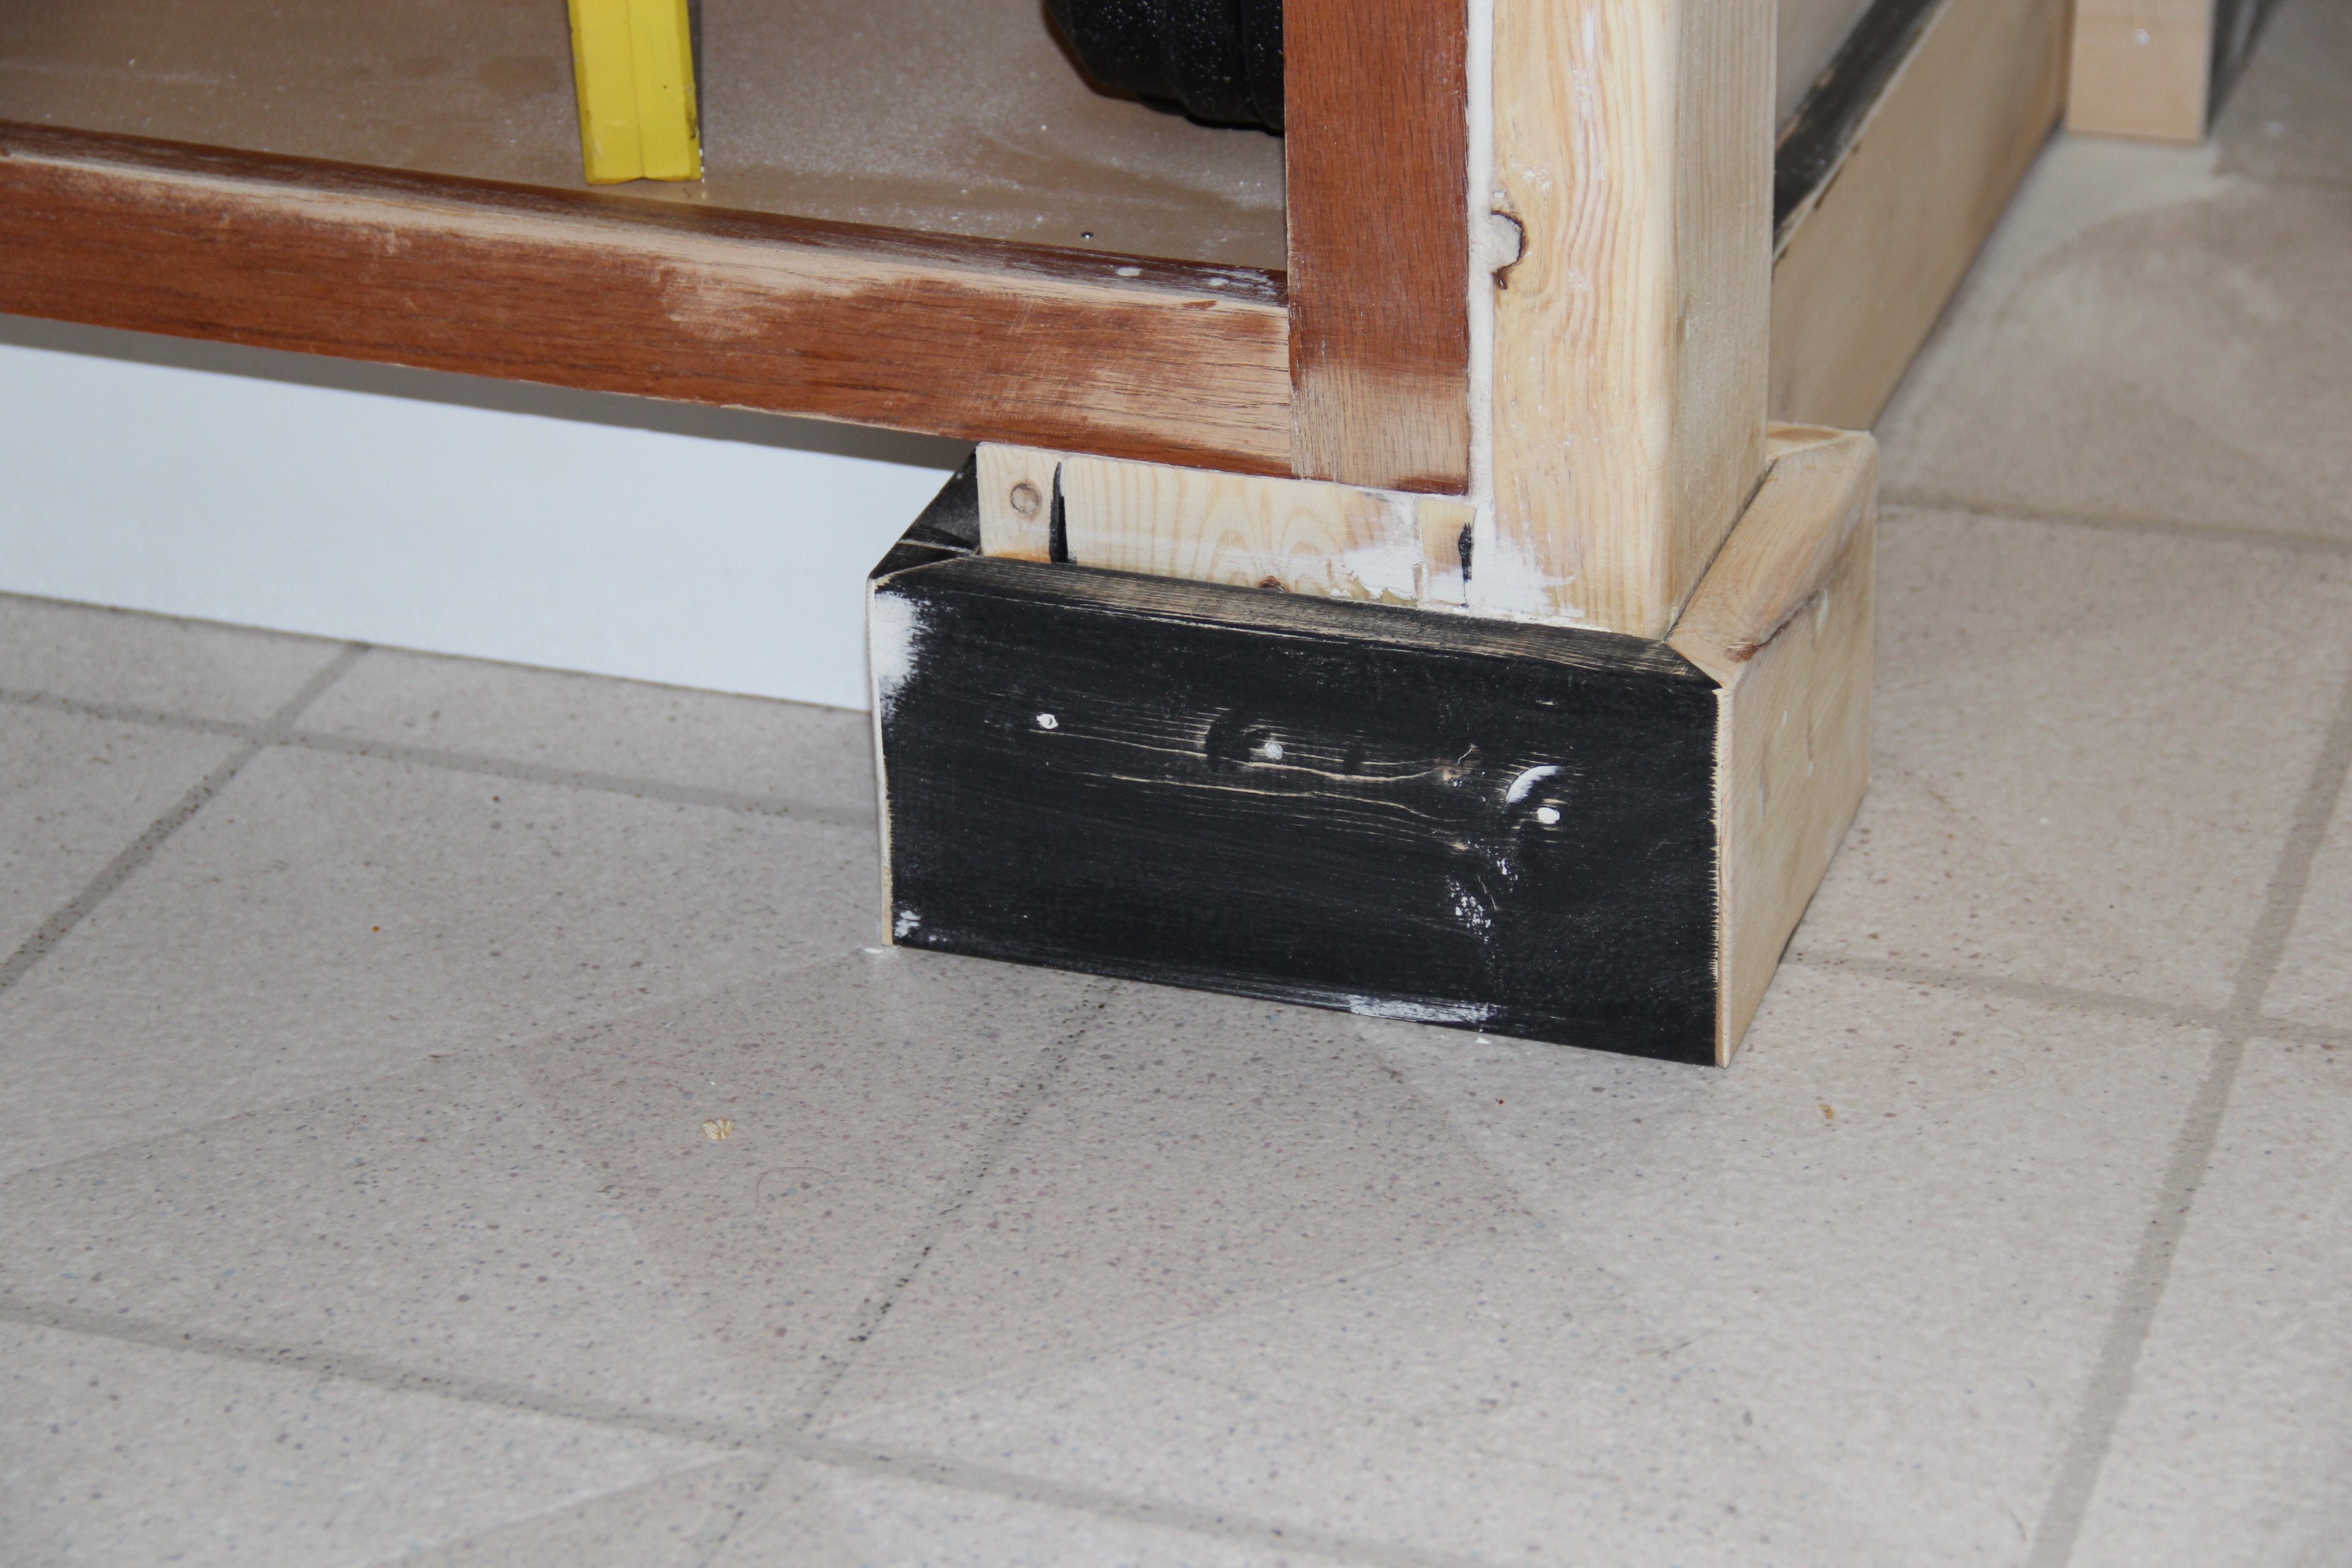 This is when the fun started, and I sanded, and sanded, and sanded some more for good measure. Thank the Lord I have an electric sander. I had taken the doors and drawers off earlier, and they were already sanded and waiting in the garage hoping for some fresh paint. To make the dust even worse, I was sanding down the butcher block in the garage. My family was very happy to be gone during this stage!!
Once everything was as smooth as a babies bottom, I went around and caulked all of the edges and filled in all of the holes with spackle. Once everything was dry, I lightly sanded everything down again.
 I was very cautious about the dust that the sanding created, and washed the cabinet a few times to make sure it was all gone before the painting began. Some people use a tack cloth, and I have one somewhere in this house, but since I couldn’t locate it, I just swept everything up, and then wiped down the cabinet with a damp rag a few times. If you have a tack cloth, use it…..they are wonderful.
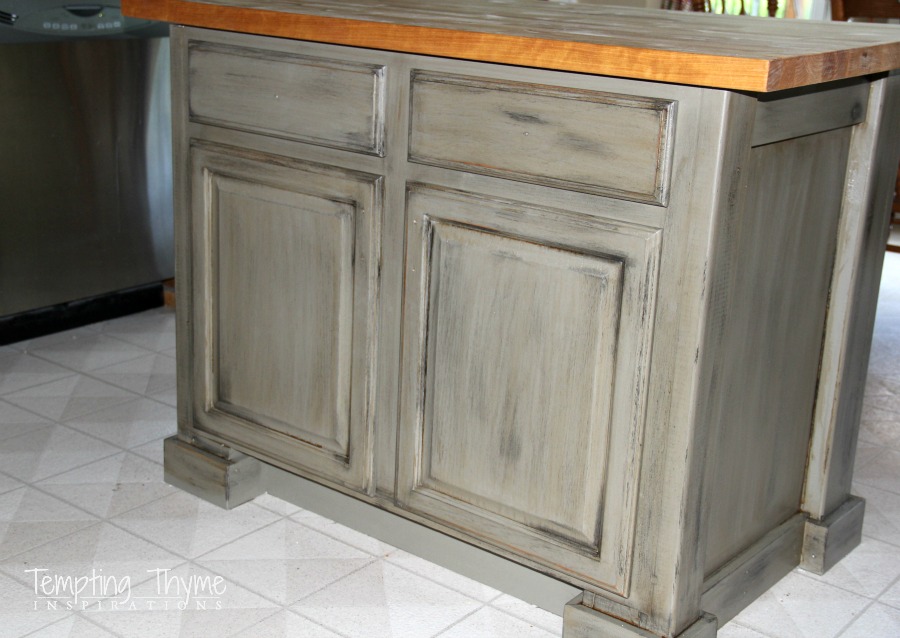
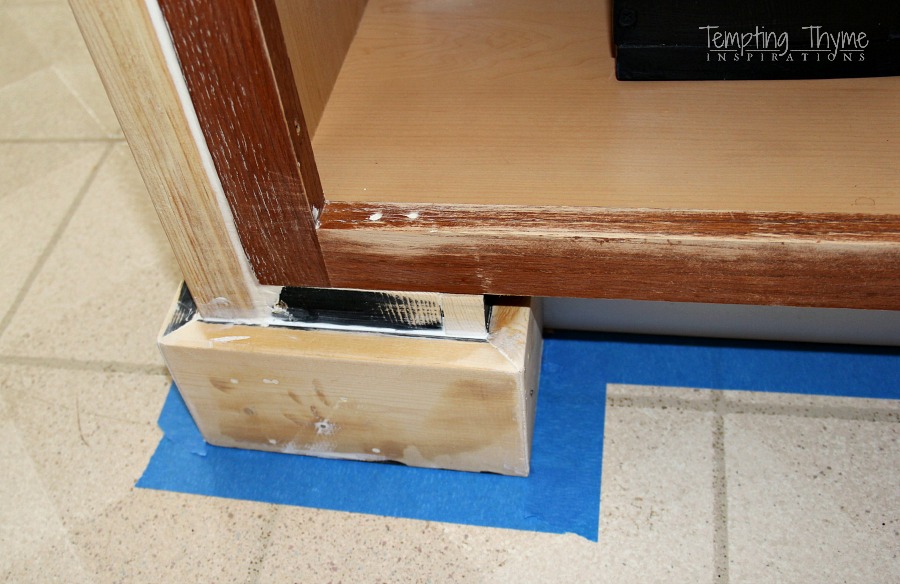 I painted the cabinet with some leftover paint from the boys’ bathroom cabinet. I knew when I was painting their cabinet that it would be perfect for the kitchen cabinets. I was thinking of doing all of them in this color, but now I am thinking that I will do the others in white and have the two tone contrast. Another reason for this, is that the color of the island changes depending on how the light is hitting it. In the can, it is a taupe……but on the wood, it is green, grey and sometimes even a blueish color. Not once have I seen the taupe that is in the paint can. Go figure!!
I didn’t prime any of the wood. If I was painting it white, I would have given it a couple coats of primer. But with the distressing that I was planning on doing, if the oak bleeds through on the doors and drawers, in my opinion it will only add to the character.
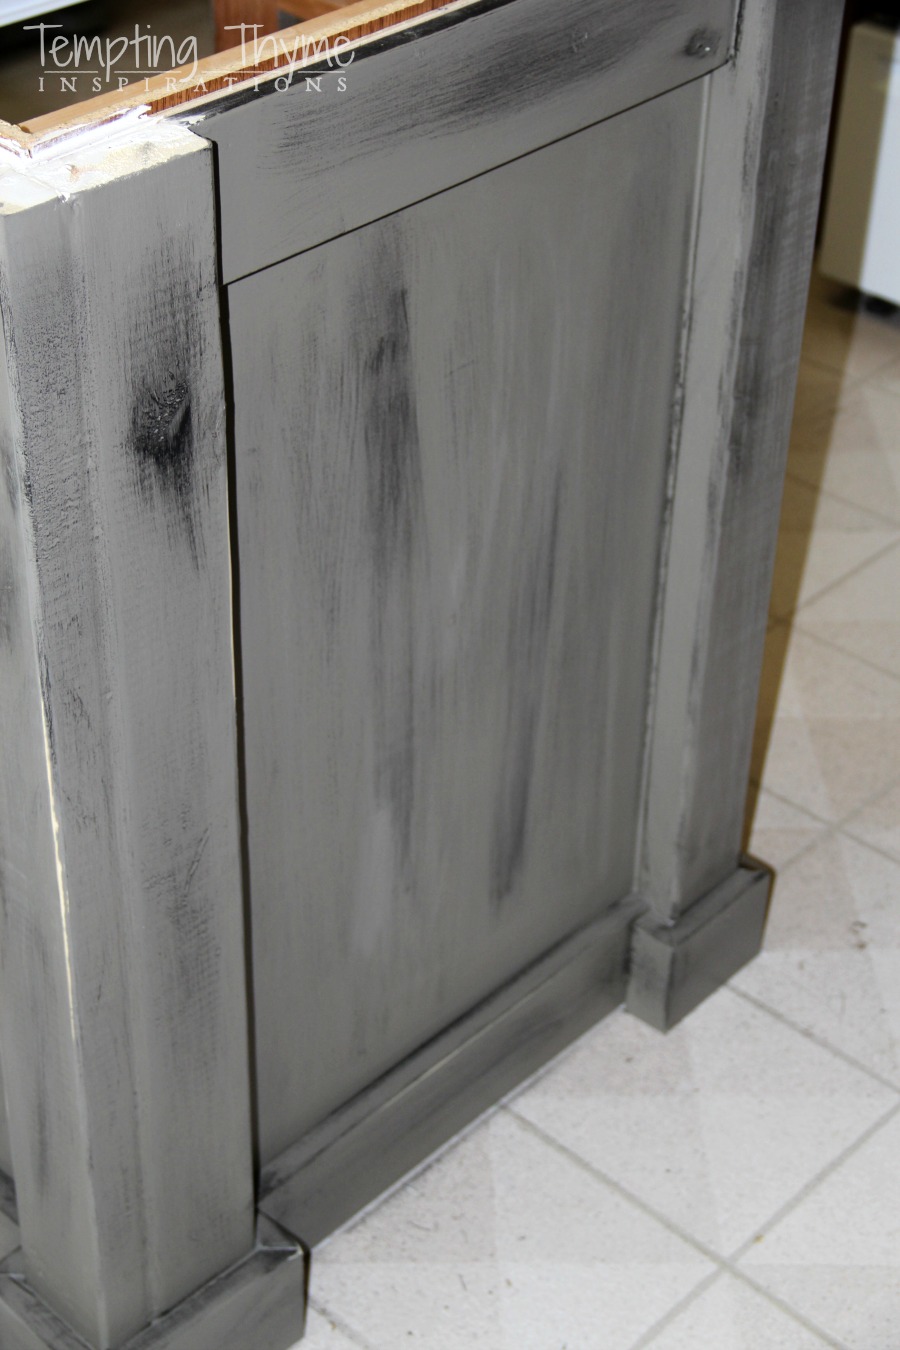 After 2 coats of paint, it was time to start the fun. I love working with paint, and seeing what I can do with it. Like I said earlier, if I don’t like it, it is just my time to fix it. I took some leftover black paint, and “dry-brushed” it all over the cabinet. Very lightly in some spots, and very heavy in other areas (like the knot holes and imperfections in the lumber).
I didn’t even sand it down after the dry brushing before brushing on the stain to ‘weather’ it even more. I did the staining in sections, brushing it on, and then taking a clean cloth and rubbing it into the cabinet. I got lazy towards the end and just starting using the cloth to apply it, and rub it in at the same time. Certainly not a practice that you should follow, but it worked out for me.
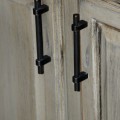
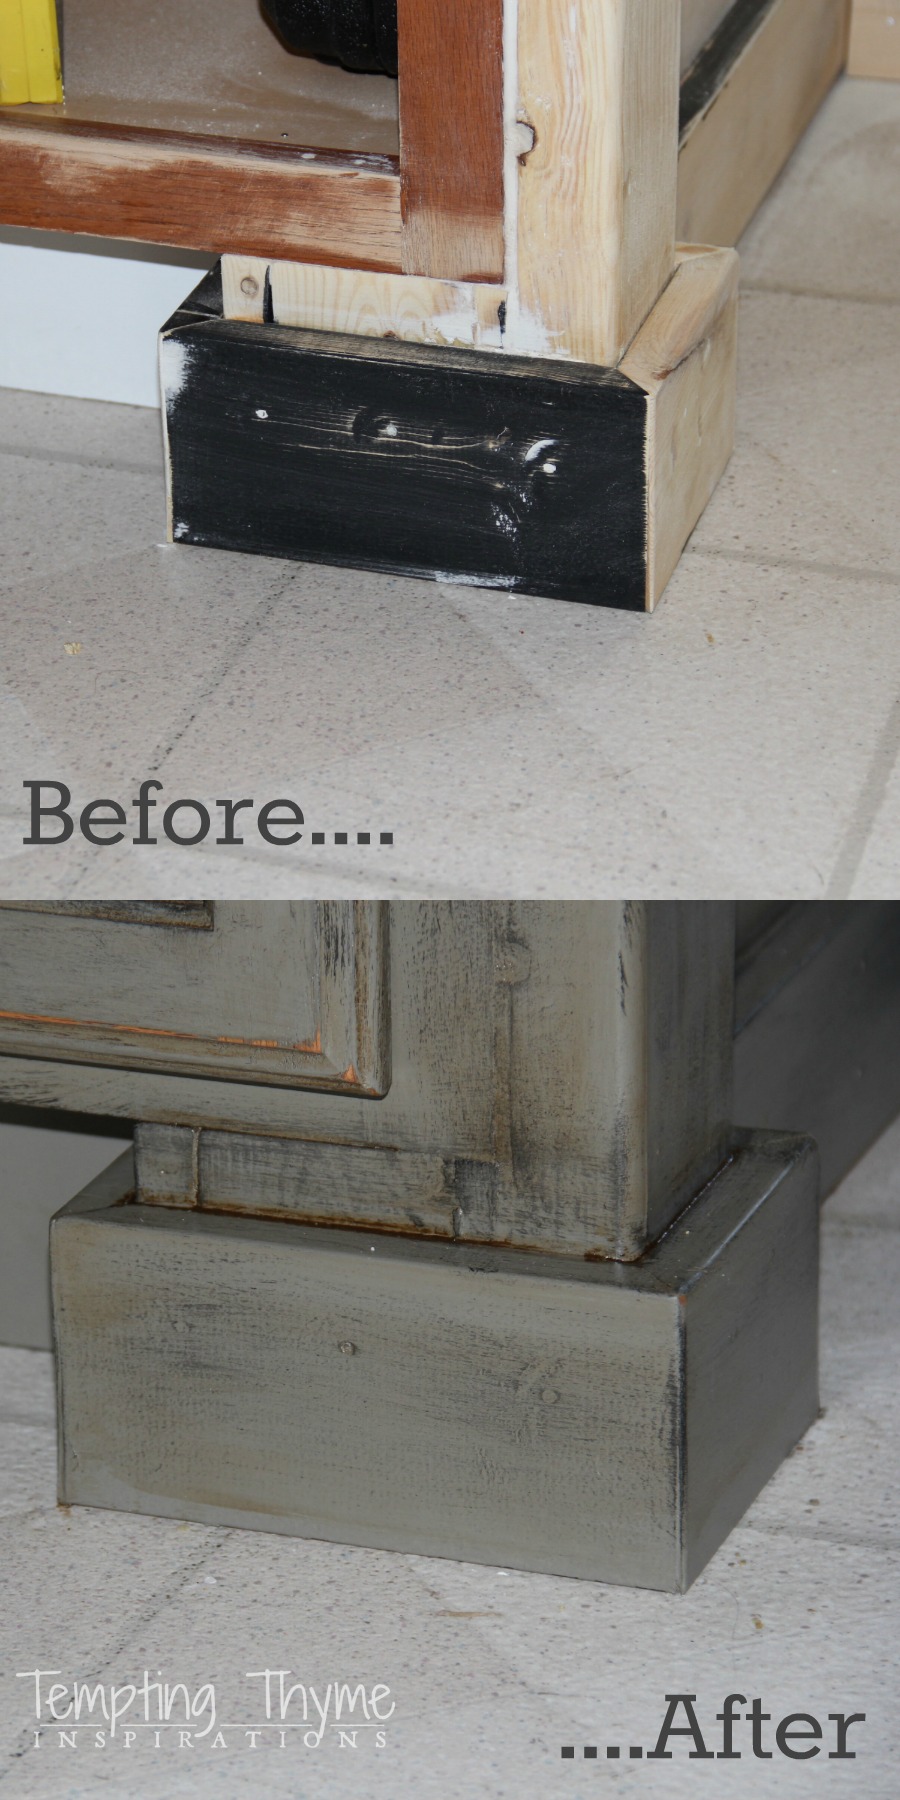 After the staining was done (I did the doors and drawers on our dining room table), I waited a week for everything to settle and completely dry before reattaching the doors and drawers, and installing the butcher block counter. The hardware is ordered, and I cannot wait for them to arrive and get this project totally finished. They are bar handles in a brushed bronze finish. Definitely happy dance worthy!!!!
Quick recap of the items used and their cost before I just give you more pictures that hopefully inspire you to bite the bullet to work on your own kitchen island:
- 1/4″ birch plywood – $27.99 for a 4’x8′ section that your big box store can cut down for you.
- 1×4 lumber for the wainscoting panel on the sides and back, and for the feet – $0 This was leftover from the shed doors.
- 2×4 pine lumber for the legs – $5.50 for (2) 8ft sections
- Finishing nails in various lengths. I bought the 5/8″ pack for $5.75 but had the other lengths already on hand.
- Caulk and spackle – $0 Already had on hand.
- Paint and Stain – $0 Used leftover product from previous projects.
- Drawer/Door Hardware – $7 Can’t wait to show you when they arrive!!
- TTL cost for the kitchen island makeover: $46.26
The butcher block counter adds another $178 to this project. I bought it at Menards, and it was my Mother’s Day gift from PT!! I will tell you about it soon, as there was definitely some work put into it, as it had to get cut down, sanded and prepped so that it would be food grade ready.
In the meantime, I hope you enjoy the weekend. I have to finish the 2 garage tables that I started last weekend, enjoy a Red’s game with K, and finish it off with another graduation party (the last one…..I hope)!


Love the look of this! Wish we could DIY like this and create a beautiful island in our kitchen.
Hi Shaunna. I found you through our conversations over at hometalk. I wanted to check out the entire project, but have been on the net so long today, I can hardly see the words . . . literally, so looked at the pictures. Tell me, will your other cabinets get this same treatment or will the island be different from them? We’re redoing all of ours too. The island will be darker in a “gray-brown” tone and the rest in a cream. We’re using copper handles and accents.
Will follow your blog now too, as well as on hometalk.
Great post, lots of hard work here 🙂
Cheryl @ Artzzle recently posted…“EZ Pack” Summer Trip Wardrobe
Hi Cheryl! I plan on painting the rest of the cabinets a whitish color (who knew there were so many whites to choose from). I will add some wainscoting to the 3 end sections, and might add some small feet to a few pieces, but I really wanted the island to stand out and am afraid if I do too much to the rest of the cabinets (other than paint) it might all look a little busy. I just installed some bar handles in a oil rubbed bronze finish and love them! You copper handles will be gorgeous, I cannot wait to see some pictures of them. Sounds like you are doing the same thing making the island darker than the rest of the cabinets. I really like the 2 tone cabinets that I see all over the internet these days. Send some pictures of your cabinets when they are finished….would love to see them.
Oh my gosh! I love this! I am not so sure I could deal with all the measuring, as that kind of thinking makes me full of anxiety. I sure would love to create a beautiful island for myself. It’s been on my to-do list for two and a half years now. I love how you gave yourself the island of your dreams.
tammigirl recently posted…A Few More Favorite Things
Thanks Tammi! Two and a half years…..I say go for it this summer…..you have nothing to lose!!! Send me pictures when it is done, as I know it will be gorgeous!
Great job! Looks wonderful! You have more energy than I. I would have sanded the black off before using. It seems like it would be easier. I hate sanding…LOL! I have a sink cabinet in my shop that I have thought about making an island in my kitchen. I couldn’t afford a butcher block top though, but I could probably figure out something. I really like the chunky legs. Thanks for the ideas!
Thanks Bonnie. I wouldn’t say I have more energy, but when I get a bee in my bonnet, things at least get started. The sink cabinet would be wonderful as the starting base for your island. As for the butcher block, you can make your own. I spent alot of time researching building my own, and was all set to go when my oldest son talked me out of it.
Love it!!!! It turned out amazing!!