Gotta love it when you can repurpose an item that had just been hanging around taking up valuable space collecting dust! I originally bought this open-backed picture frame ions ago, creating a cork board with it. Loved the frame……hated it as a cork board! Could not, would not get rid of it! No matter how much PT grumbled that it was cluttering up our storage room. LOL! Isn’t that what a storage room is all about? Storing the items that you just can’t part with, hoping that you will have a use for it someday?
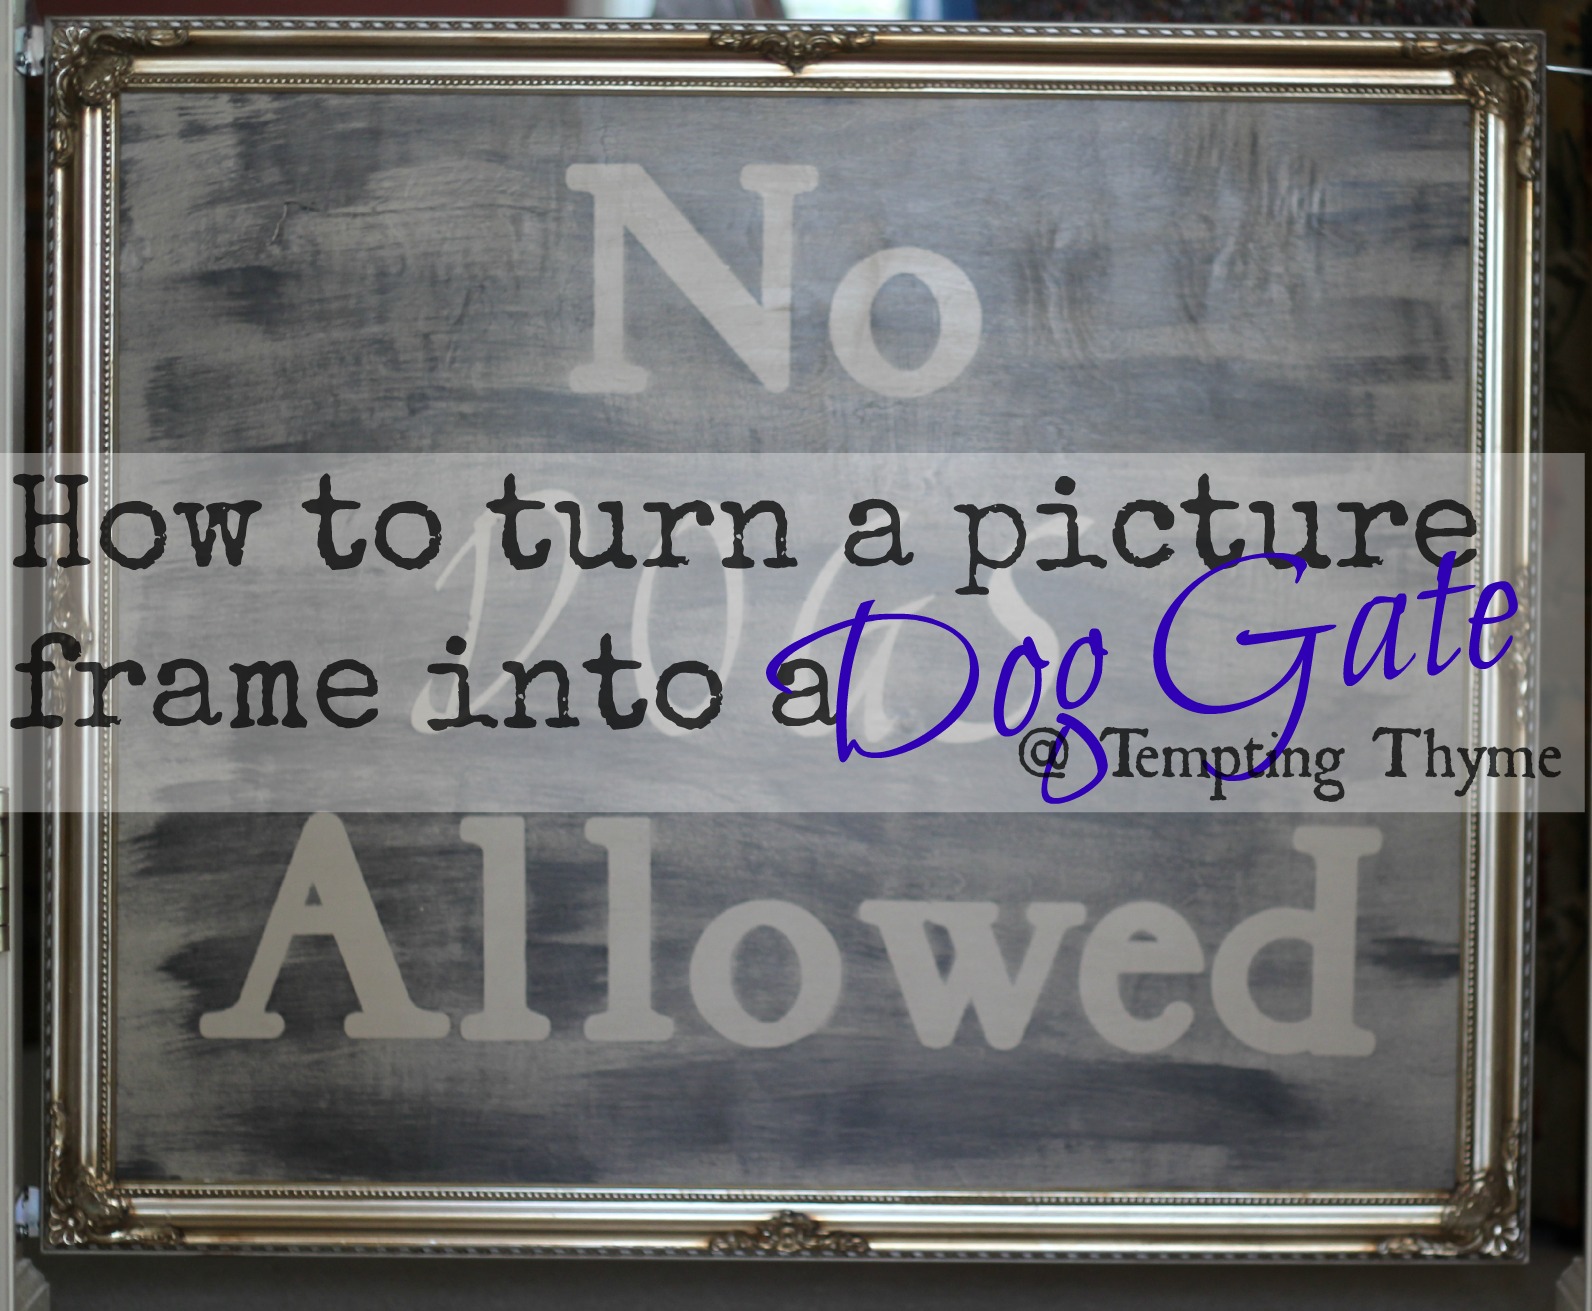
If you follow me on Facebook and Twitter, then you know that we added a new member to our household in June.
New puppy + potty training = lots and lots of accidents!!!
We all know ‘accidents’ are best cleaned up from vinyl and hardwood floors, right? Not on carpeted areas like the dining room! As this was a temporary fix (I hope) I did not want to spend a fortune on baby gates or the fancy dog gates you see in catalogs. We tried a number of household/loose items such as a Graco playpen, the sides of our boys’ crib….nothing that I was willing to have people see for months on end. Although, truth be told….we are still using the crib sides in other areas of the house. More on this later!
Materials Needed:
Open Back Picture Frame ~ I purchased mine from Hobby Lobby way back when on sale 50% off.
Plywood ~ Purchased from Lowe’s, 1/4 inch thick.
Vinyl Letters ~ I had this in stock and used a Cricut Expressions to cut it out.
Paint ~ Leftover from painting the boys’ bathroom cabinet.
Sandpaper ~ I used a 220 Grit
Hinges ~ Purchased from Lowe’s
Gate Latch ~ Purchased from Lowe’s
Spray Paint (optional) ~ to cover the backside of the plywood
Instructions:
I measured the opening of the frame and sent B to Lowe’s to get some plywood. If any of you didn’t know, they will cut the wood for free. I have done upwards of 8 cuts and they have not charged me for this service. I have heard others say, though, that they are charged .25 cents per cut after the 2nd cut. I guess it just depends on what Lowe’s you walk into and I am sure if I asked them to do a dozen I would be charged something.
We had to make two trips to get the board cut, as the first time B didn’t have them cut it to my specific measurements. It is a good thing I use this same wood for art projects, or he might have gotten an earful! LOL! I sanded the board front and back lightly, damp washed it to remove all residue and dust, and then painted 2 coats ~ I used a taupe leftover from the bathroom project. Lightly sand in between the coats. I then cut out some vinyl letters using my Cricut Expression (love, love, love this machine……any of you own one?), centering them up with some leftover wood railings. Peel the paper backing off of them and press them into place on the board. I did some practice runs with paper so that I would know what size (inches) would work best for the board. It is always best to practice with inexpensive paper versus the higher cost of the vinyl.
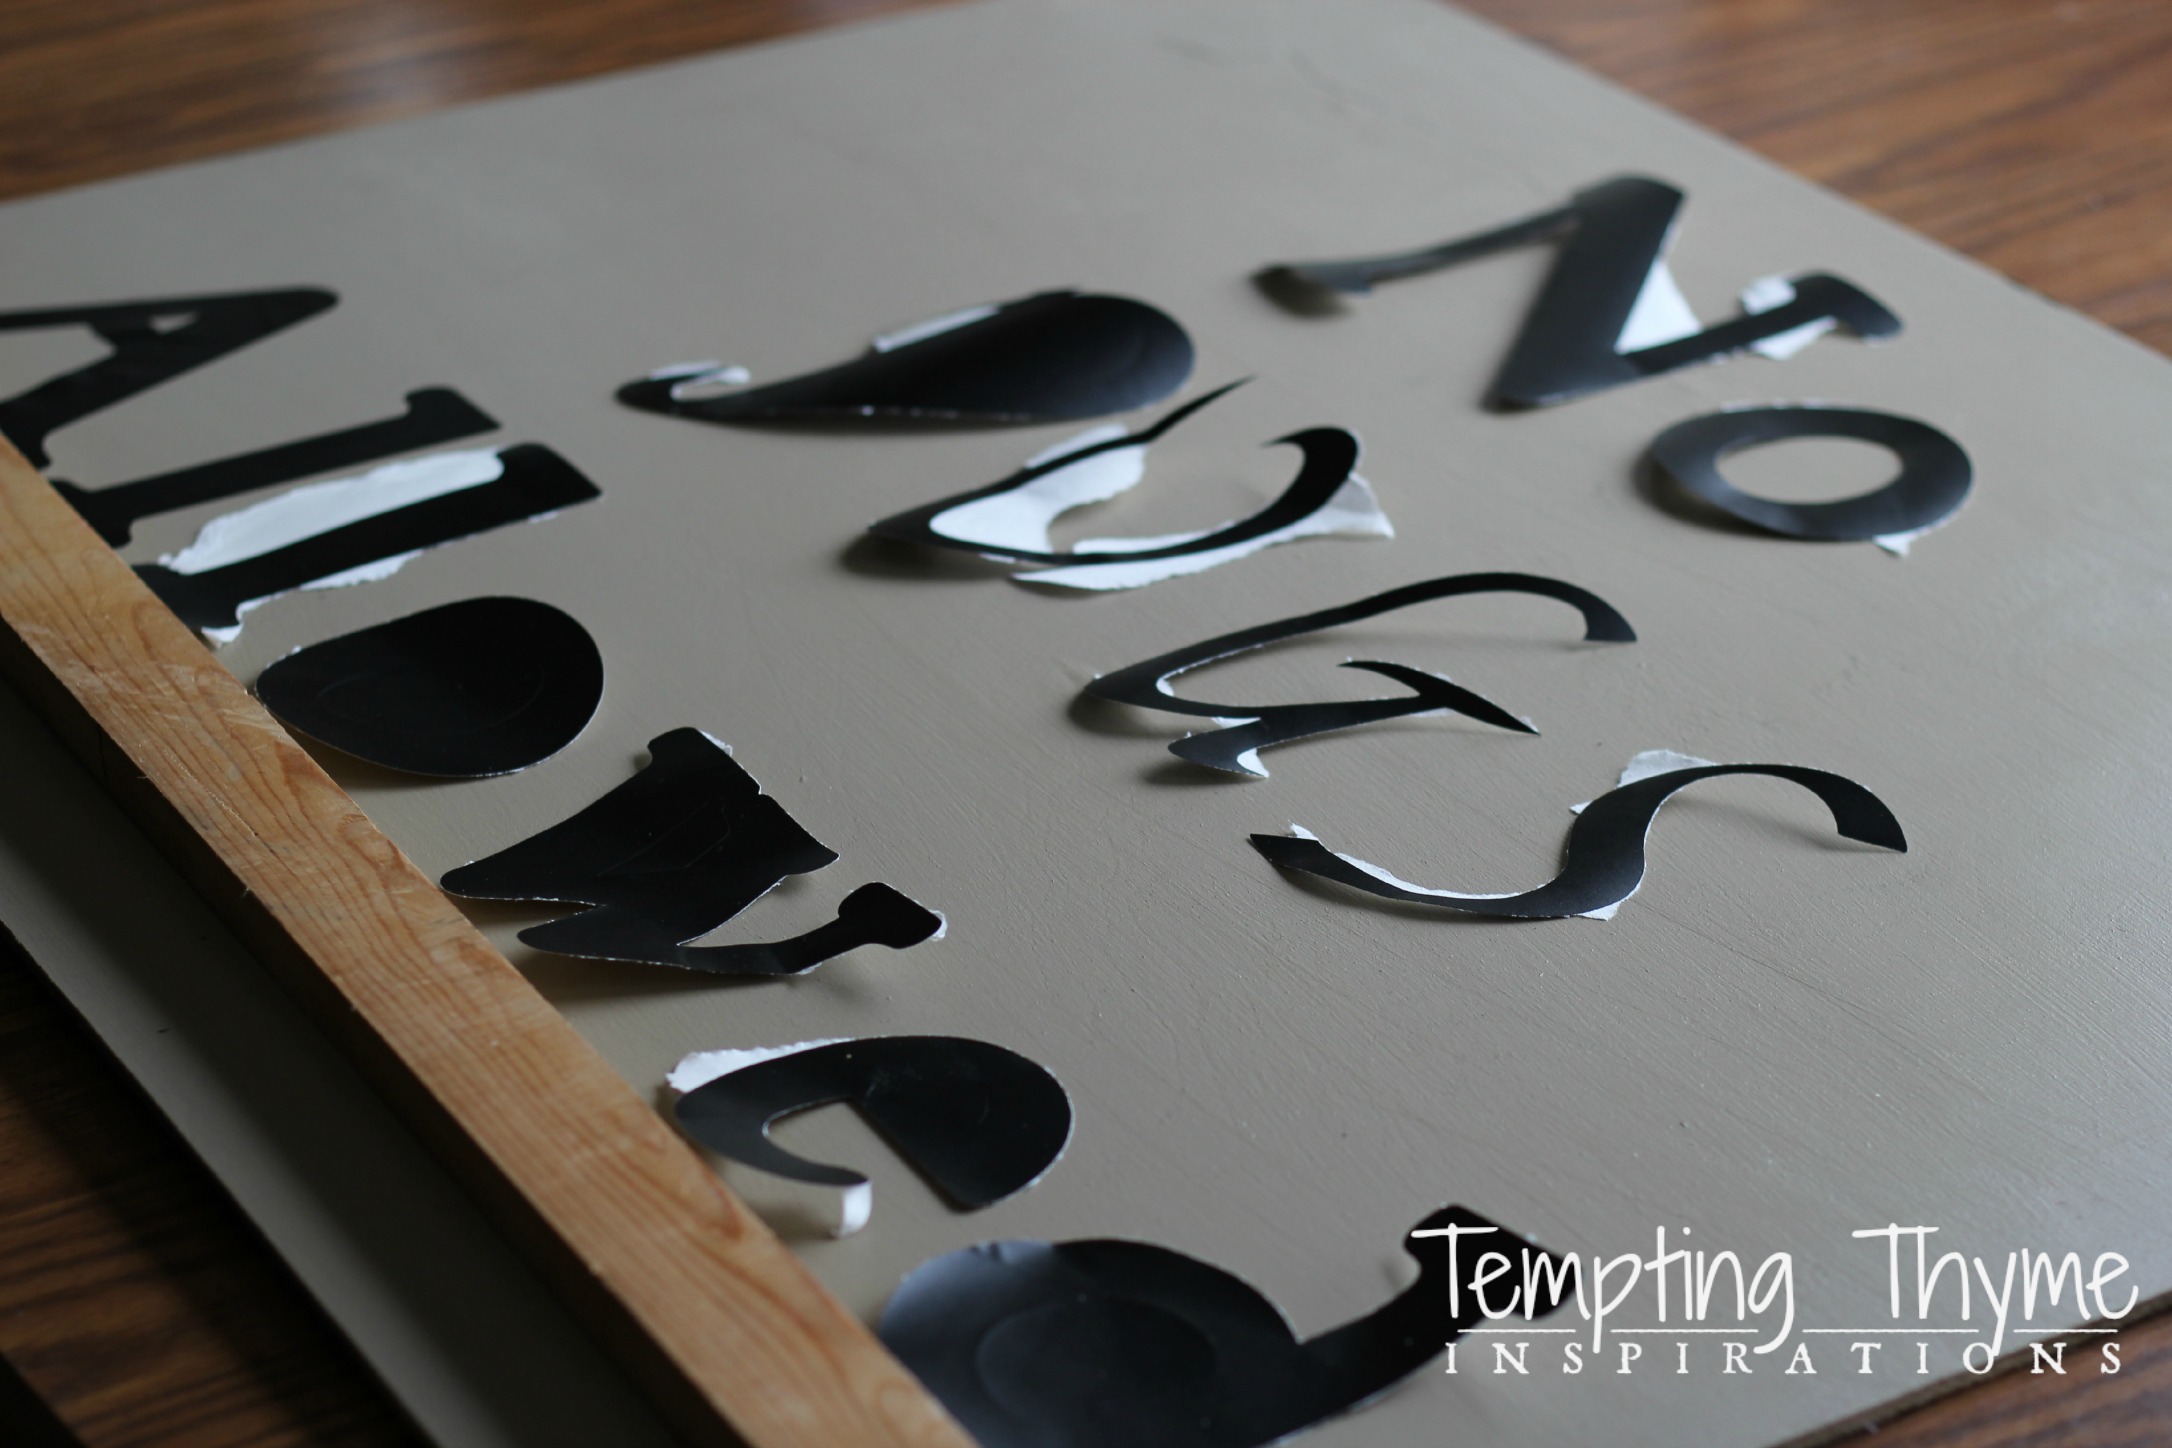
After the letters were pressed into place, I brushed over them with some leftover black paint. I used a dry brush technique which has you loading the paint just onto the bristles of the brush, tapping the excess off on some newspaper and ‘dragging’ the paint over your project. If you want a heavier application, just repeat the dry brushing until you have obtained the desired look. For the dog gate I went over everything 3 times.
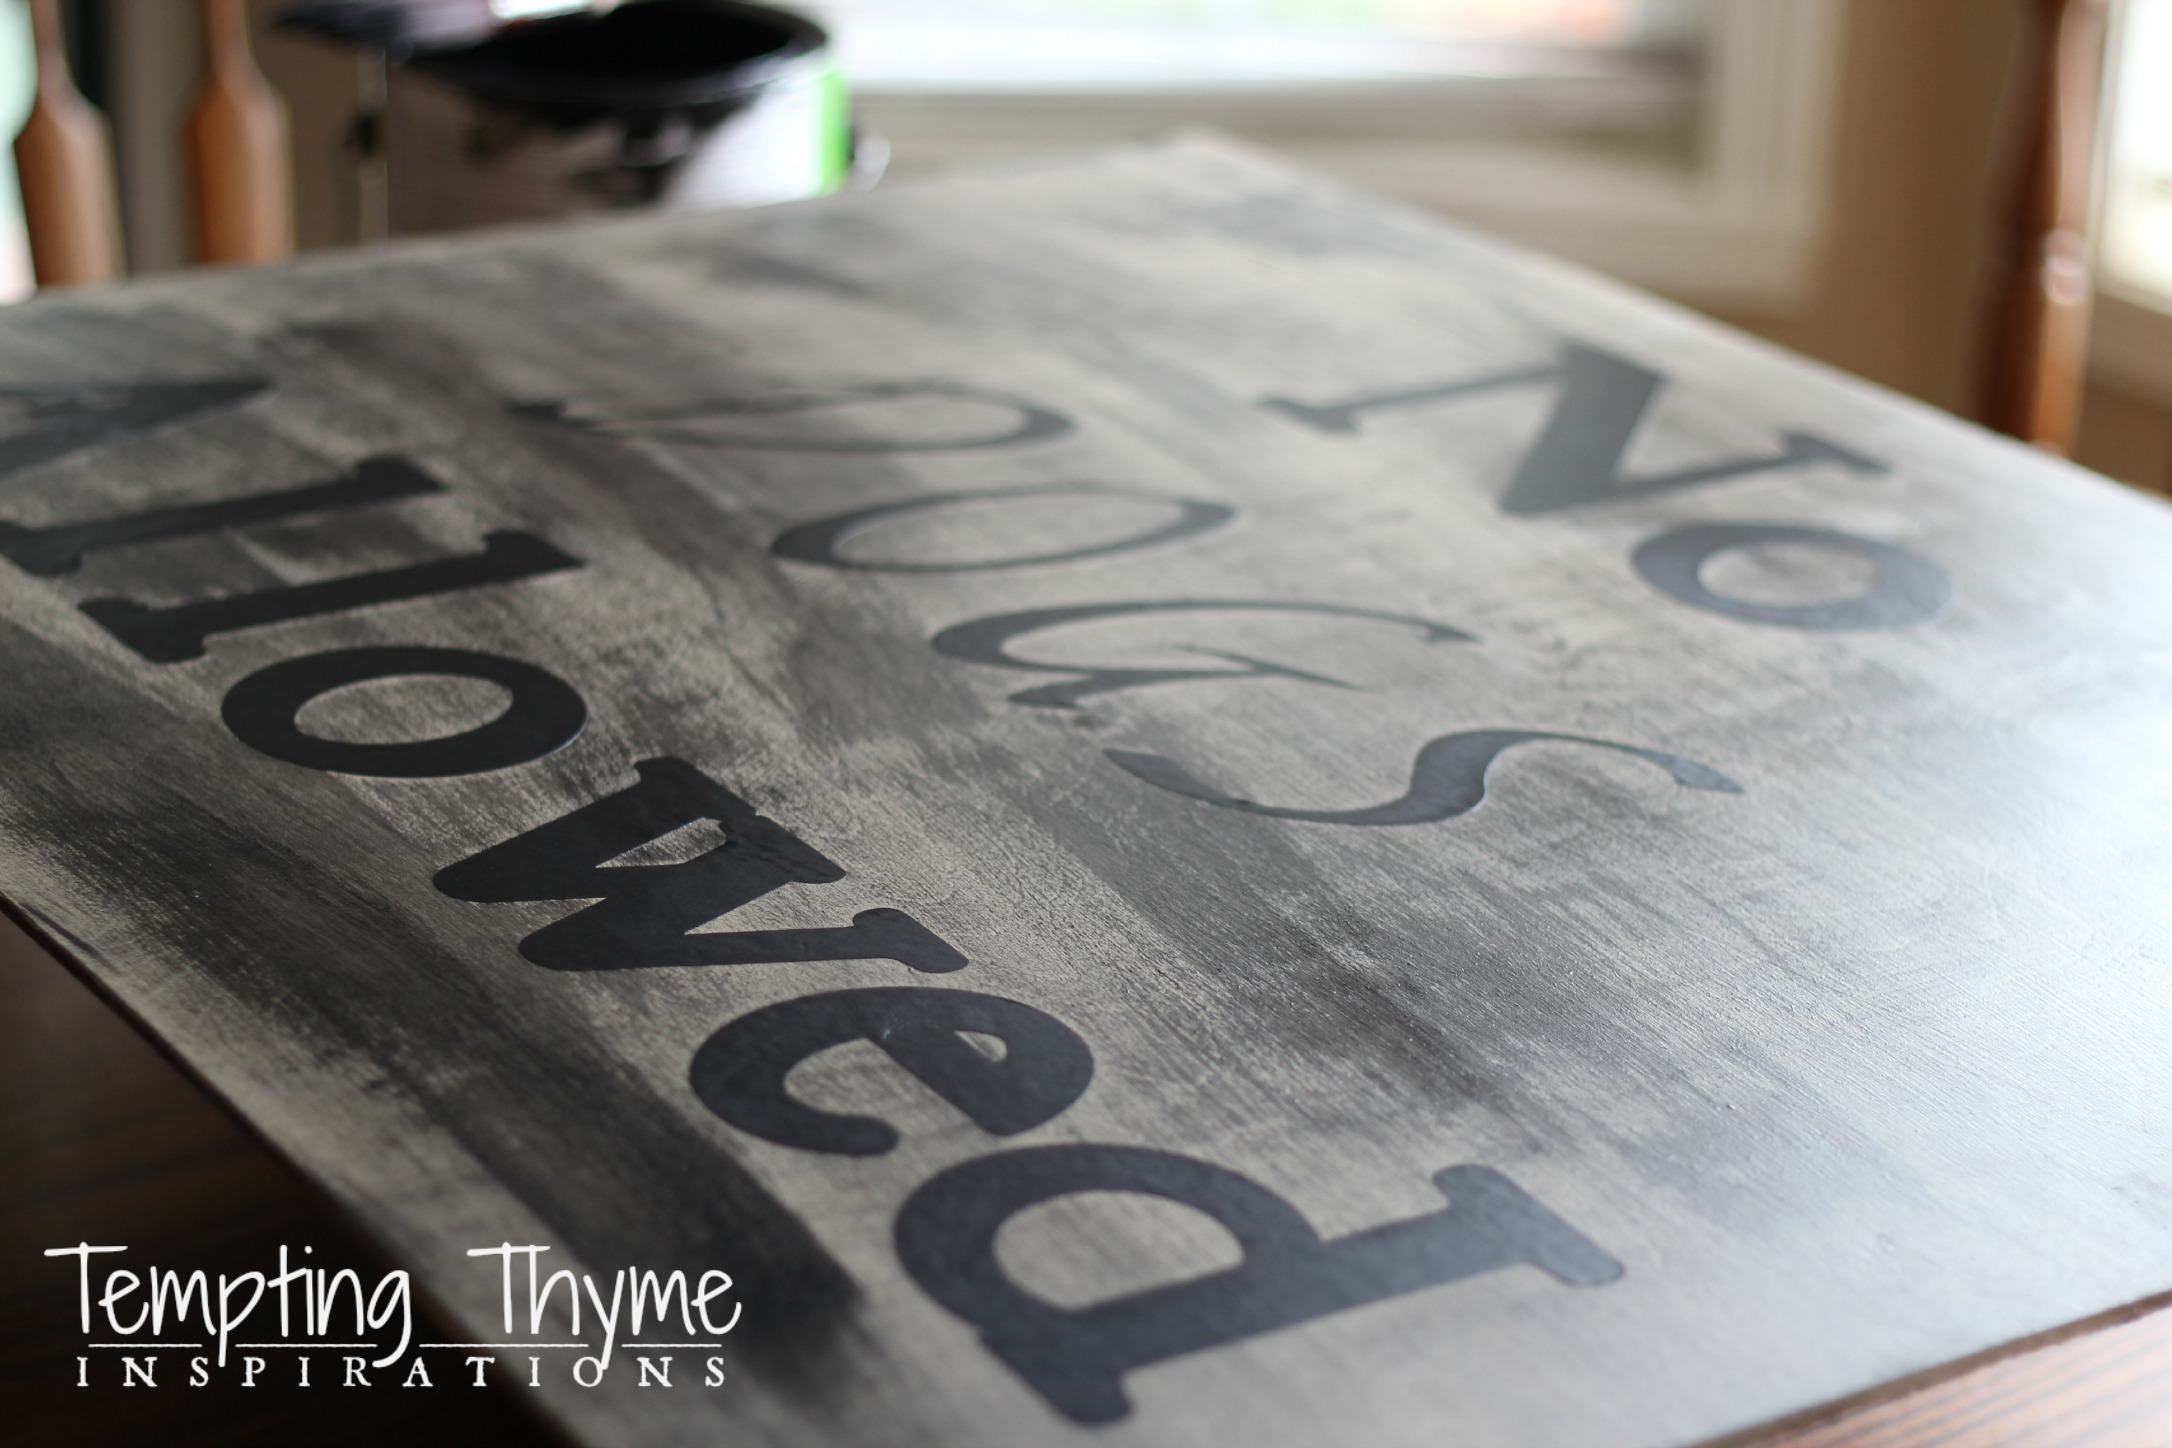
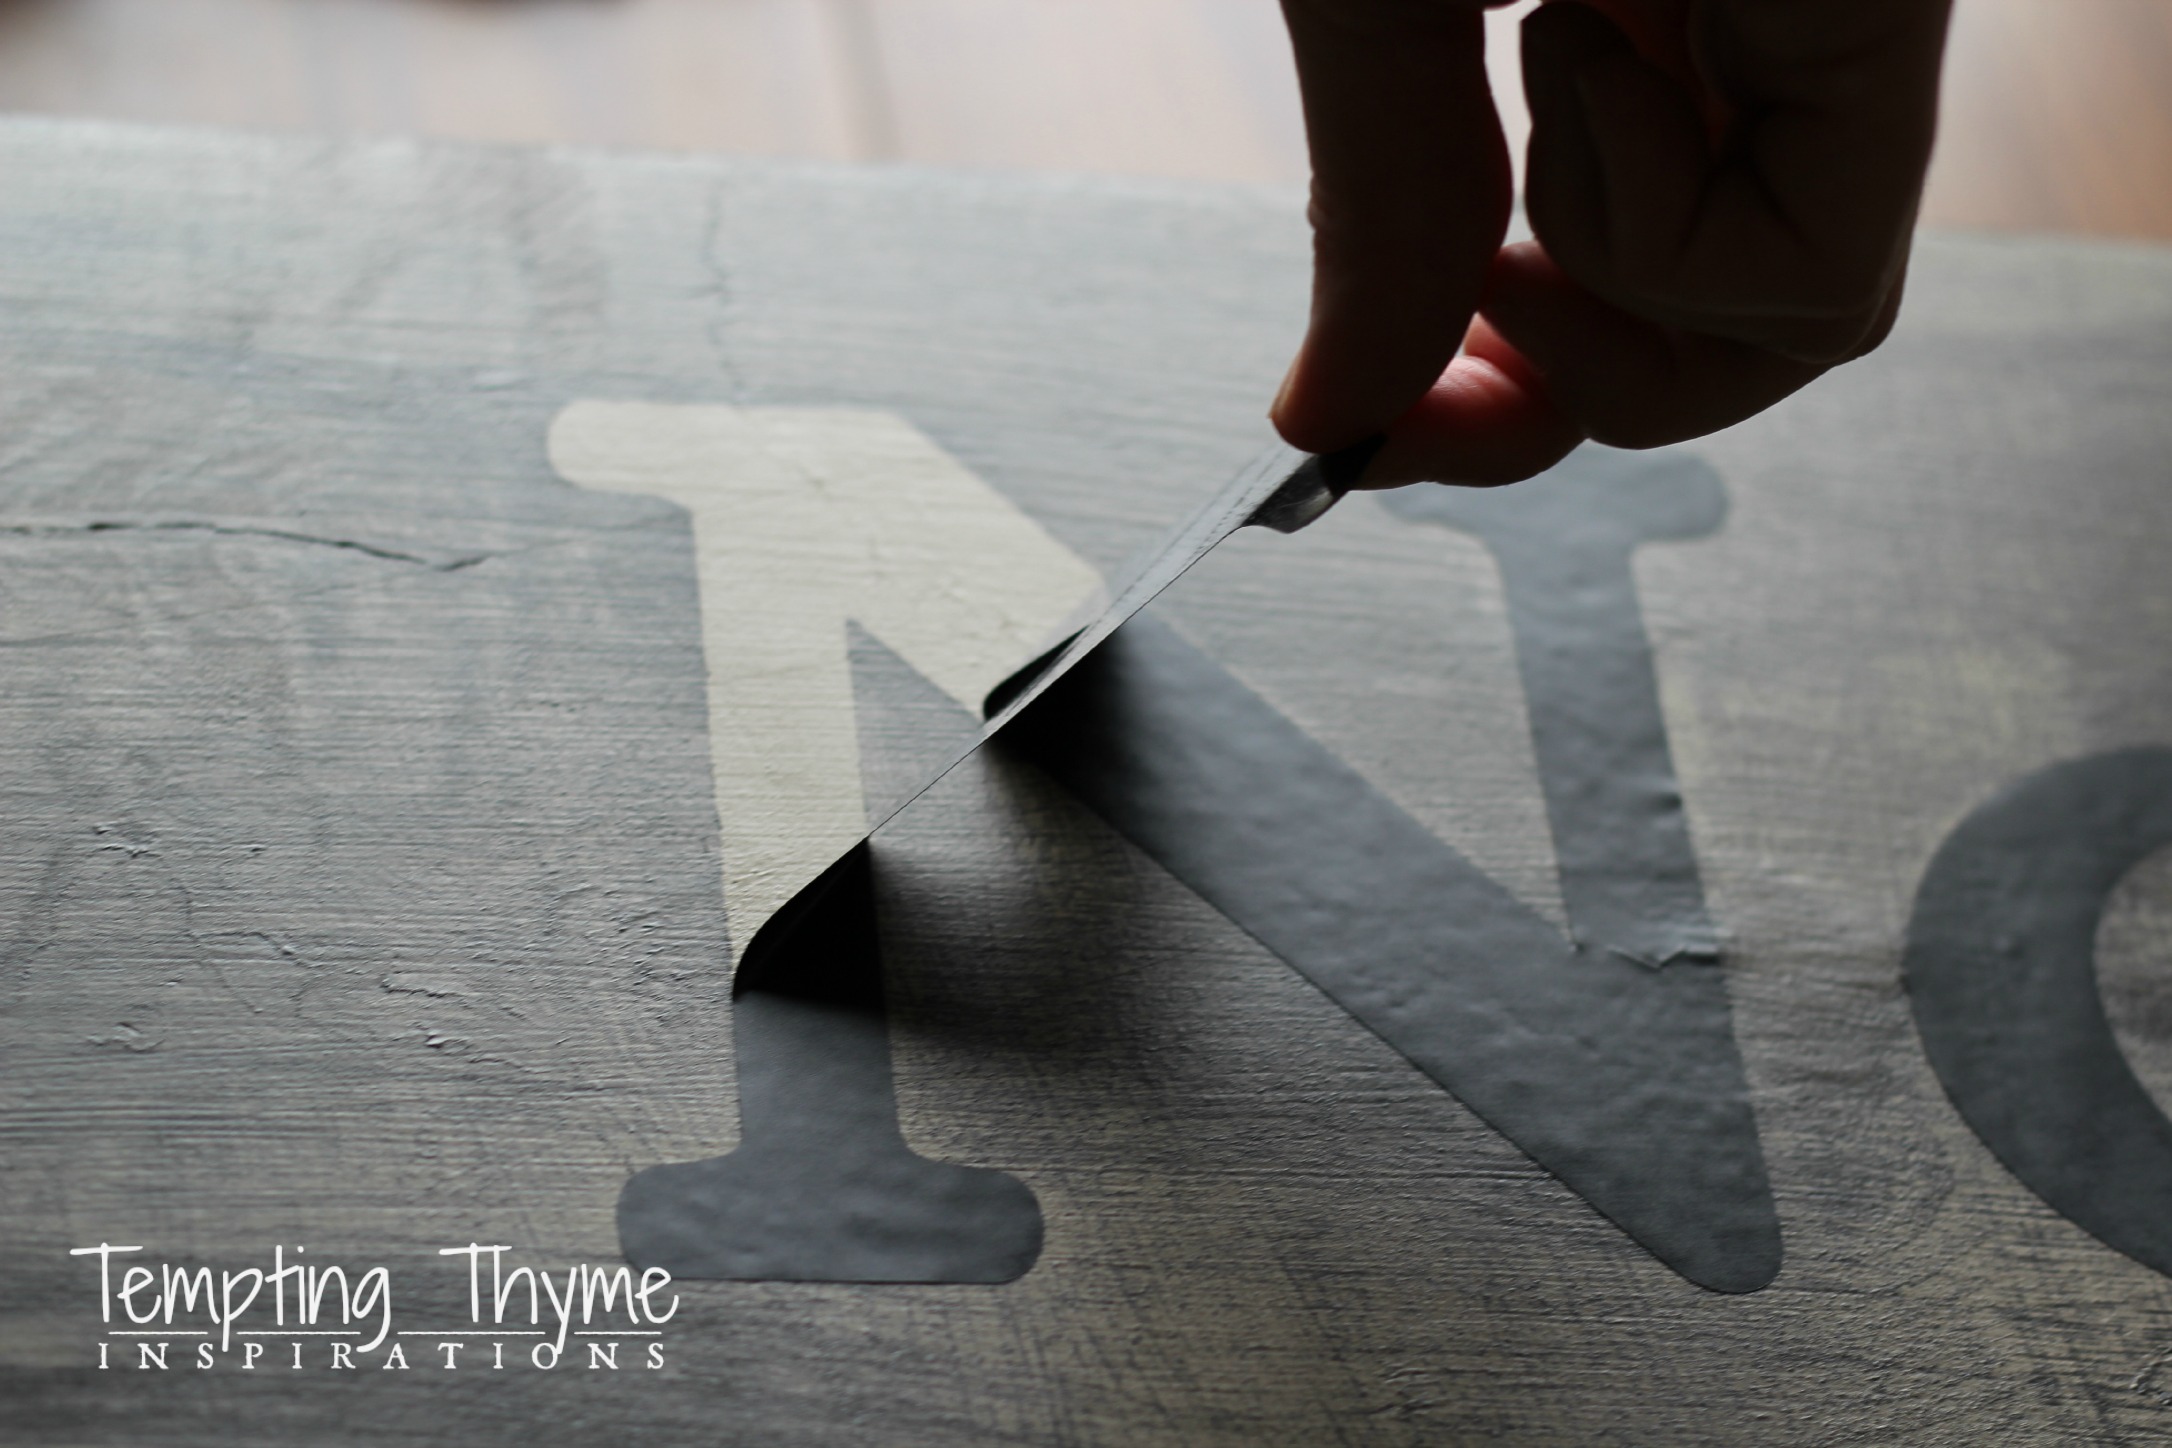
Let the paint dry a few minutes, and then carefully peel off the vinyl letters. Let the paint completely dry and then give the board a very light sanding (220 grit).
At this time you will be ready to add the hinges to the frame. You need to be careful that you don’t buy hinges with a deep screw. The depth of the frame is minimal, so you need to be careful about the size of the screw that you use, or you could end up splitting the frame. Trust me….I did it…don’t look to close!
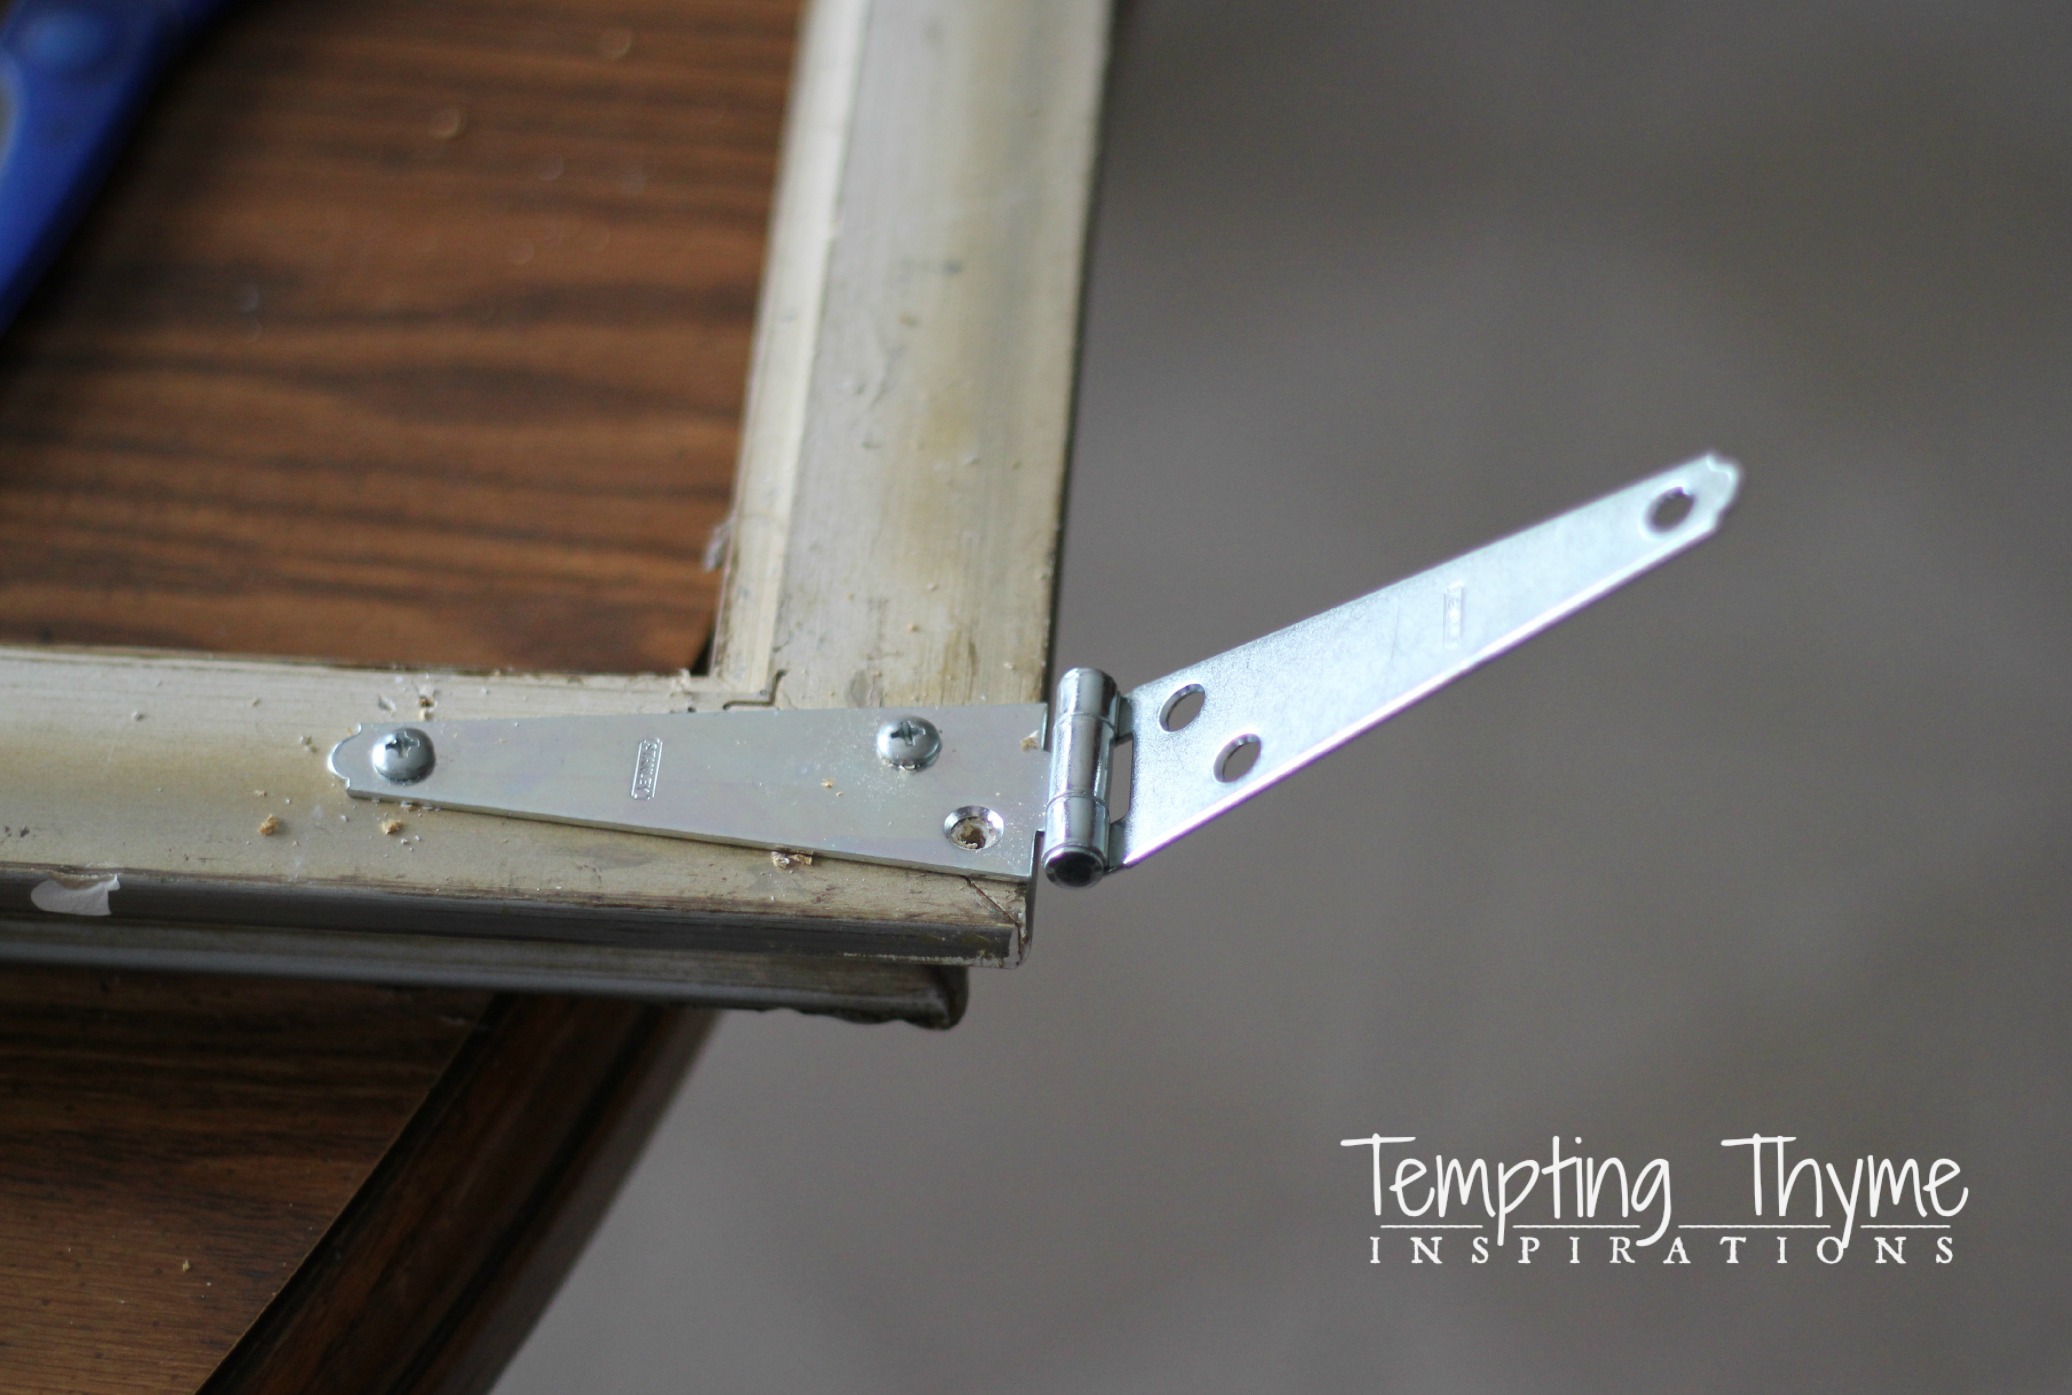
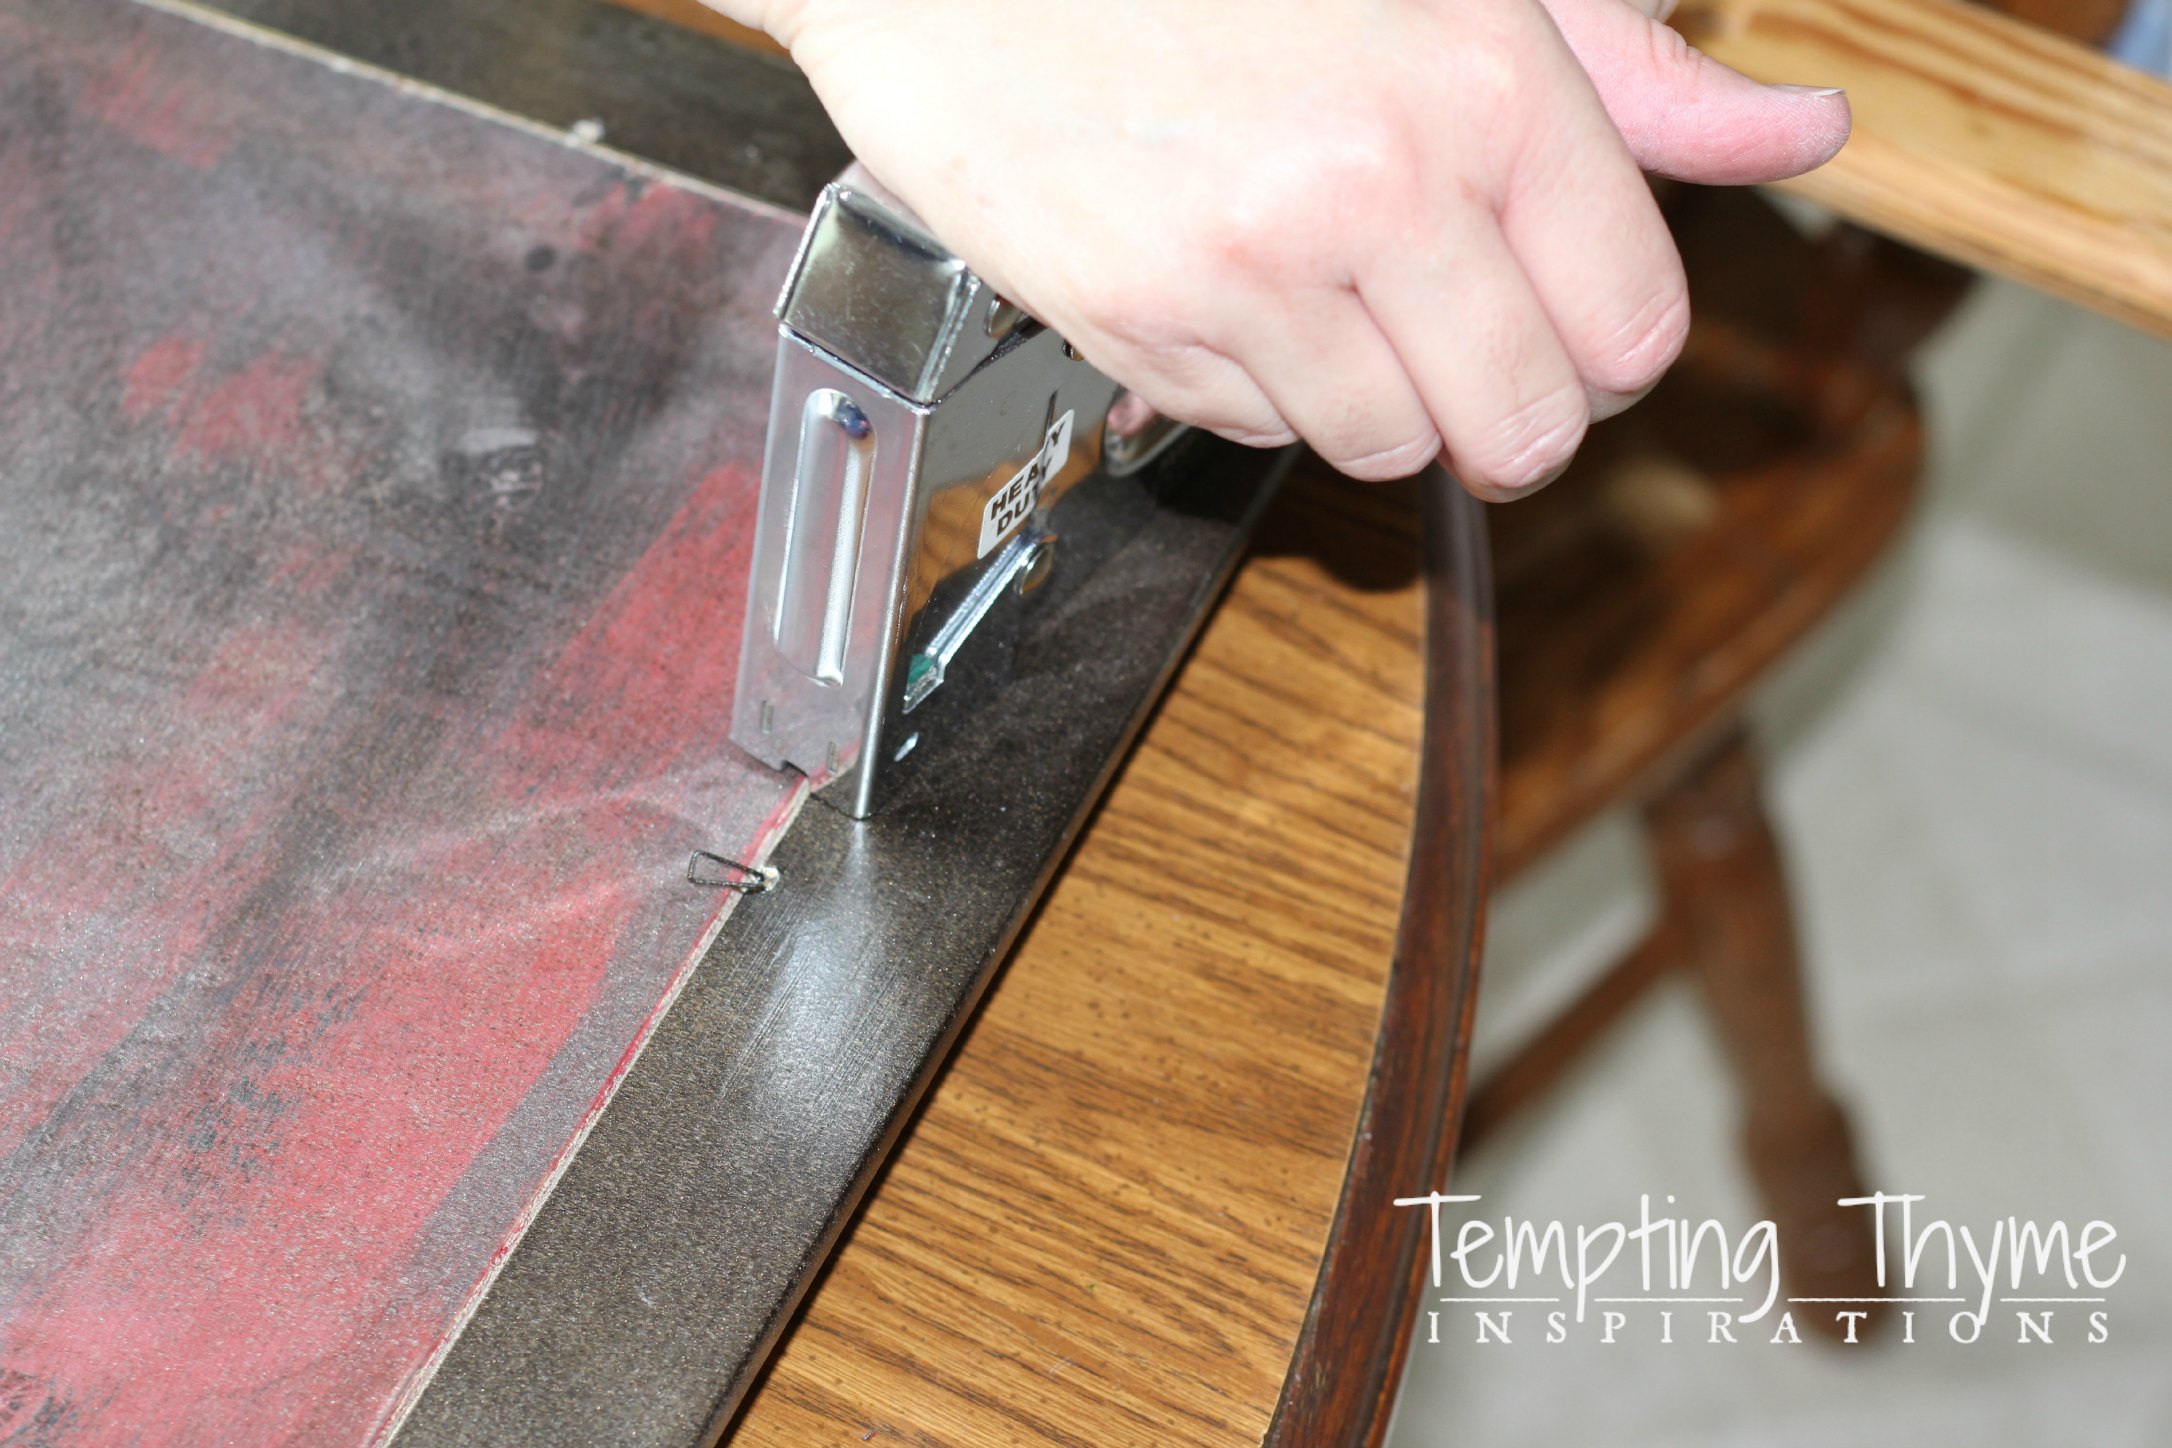
Attach the wood to the frame using a staple gun. You might notice that the back is painted. After putting on the taupe basecoat I decided to lightly spray it with various shades of red, black and a metallic bronze that I had left over from previous projects. My dining room is painted in a brick red and I was hoping to have this doggy gate blend in instead of sticking out like a sore thumb. The back of the frame was only spray painted with the Metallic Bronze. I think I might end up doing another saying on the back, just haven’t been inspired yet!
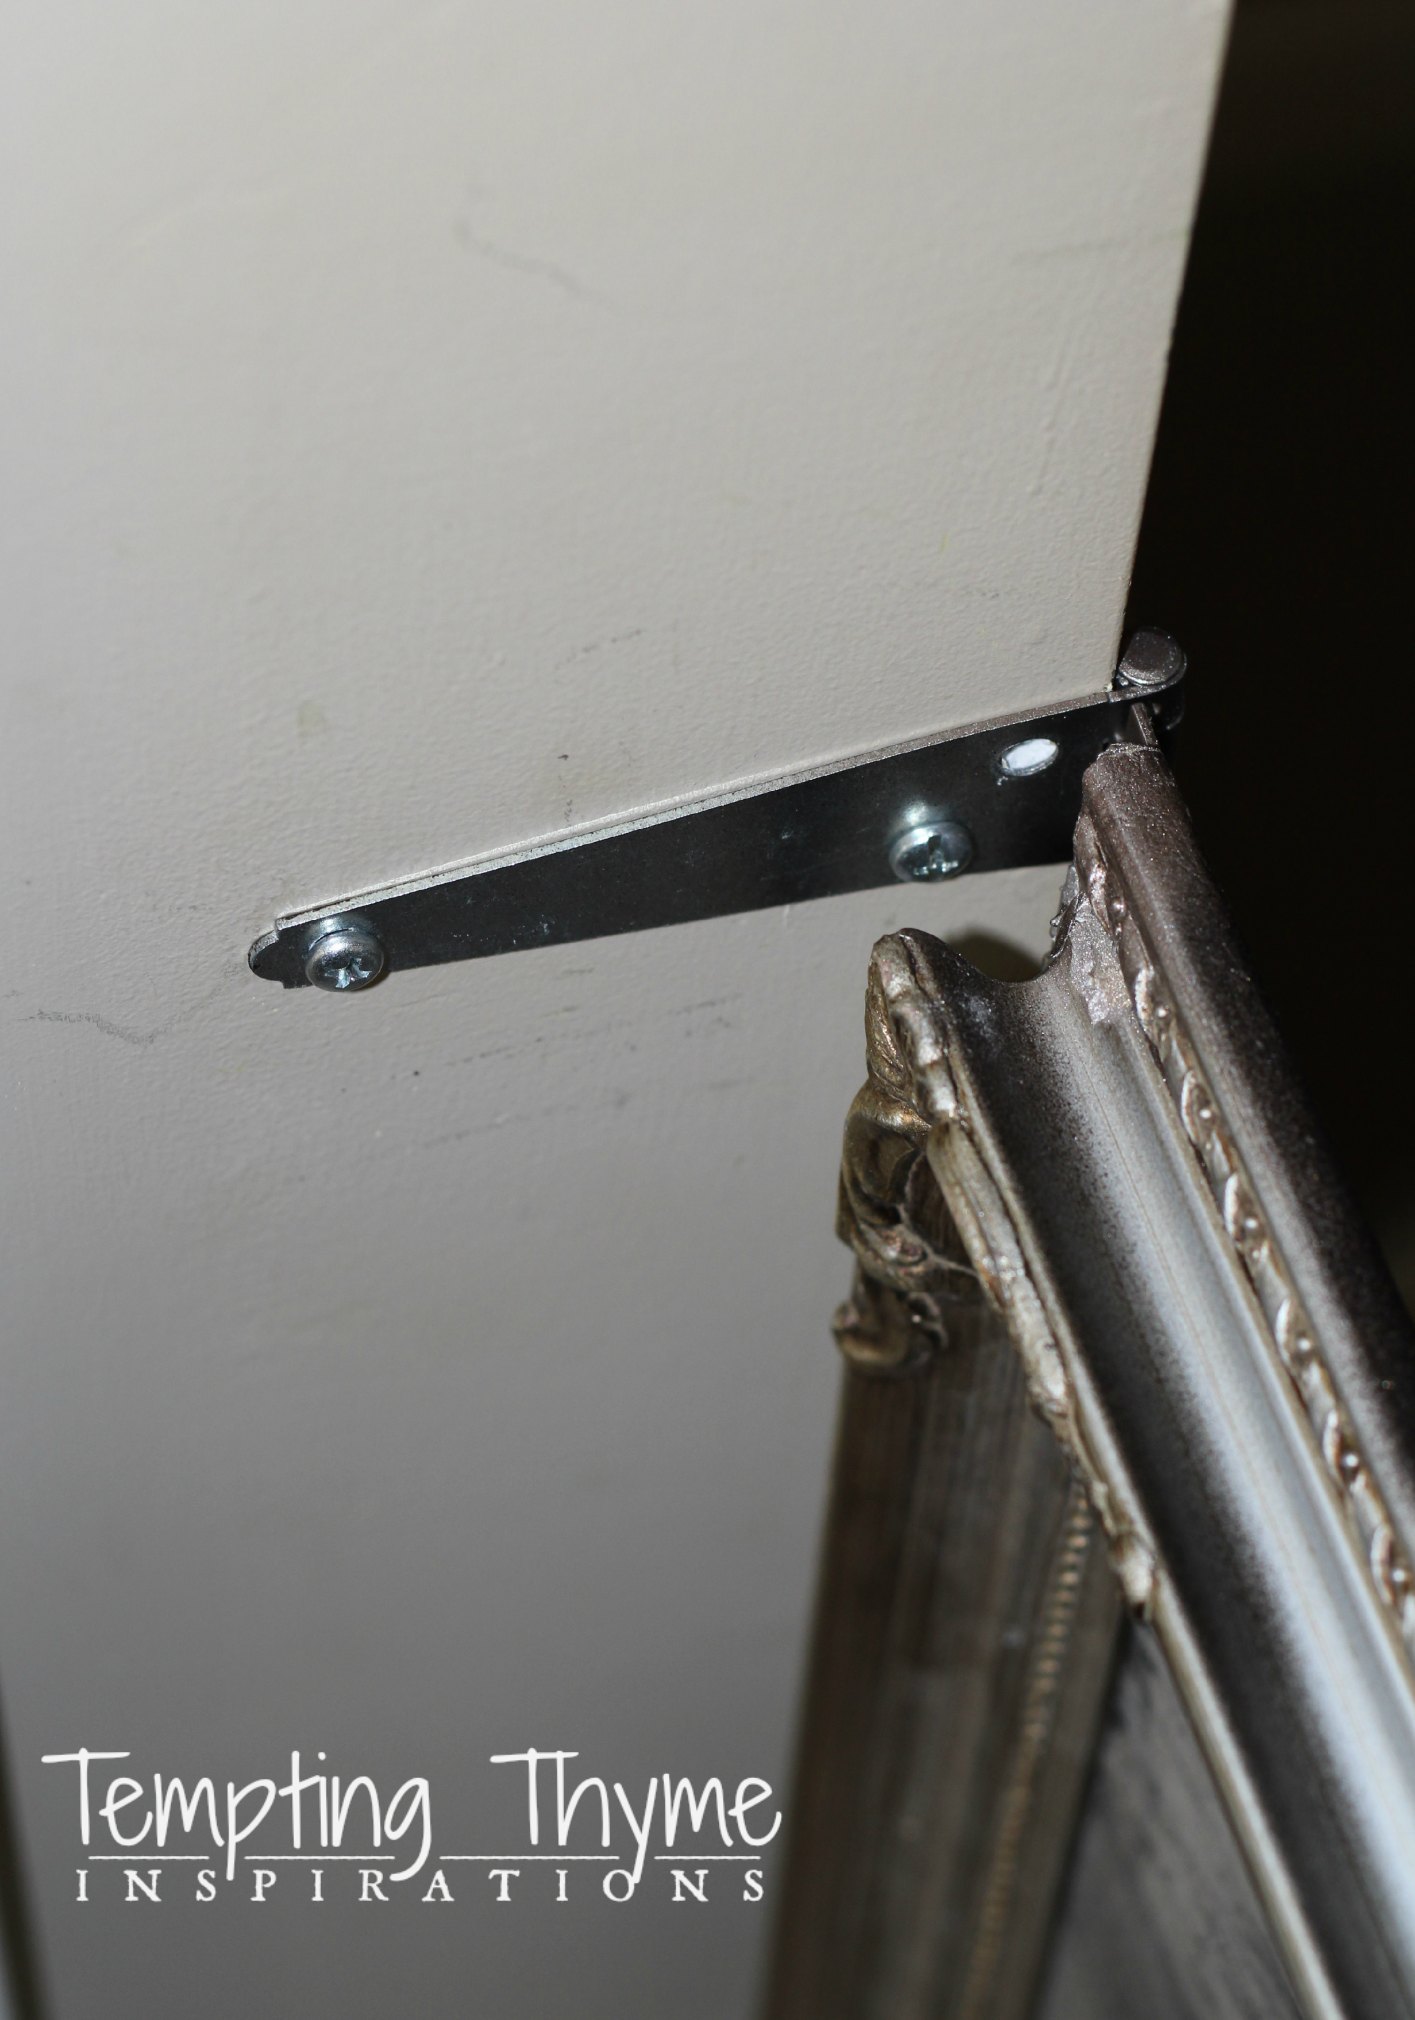
I attached one side of the hinge to the frame and the other to the kitchen wall. You can’t see both of them, but there is a hinge at the top and one at the bottom. I will be painting my kitchen soon and will go over the silver brackets so it blends in better with the wall.
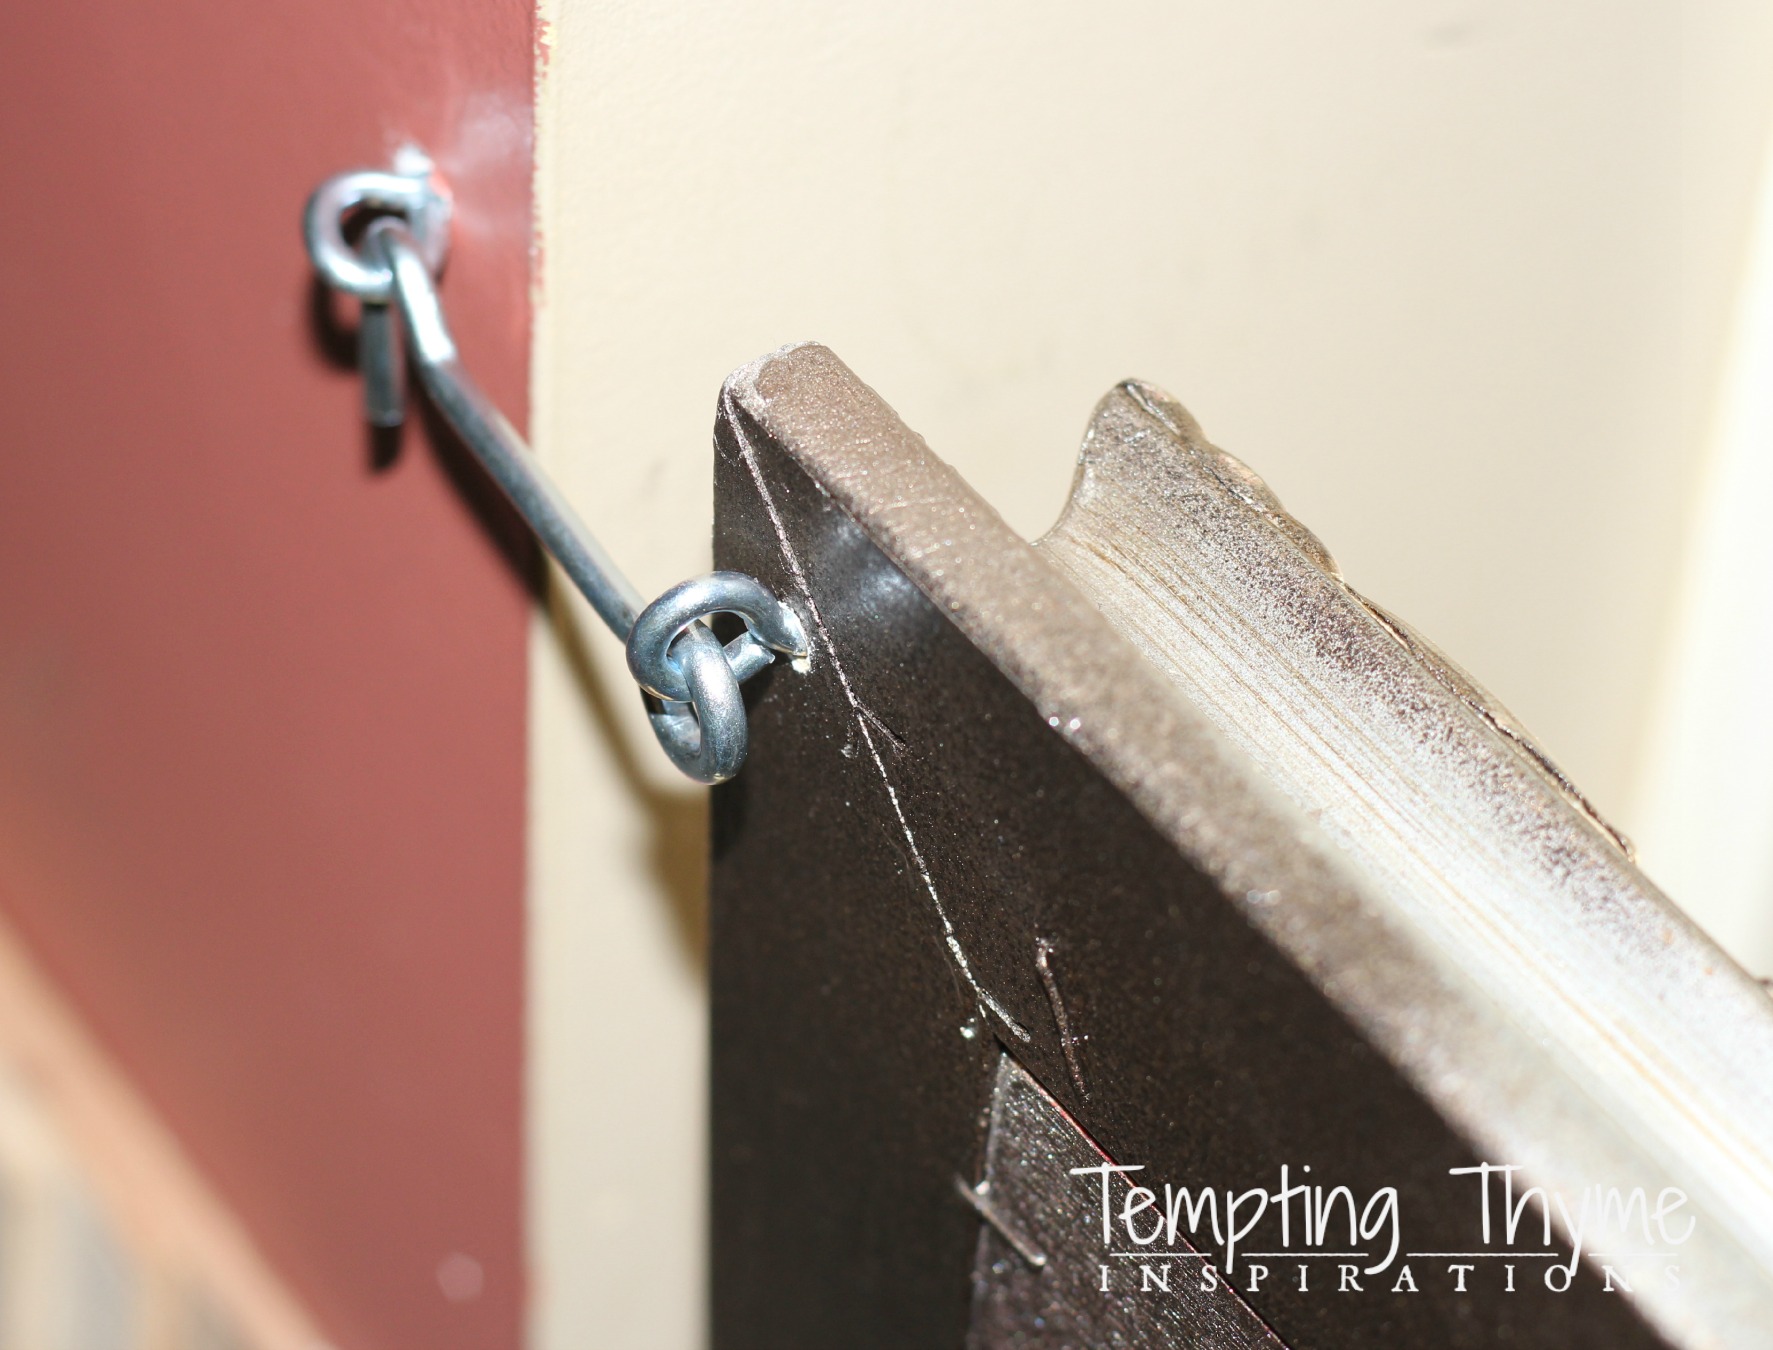
I had a hard time initially finding a latch for this frame. All I could find were the large ones meant for sheds and cafe doors. There were a few weeks that this door was installed and I was waiting for Rudy to figure out that he could just push it open. Thankfully, he never did! I will not say anything snide or smart-alecky about my baby! Finally, I found something that would work…… Ready to see the finished doggy gate????
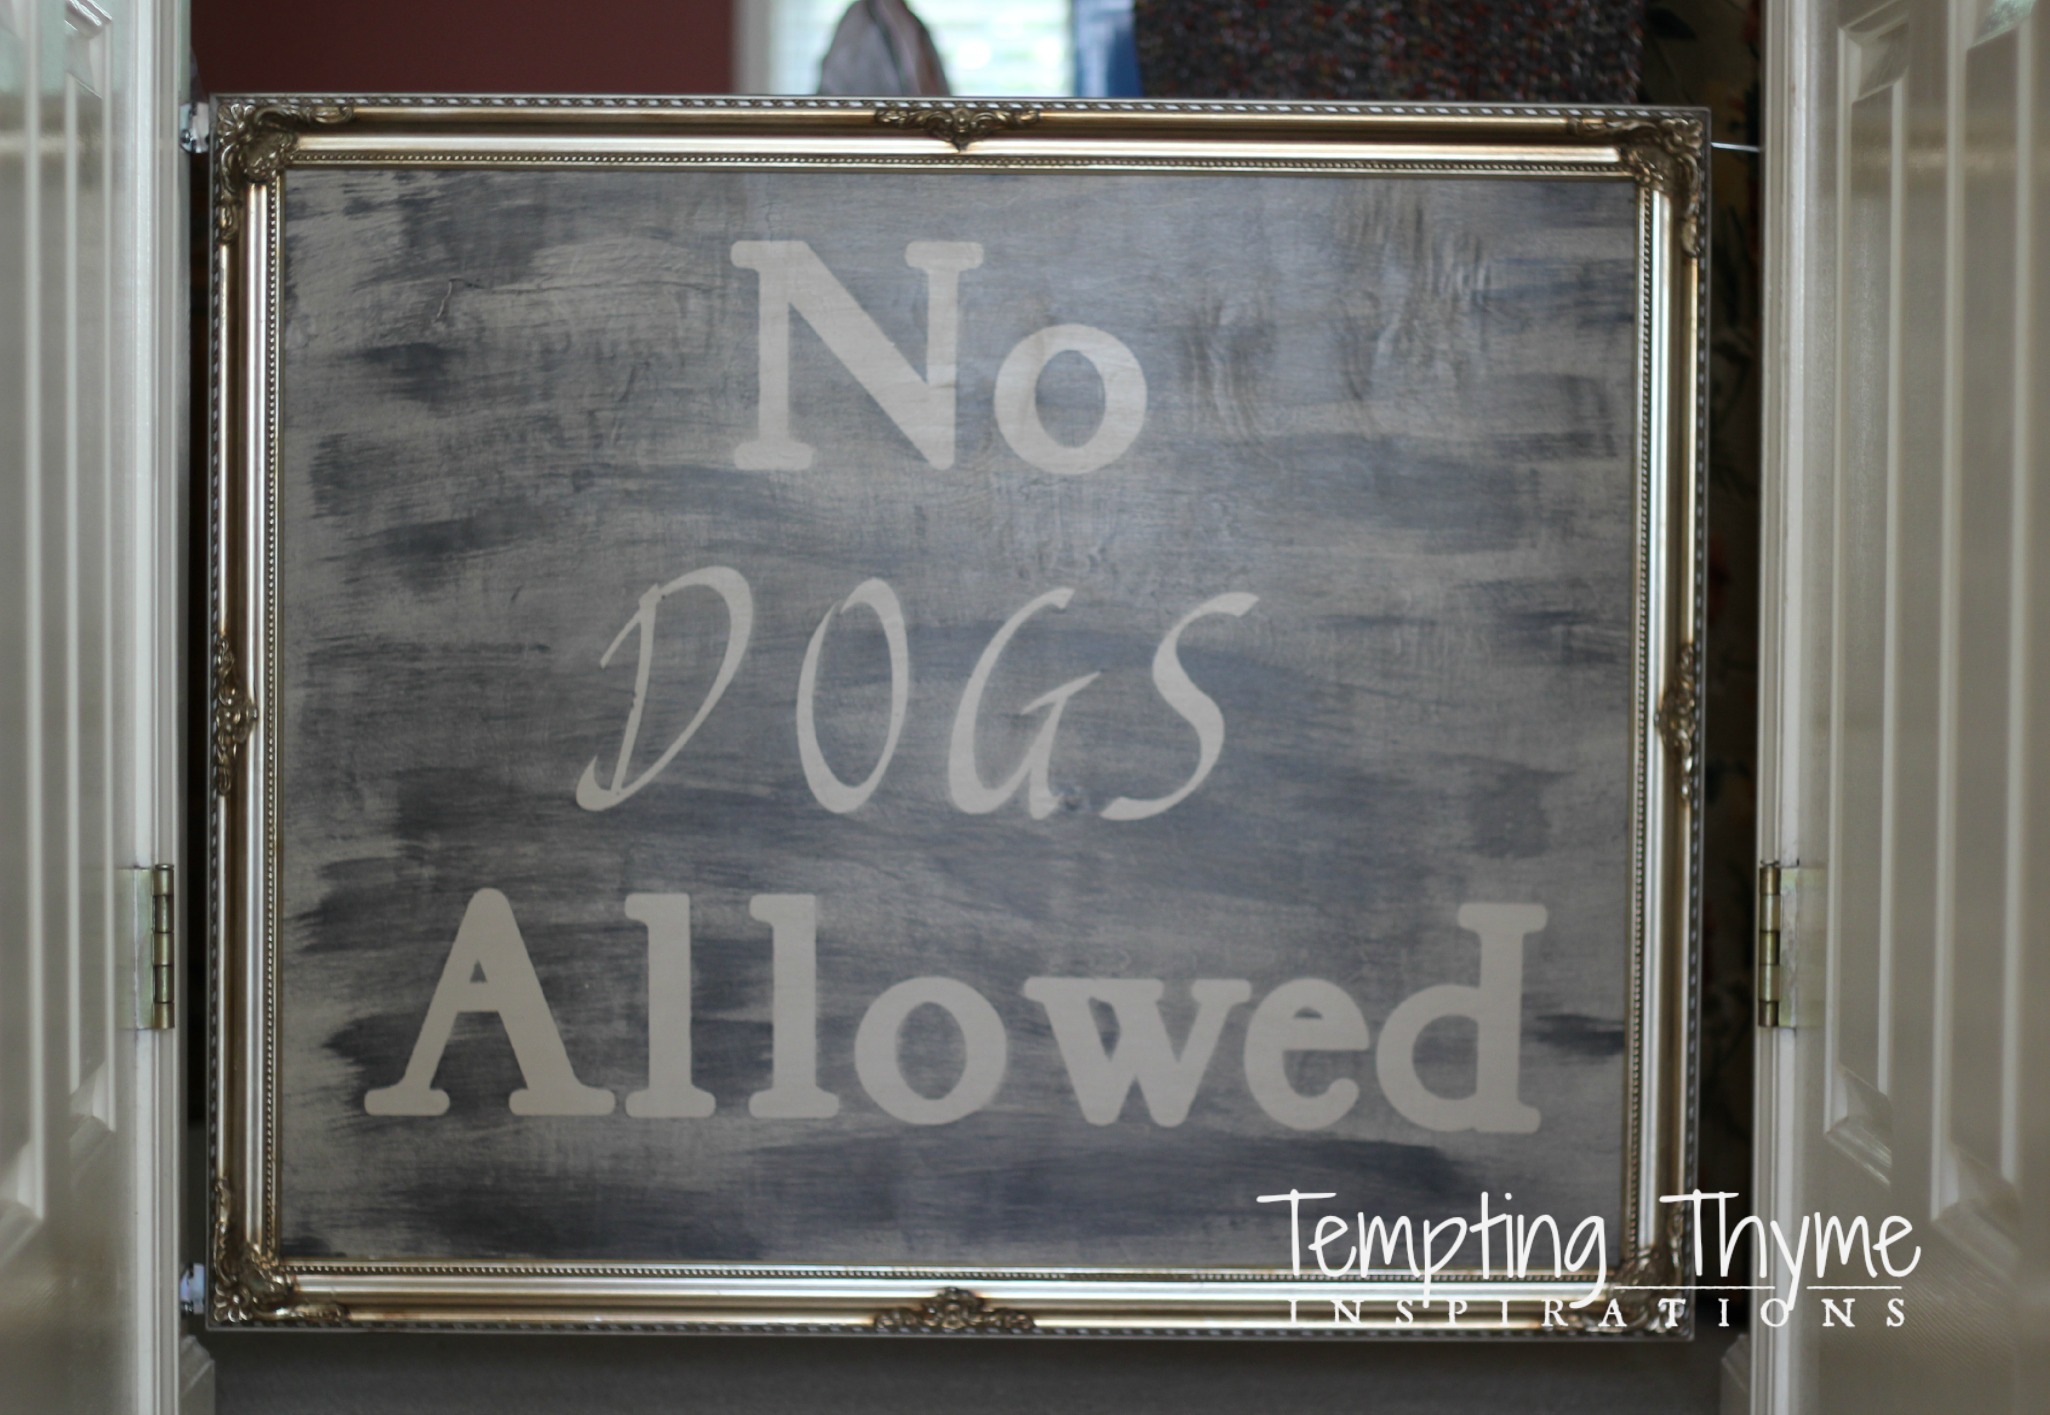
I still love it! Even when he is fully potty trained, I might keep it up! It is hip….it is fun…..and it makes me smile!
Who knows, maybe when I am ready to switch things up I could turn it into a chalkboard! Hmmmm…..
Until next time……
Shaunna
Related Posts:
Subway Art Using Picmonkey
How to create a Watermark using Picmonkey
How to make Photo Coaster’s from Tiles
Linking up to Best of the Weekend at Little Miss Celebration and, and Before And After over at Thrifty Decor Chick, as well as these other great parties…

excellent work my friend from Ireland!
I have tried a number of different options for dog gates, most of which did not fit into my décor whatsoever! I was search the web for ideas and ran across this site! What a fantastic idea! I love it! I’m also considering using a fireplace screen as well, since they can be decorative and not difficult to maneuver around, but this would only work with dogs that aren’t jumpers or talented escape artists! Thanks for the tip!
Thank you Kay! That is the same thing I was feeling, everything on the market was either too expensive or down right ugly for where I am in my life right now! This was super easy to do, and if you don’t have a Cricut, or something similar, I know that you could still create it printing/cutting out the fonts from the computer and using double sided tape to hold to the board. You would have to be extra careful painting over it, but it would work in a pinch! If you make one I would love to see a picture!!
That is fantastic – I love it! I’ll be pinning this for when we get our next puppy!
Barb
http://turtlesandtails.blogspot.ca
Thanks Barb!
That is awesome, and so much more attractive than those ugly baby gates! Pinned!
Thank you! Baby gates are ugly, and if you want anything attractive….they cost a fortune!
You will be surprised how often you may need to confine your dog when you have guests or are working on the floor. I’m thinking of doing something like this for my older dog that I prefer to keep confined to the kitchen while I’m away. Just in case.
This is the perfect reason for me to keep it up long term. Let me see a picture if you make one! I highly recommend it, and it is fun….no matter what my husband says. You don’t even have to have an open backed frame, if you have a miter saw and leftover moulding you could make your own frame. This is what I will be doing next time!
Visiting from Shine on Fridays. What a great idea! I NEVER would have thought to use a frame to make a gate! So creative!
Thanks Nicole!!
That is so cute. What a great idea! Thanks for joining us this week at Let’s Get Social Sunday party. Have a wonderful week!
Shaunna,
What a great gate, I love it! Thank you for joining us at Let’s Get Social Sunday. I am a new follower and from looking around signing up to get e-mails too! I don’t want to miss a thing.
Have a wonderful Sunday evening.
Wanda Ann @ Memories by the Mile
We use a baby gate to keep our dogs out (or in depending on how you look at it), but this is so much cuter! Great work
LOL…I would say we try to keep Rudy ‘in’ as much as possible!
Shaunna, what a great project! Not only is it super functional it is totally adorable! Love it! 🙂 Pinning! If you have time, I would love you to share this at our Best of the Weekend party tonight. Have a happy Friday and a great weekend!