Are you all ready for Christmas?
In 11 short days!
Eleven…..
short……
………days!
Oh my!
Have I ever told you that I loovvveee this time of year?
Twinkling lights adorning the tree!
Wonderful smells coming from the kitchen!
The first snowfall…….which happened yesterday! (Happy Dance)
Love the snow, not so much the cold weather! 😉
Good will to others is in abundance……. unless you are trying to buy the hottest toy of 2016!
Have to be honest…..I do not understand the appeal of the “Hatchimals”.
Do you?
I think my favorite might be the extra crafts that usually get made this time of the year. I have always tried to do something homemade to give to neighborhood friends and colleagues……
Haven’t quite figured out what I am putting together this year, but as I said…..I have 11 days to figure it out! LOL!!
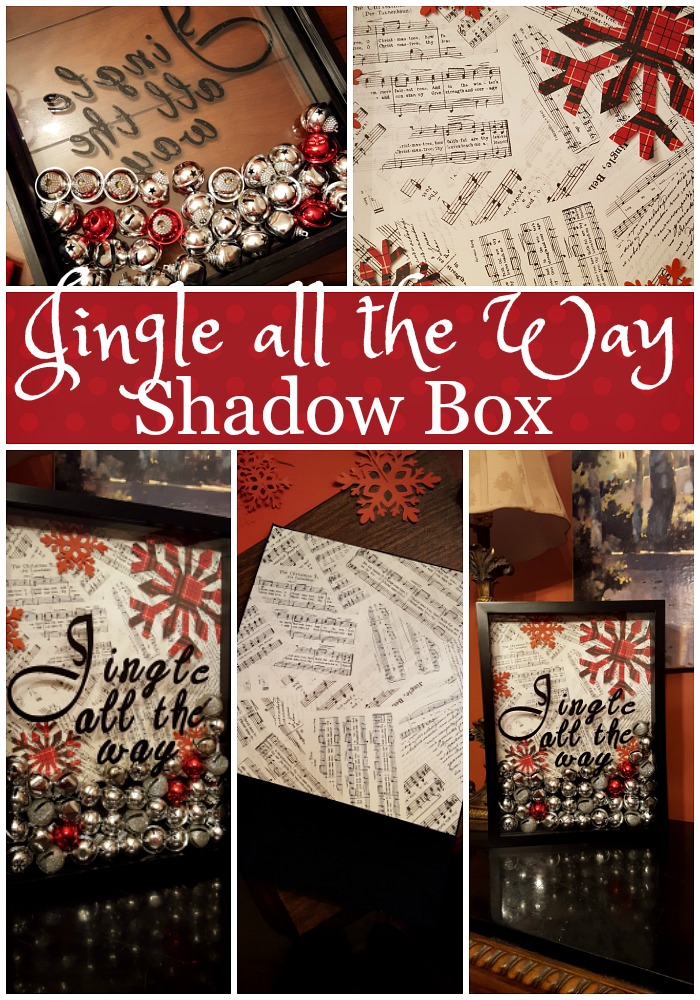
I did get one little project completed a few weekends ago. I saw this shadow box a couple of years ago on Pinterest, pinned in……. and then let it sit around collecting dust in my dream pile!
No judging…… I know you all do the same thing! 😉
Annyywwaayy, a girlfriend and I got together for a craft day over Thanksgiving weekend, and I am super excited about how it turned out.
Here was the inspiration……
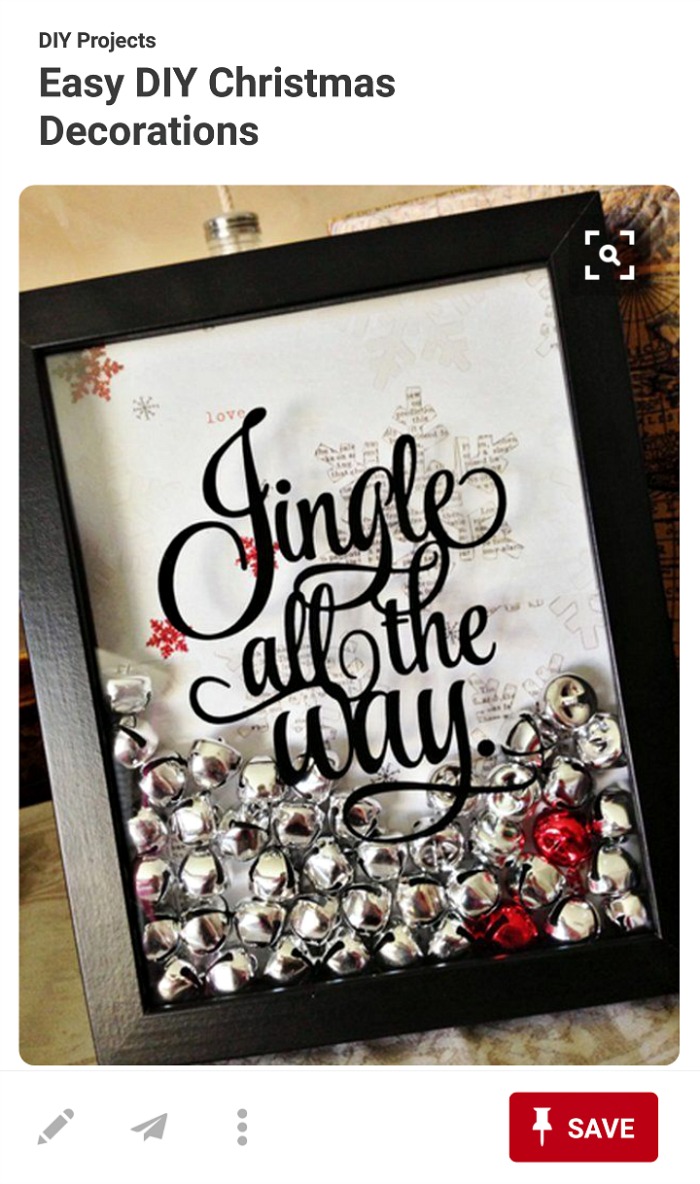
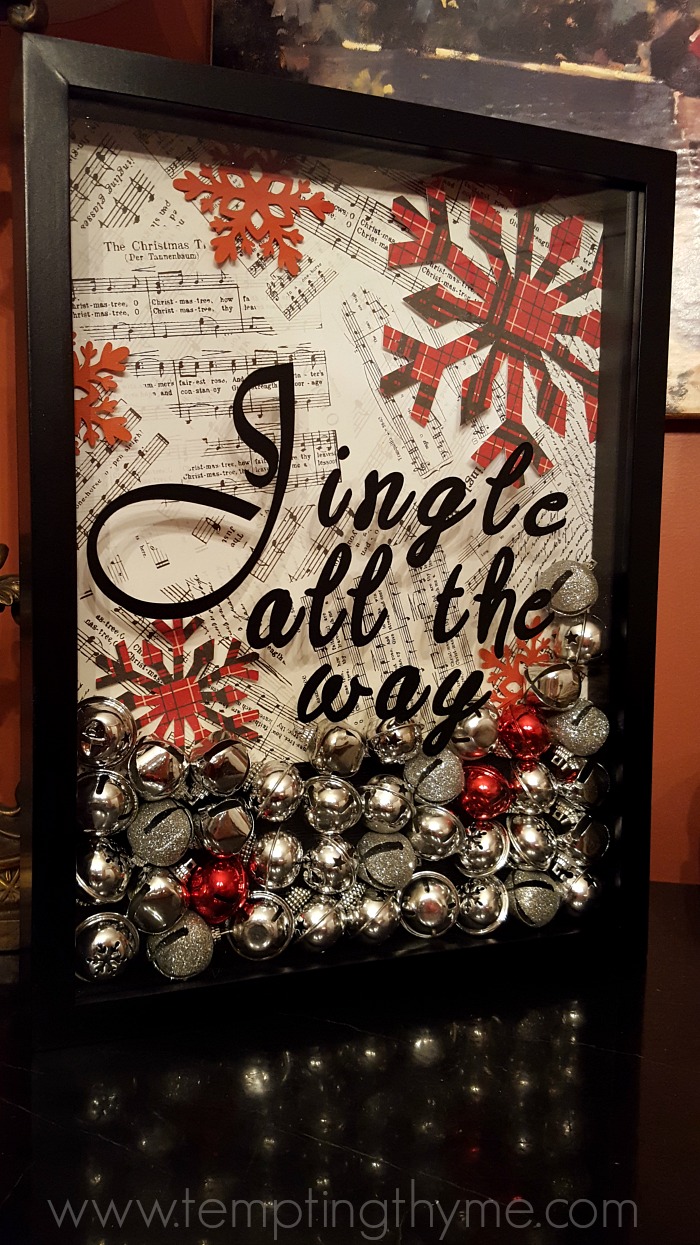
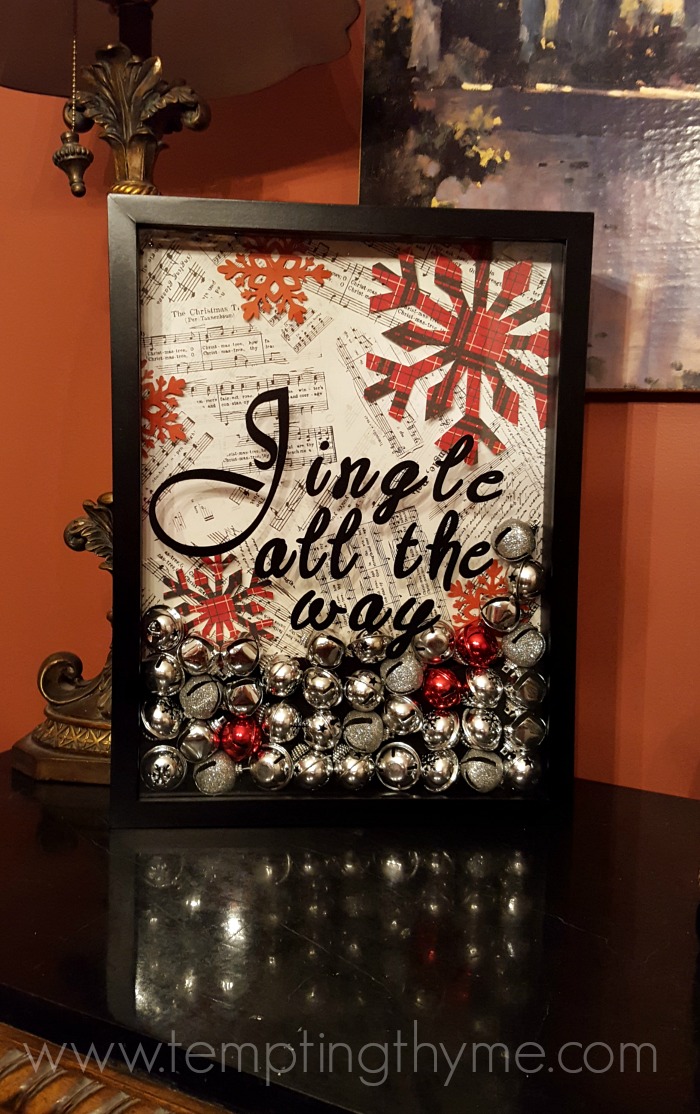
and here is our version….
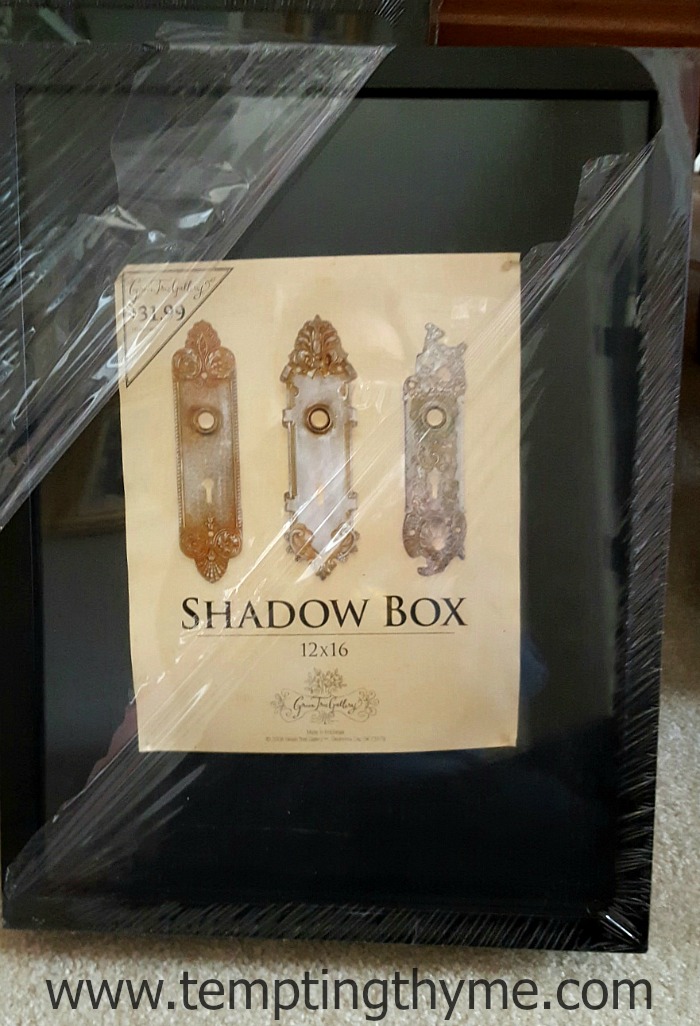
It all started with 2 shadow boxes that I purchased many moons ago with great intentions of putting together some sports memorabilia for the boys.
Needless to say, it never happened…..and they became the perfect backdrop for this cute display!
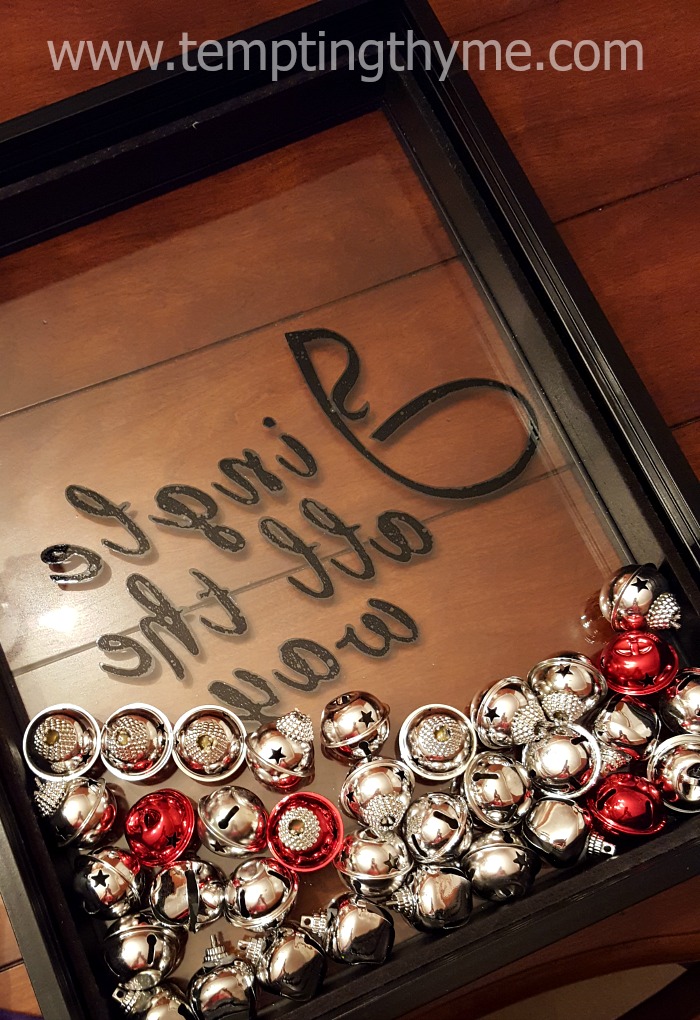
The hardest part for us was figuring out the font that we wanted to use!
We were using her new Cricut Explore Air, so a lot of time was wasted just trying to pair up a couple of fonts together to achieve the look that we wanted.
We didn’t get the curlicue look that we were going for, but we got pretty close!

We also used the Cricut to cut out the snowflakes!
Don’t look too close at the solid red ones, as they have a slit on one side. I guess the idea is to connect two of them to form a 3D dimensional snowflake to hang from fixtures and ceilings??
I adore this sheet music!! It is so perfect that it has Jingle Bell lyrics!
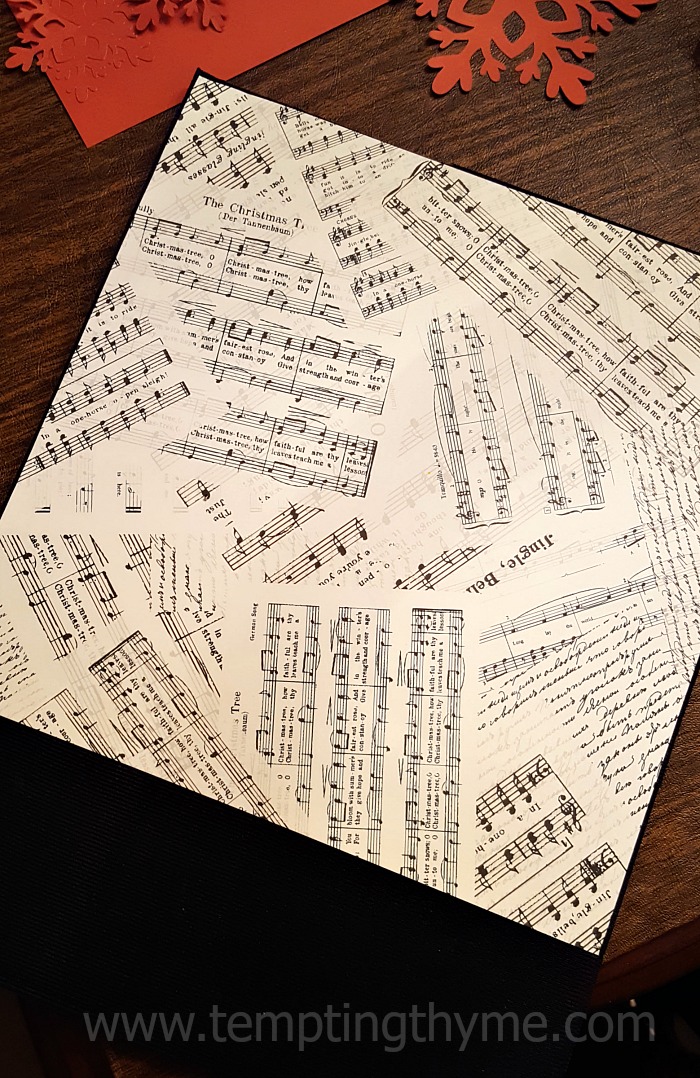
Cheryl found both the plaid and lyric paper at Michaels in one of those big packs they sell in the scrapbooking section. The pack only had 2 sheets of each, which was no problem for the snowflakes, but didn’t allow us to fill the entire back board with only 1 sheet of lyrics.
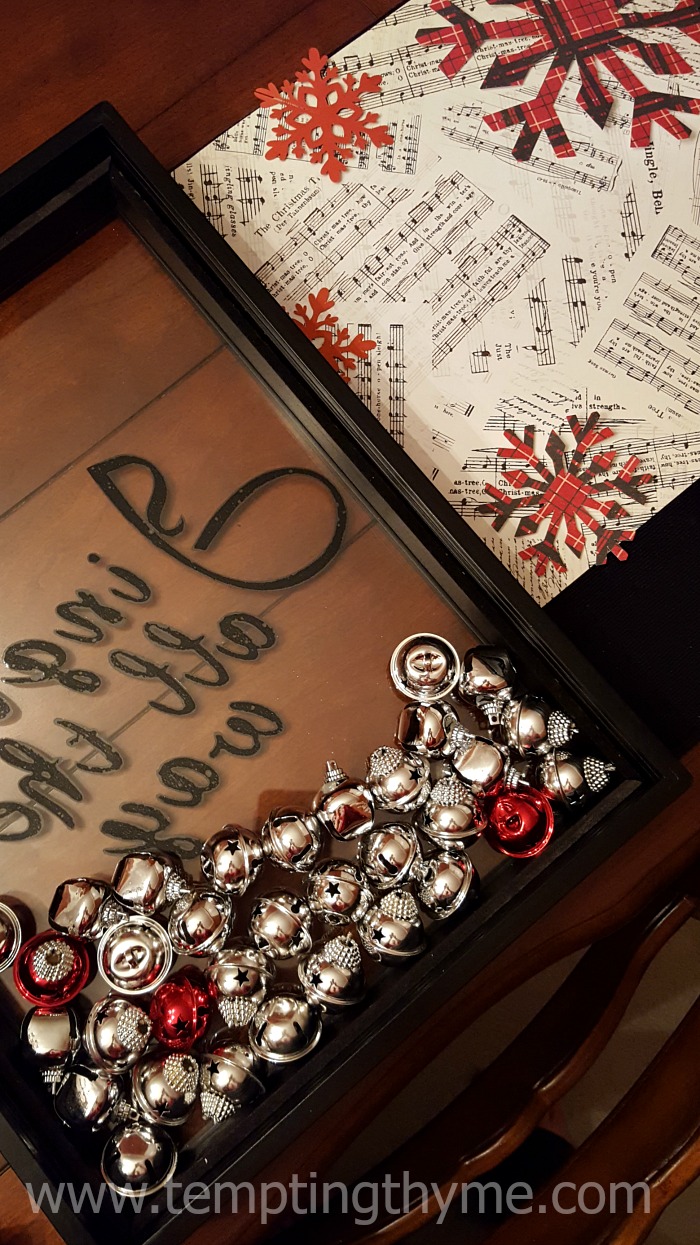
Because we only had 1 piece of paper (each) to cover 3/4 of the fabric backing, we had to play around with the placement of the bells. I actually would have preferred to use bigger bells, but the depth of the box didn’t allow it. Sigh!
If you look close, you will see 2 different jingle bells. I ran out of the smaller ones, so I headed to the storage room and stole a strand of jingle bell garland off one of the boys’ smaller trees that used to be in their rooms.
Still can’t believe I did it, but cut it apart I did!
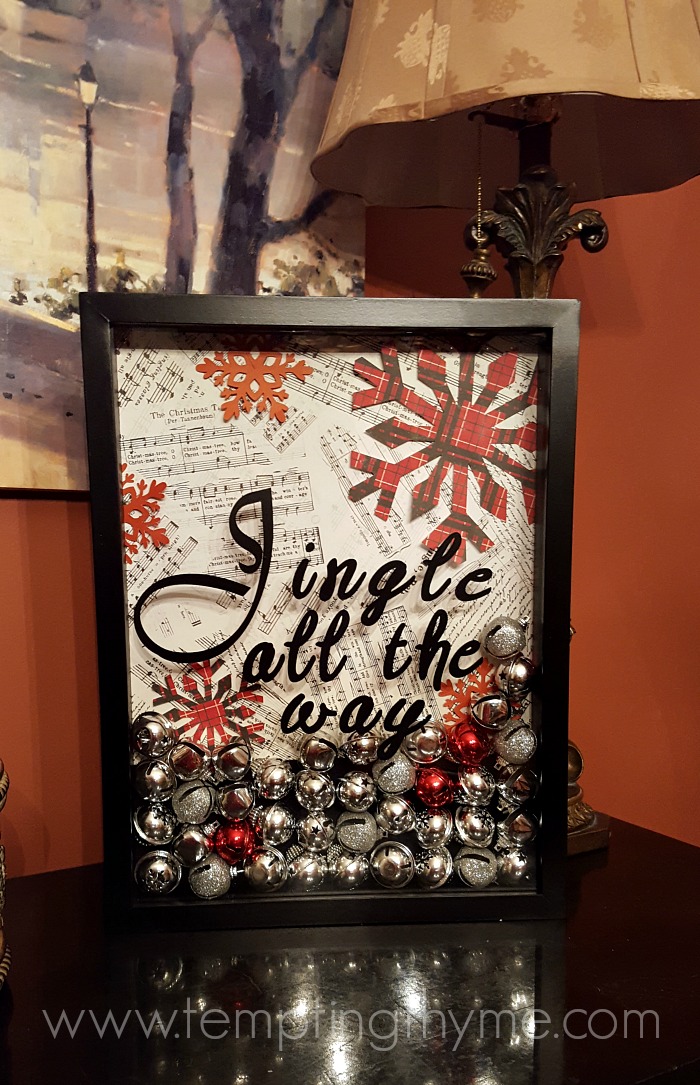
It is currently sitting on the buffet in the dining room. Makes me want to eat in this room more…..just to see it shine!
Best part of this Jingle all the Way Shadow Box? Spending a day (okay a half day) crafting with my friend!
Shaunna
Supplies Needed:
*Shadow Box (this one is 12×16)
*Scrapbooking paper for the background and snowflakes
*Small Jingle Bells
*Double sided tape (I used adhesive dots)
*Vinyl letters (I used a Cricut to cut out the vinyl)
Directions:
- Open up the back of the shadow box. Pull out the glass and clean both sides with glass cleaner. Set aside while you cut out your lettering. If you do not have a Cricut, or a Silhouette, you can purchase vinyl lettering in stores and online. I just don’t know the fonts that you can purchase it in, nor the sizes offered.
- Place the lettering on the front of the glass. Vinyl is very forgiving, so if it is not exactly where you need it to be, just peel it up and start over again. Put the glass back in the box, and start layering in your jingle bells.
- Adhere the background paper to the back of the box with double sided tape. If your backing is fabric like mine, then use the pins that came inside the shadow box and pin the paper at an angle to the backing. Play around with the placement of your snowflakes, and use double sided tape, or adhesive dots to give them a little elevation and dimension.
- Carefully place the backing board back into the box and seal it back up. Display in your favorite spot of the house…..OR give to someone special for the Holidays!
I absolutely love bells! This is a perfect way to share the jingles of the season!!!
Looks great! Merry Christmas to you and your family, Shaunna!
Thank you Jennifer, Merry Christmas!