
I can finally breathe!
I believe that there has been enough time and space to recover from the kitchen cabinet “rehaul” that started back in the late Spring.
Sometimes when you are in the thick of things, and it keeps dragging on…..you just need to turn your back on it for a little while!
No what I mean?

I wanted to show you how I beefed up the crown molding to make our cabinets look a little more customized. I think you all figured out by now that PT got his way on whether we I should beef up the molding, OR build the cabinets all the way to the ceiling for additional storage.
He may have won that discussion, but I think I won overall as he allowed me to take the plunge with zero grumbling!

Before I give you the very simple steps that I followed (after a few trial and errors and mishaps), I have to tell you that I am NOT a carpenter….or even a woodworker. I am definitely a DIY fanatic who learns by surfing the internet, plotting with paper and pen, and then willing to take chances.
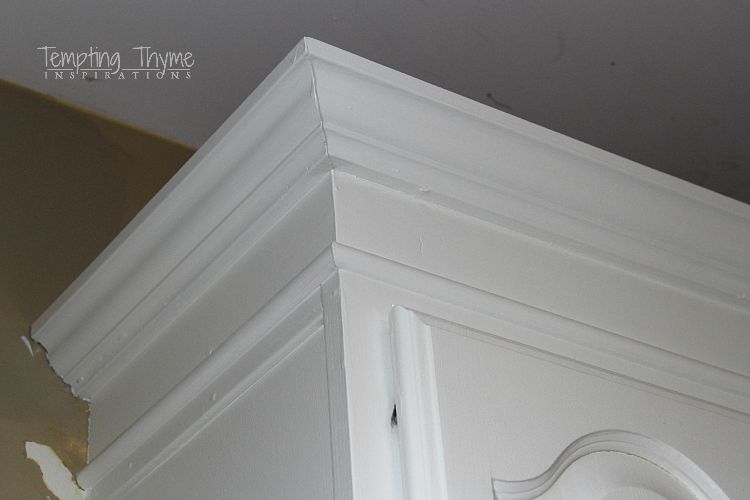
If you look closely at the finished product, you are going to see that it is not perfect! There are a few areas that I want to touch up and rework, but to the average eye…..it doesn’t look too bad! 😉
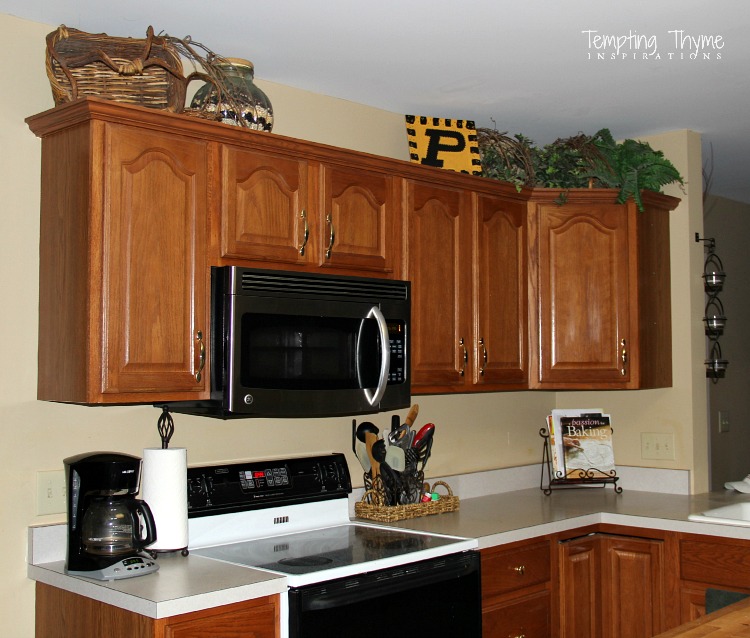
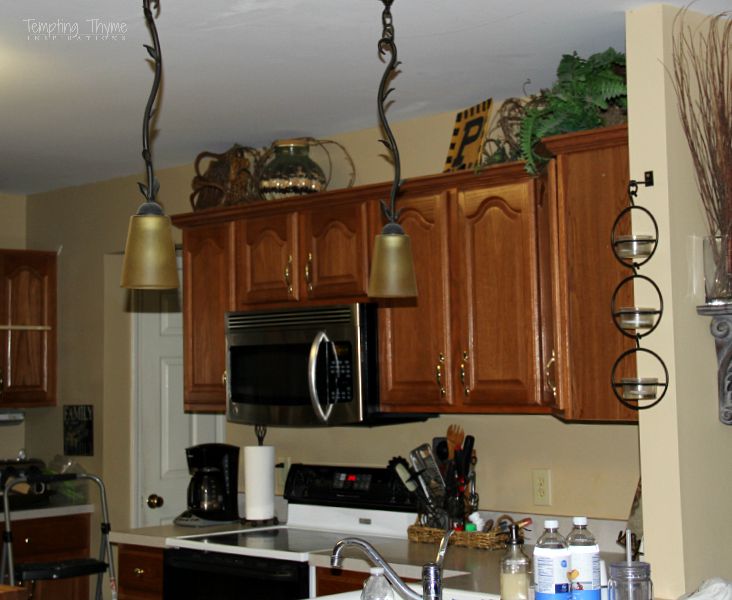
Here is a quick shot of what the kitchen looked like “before”….
Actually nothing wrong with the cabinet and the molding, everything was in proportion with the 8 ft. ceilings that are in our kitchen. I was just ready for a change! 😉
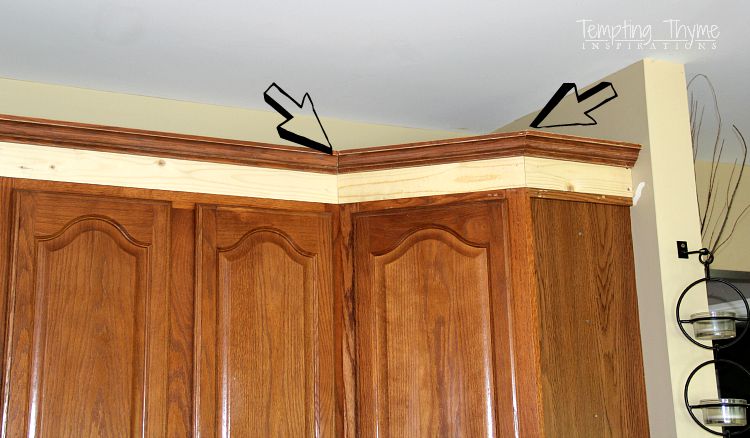
The goal here was to add some height and weight to the cabinets. I was going to achieve this by taking off the existing crown molding, layer a 1×2 on the edge of the cabinet tops and then simply nail the crown molding back on to it.
A….. I realized how hard it was (for me) to be going up and down a ladder, twisting my head to fit between the cabinet and ceiling, keeping the molding level, and nail everything in place to anchor it.
B….. the 1×2 (which is really only ¾” x 11/2”) just wasn’t cutting it. By the time the crown molding was nailed to it, and a little trim board was added to cover the seam, I was wondering why I would even bother to go through all the effort.
Off to Lowe’s again to purchase some 1×4’s. By this time I had also figured out that I would be building the molding “frame” in the garage, and then attaching the entire piece to the cabinet as one unit, not separately as I was trying to do before.
As I was working solo, I found this method worked best for me! If you have help……it might be easier to layer the wood directly onto the cabinet.
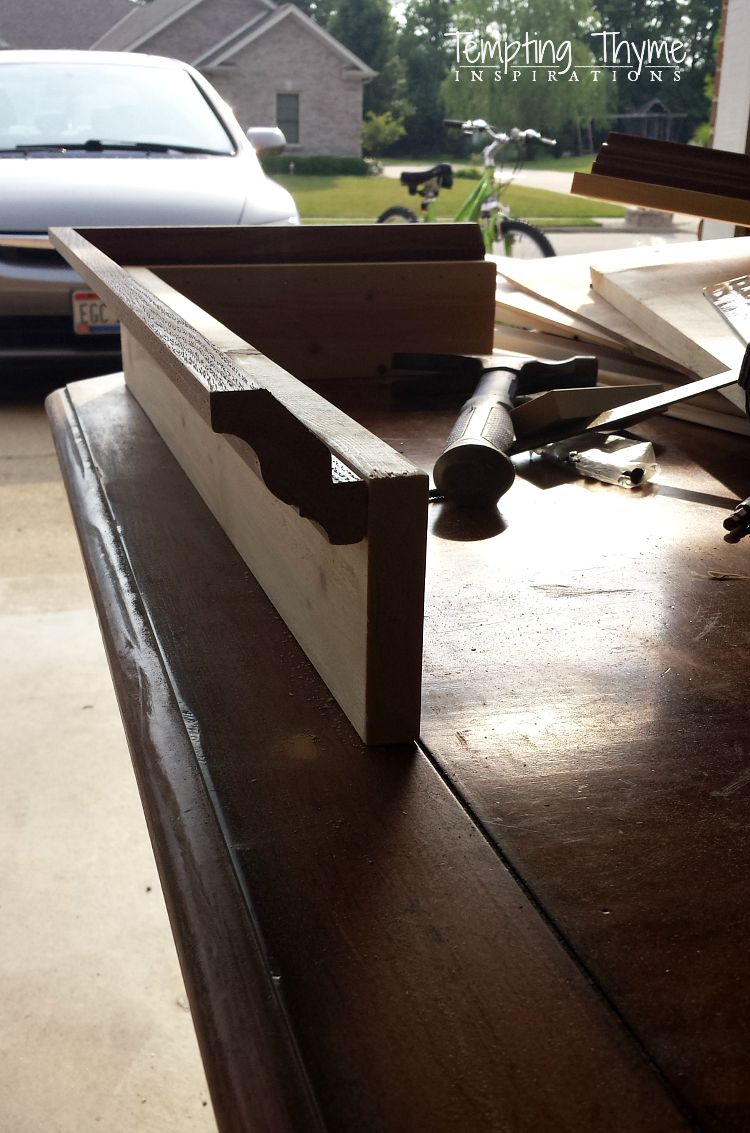
1. Making the frame….
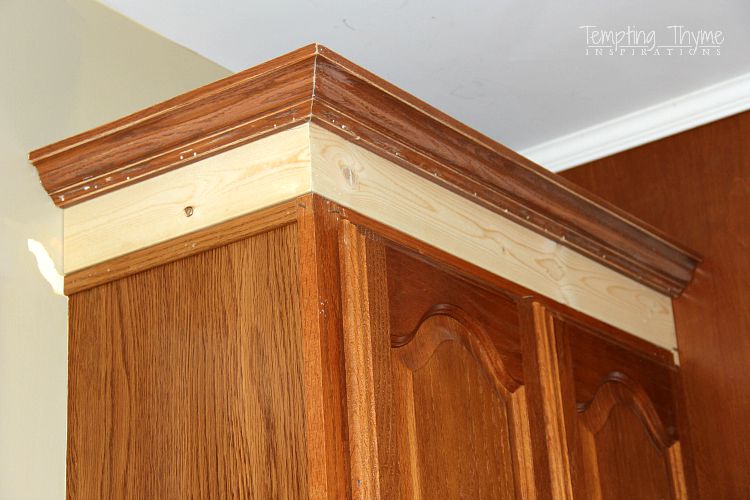
Measure each cabinet from wall to wall. This will be the face of the frame. Now measure the depth of the cabinet (front to back). Once you have your measurement for the depth, you will be deducting the width of your 1×4” board, as the side piece will be sitting behind your face frame. I actually took a little more off (about 1/8″) as I wanted a little wiggle room setting the boxes in place.

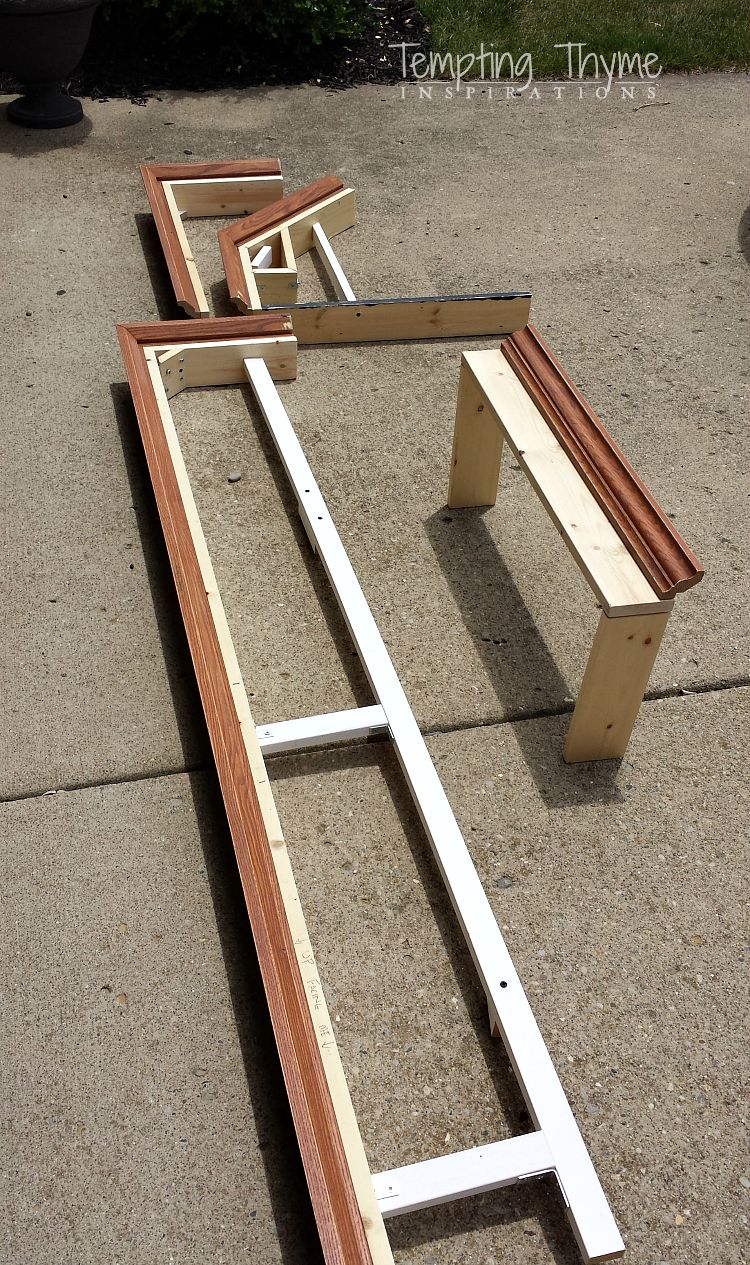
The 2 boxes on either side of the refrigerator were fairly simple to make, as there weren’t any special cuts going on with the 1×4 wood. The frame on the left is literally just sitting on top of the cabinet edge. I would later screw reinforcing blocks to the back of the frame (1×2’s that were leftover from the original plan).
**Make sure that the face of the crown molding box sits flush with the cabinets’ face. I know….that was probably a no-brainer!!
2. Cutting and Attaching the Crown…..
I got lucky in the fact that I was reusing the crown molding that fit like a glove on the cabinets. This allowed me to literally nail it onto the top edge of the 1×4. I did have to make the appropriate cuts with the 1×4 boards but for the most part they were simple 45 degree cuts.
The only issue I ran into was the long cabinet run above the stove. There were 2 funky angle cuts that I had to make, but I put the previously cut molding up as a guide and adjusted the miter saw that way. If I didn’t have those as a guide, I am positive I would still be in the garage trying to figure it all out. 😉
Have I told you how much I love my pneumatic nail gun? Best purchase I ever made!!
3. Reinforcing the miter cuts…..
You noticed that for that long run, I built it in two sections. I figured it would be easier to attach if I did it in sections. Once you caulk the crown molding, you will never know that it wasn’t just one long piece. To prevent any of the outside miters from coming apart, I screwed in a couple of reinforcing blocks to the backs of the crown at each joint. I can’t swear about the angle…..but I think it was basically a 22 1/2 degree cut. I held the block up at an angle and then ran a pencil across where I should make the cuts. I wanted the block to sit flat against each side of the boards.
Hopefully that made sense!
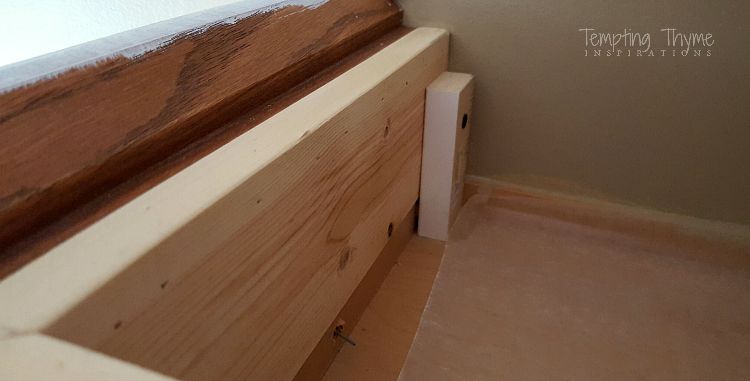
I also decided to be extra cautious and built a support system that would extend to the wall. I later removed most of them, but it helped me keep everything stable during the lift and install. All I can say is measure, measure and measure again!!
4. Mounting and Attaching……
Once the frame/boxes are complete, you will need to attach it to the cabinet. Carefully place them on top of the cabinets. Make sure that everything is lined up, joints are tight and the face frame is in line with the front of the cabinet. I used 1×2 cut down to about 4″ in length, and drove 1 screw into the cabinets top panel, and 1-2 screws into the 1×4 molding. Make sure to measure your depth and use the appropriate size screw. You don’t want the screw to come out the other side.
***Yep, I wasn’t thinking my first go round!! That is why they make wood filler and spackle…..for people like me who don’t plan 100%! 😉
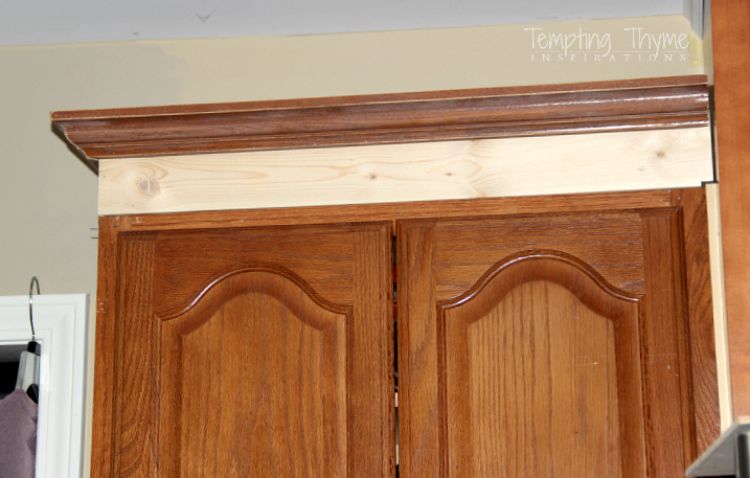
To give you a real before and after……
To this……
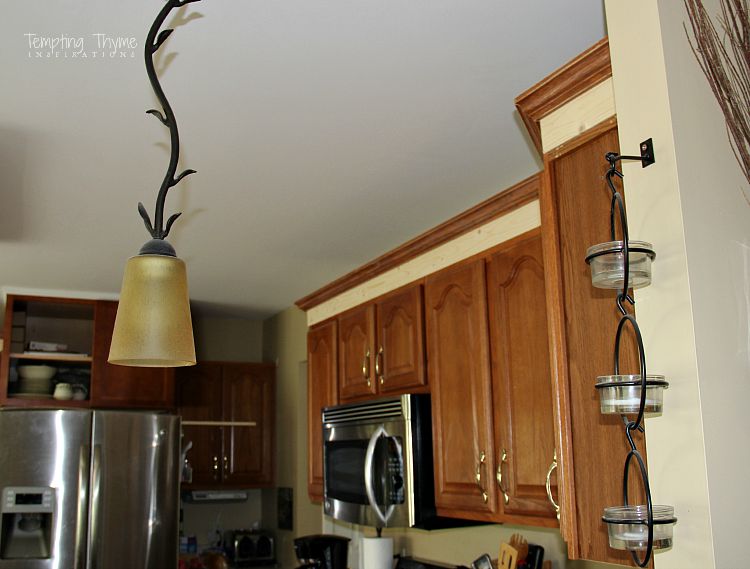
And after filling in all of the nail holes, caulking the seams, and painting the cabinets……..
You might have noticed that I added small trim molding over the seam between the cabinet and crown molding. I attached it with a bead of E6000 glue and kept my fingers crossed that it would stay put!
After almost 4 months, I think I can uncross my fingers! 😉
Here are some of the other kitchen posts if you want to follow along:
Refrigerator Cabinet (the Dominoes have fallen)
Kitchen Inspiration
The Transformation certainly is White!
Kitchen Island Makeover
How to make your builder grade island look like a piece of furniture
Caring for Butcher Block
The lowdown on our kitchen cabinet hardware
Just in case you were wondering…….
Yes I have since painted the kitchen walls! LOL!
If you raise up the crown molding you are forced to paint the walls. No getting around that fact, unless you want to start a new trend…..and if you do, I don’t think many people would follow your lead! 😉
Shaunna


Gorgeous remodel of those cabinets! I have the same ones in my kitchen and they need updating, thanks for sharing!
Jemma recently posted…Best Paint Sprayer for Cabinets
Thank you!