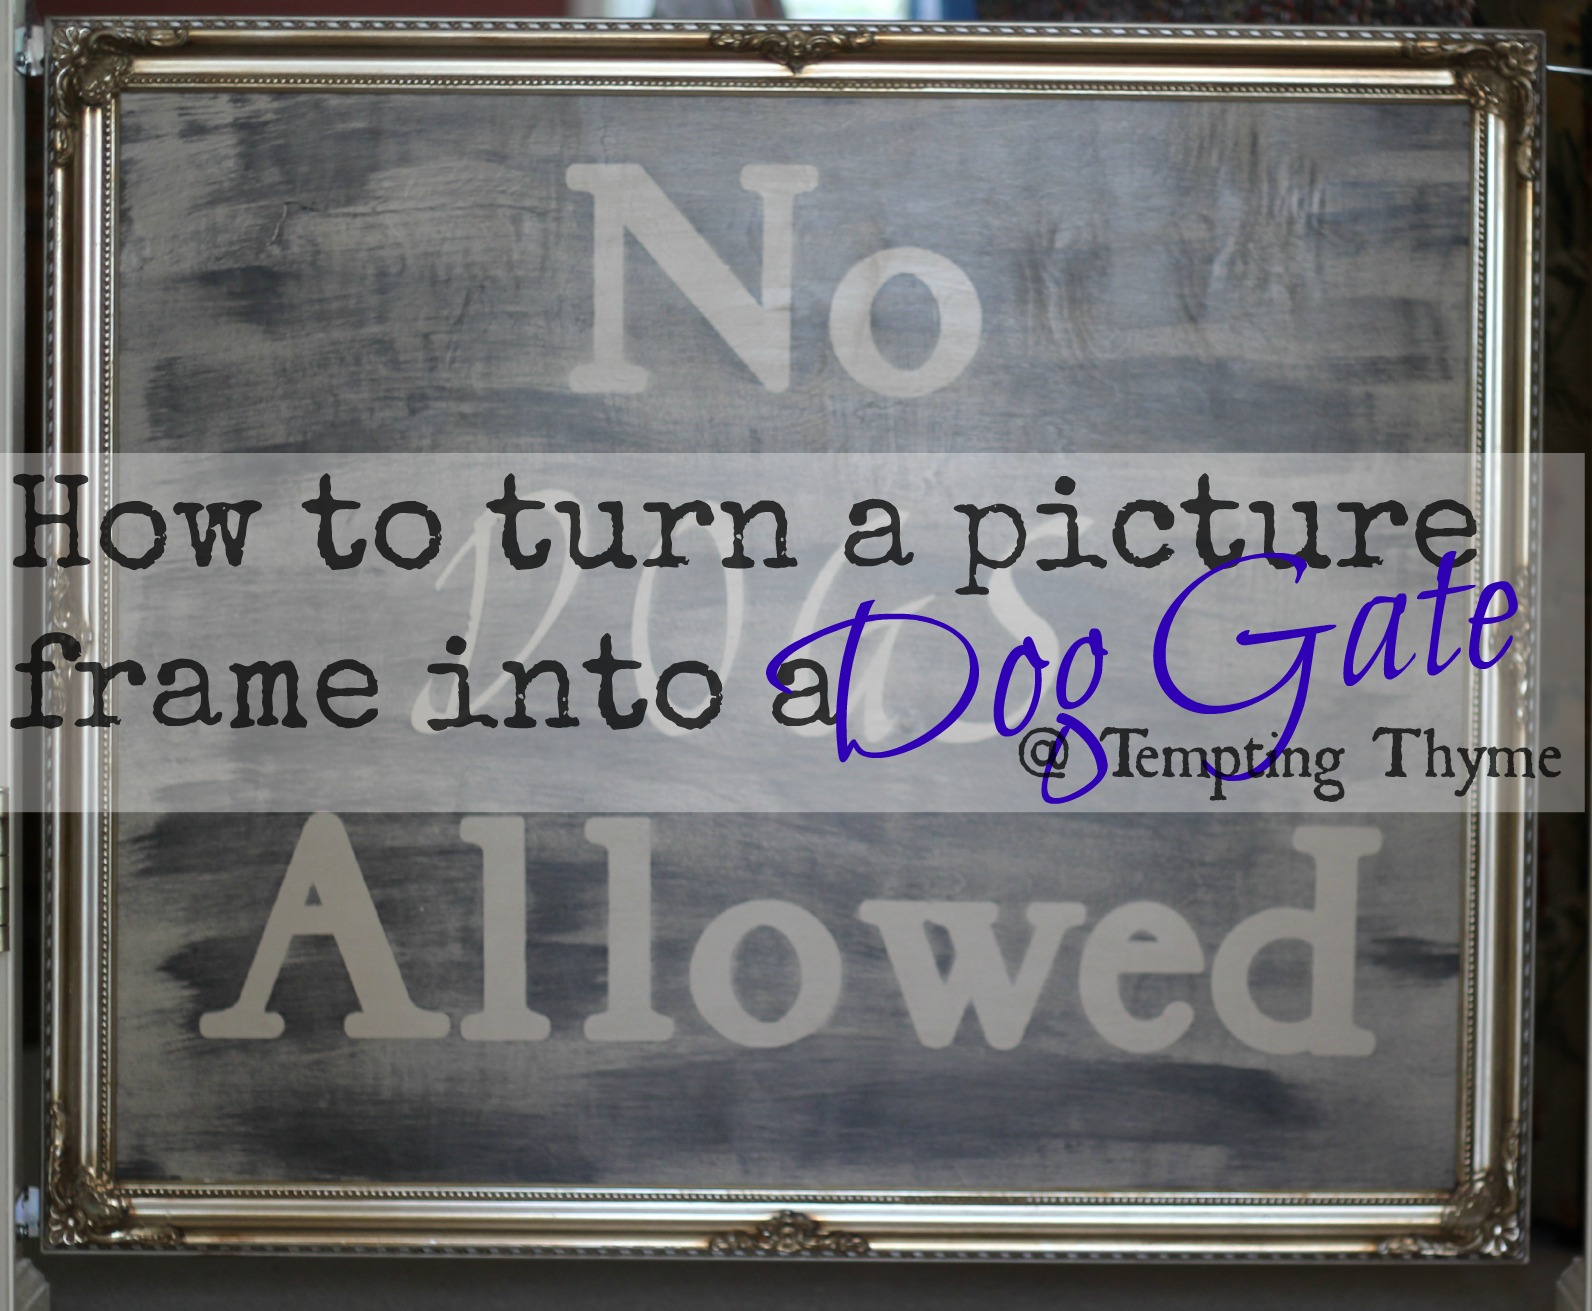
Can you believe it is December and that Christmas is only 20 days away? You are probably one of those spot-on, organized peeps who is already done with their shopping and everything is wrapped and tucked prettily underneath the tree!
I used to be you……. {SIGH}!
Now I am the total opposite, and have not even bought a single gift! Oh wait, I bought Rudy a red sweater to celebrate the season……buuuttt he is already wearing it, so I guess that doesn’t count.
Back to square one! 😉
If you are giving your loved ones some artwork (photograph, prints, your child’s latest Picasso) here is a simple trick to frame and mat your piece AND save a ton of money!

Have you seen the cost of framing these days? Wowsa!! You could buy a print for $5, but spend well over a $100 to have someone professionally frame it! Ouch! I have done this way too many times to count, but NO MORE!
Well……never say never, but I am pretty confident that I will be framing the majority of our artwork! It is too easy not to do it myself!
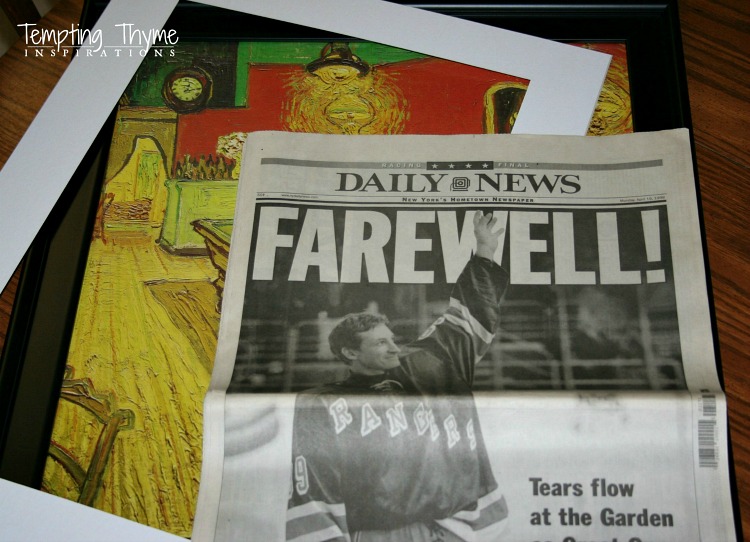
A few years ago I came across a newspaper article that PT had been saving. It was the photo of Wayne Gretsky saying goodbye to all of his fans during his last game as a professional hockey player.
If you haven’t figured it out yet, my family is a little hockey nuts!
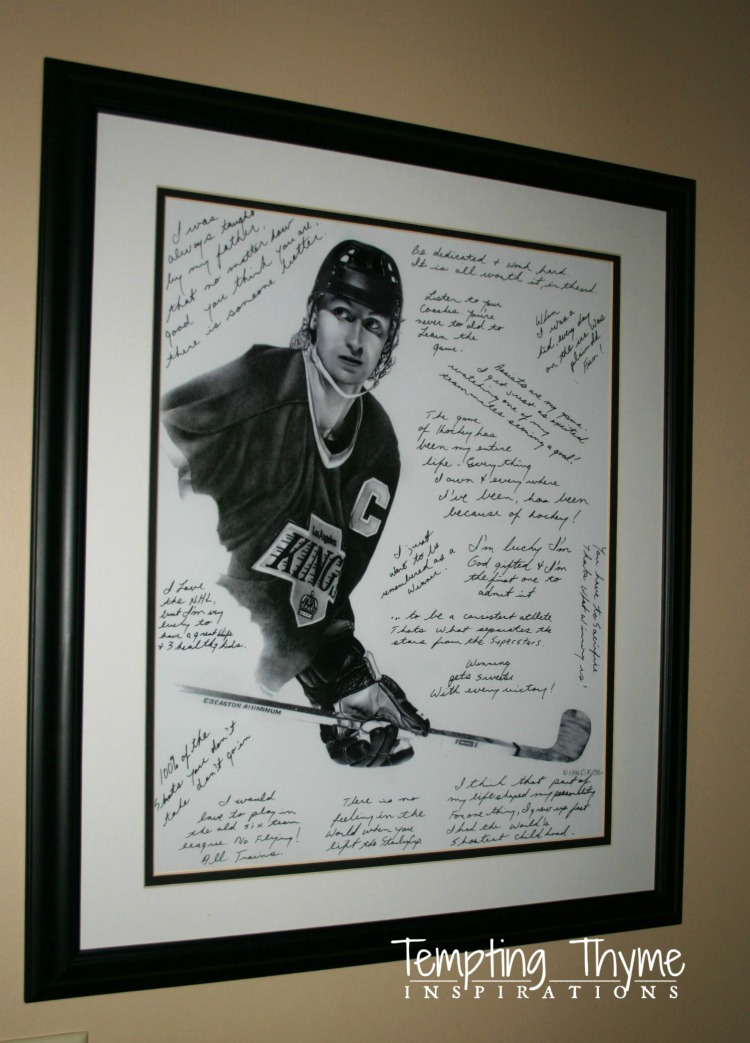
This is a Wayne Gretsky print with all of his quotes surrounding him. PT and the boys gave this to me for Mother’s Day in 2009. I have no idea if it is actually Wayne’s handwriting…I think so, but you never know nowadays! Anyway, we were at a hockey tournament for K’s team in Chicago and they were having this huge silent auction in the lobby. I had recently found out that I had breast cancer and his quotes truly resonated with me. It called my name throughout the weekend, and I spent an unnatural amount of time staring at this picture. I asked PT if we could place a bid on it, and he said “of course”. One bid does not make a winner…..right?
As we had bigger fish to fry when we got home I totally forgot about little ole’ Wayne.
I do not even want to know what PT’s final bid on this was, but imagine my surprise when they presented it to me for Mother’s Day. He told me he had to have them ship it to a co-worker’s house so that it could remain a surprise! Love that man!! It is now hung on a wall in our mudroom, and I see it every time I enter the house from the garage. It is a constant reminder to never give up; hard work pays off in the end…..no matter what the odds!!

Back to the framed artwork! I had to make a few adjustments as the article was very tall and narrow. I was having a hard time finding a frame that would be suitable, and for me the easiest solution was to mat the article.
I could make the mat as wide, or as narrow, as I wanted.
Matting can truly make the artwork a little more polished versus just throwing the art in a frame. You could go even fancier and double mat your art, but for this simple newspaper photo I thought the double mat would be overkill!
I took the article with me down to Hobby Lobby and had them cut a mat to my specifications. This was easy for me to figure out, as the only frame that I could find (at Hobby Lobby) that worked was this 18×24 from the Green Tree Gallery. I don’t remember the price of it, but I do know that it was 50% off. Have you noticed that these frames are 50% off about every other week? Love that fact!
You can buy the open back frames, but then you will not only need to buy the mat, but the glass and the board backing as well. So much cheaper if you can find a frame that has everything all in one package!! You might even get lucky and find one that already has the mat, but then you are limited to the size opening that it offers. =(
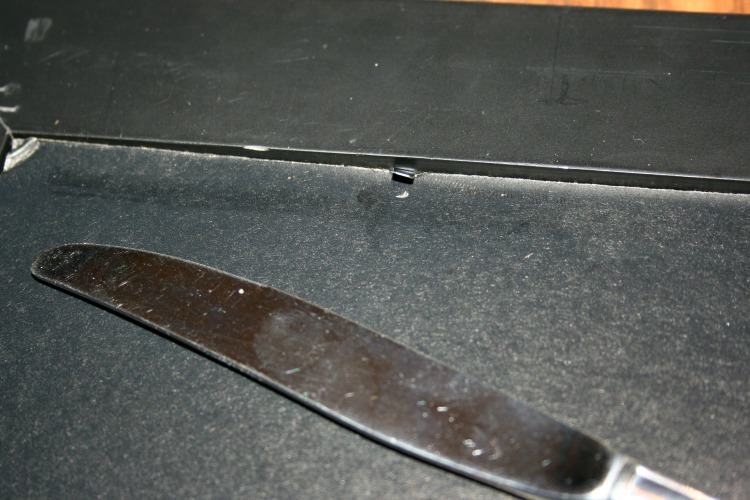
I popped open the back tabs with an ordinary kitchen knife, cleaned the glass front and back…..
See that hump in the middle of the article above? Can you believe I actually thought about taking an iron to it? I am glad I didn’t….I could have burned or singed it! 😉
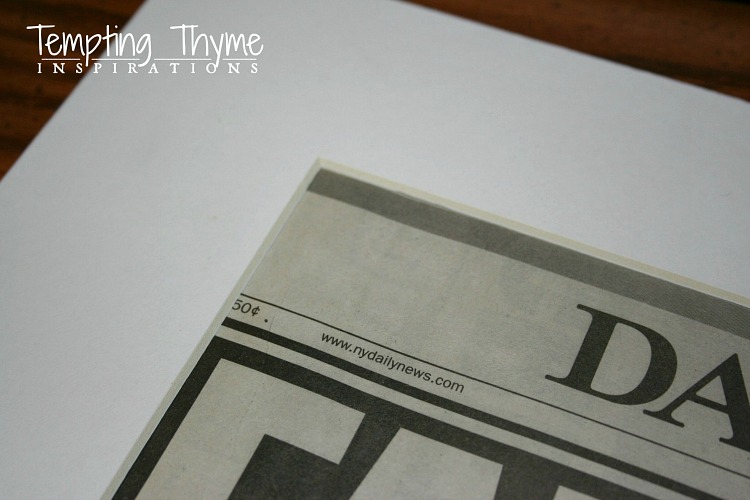
When I had them cut the opening of the mat, I used the black “frame” that was already on the newspaper. It was as if the New York Daily News knew that people were going to want to frame it and were helping us with the process. 😉 I used archival double-sided scrapbooking tape to attach the mat to the article. I spent a fair amount of time smoothing the paper as I slowly lowered the mat down. I didn’t want any wrinkles and/or crinkles popping up!
Once the article and mat were attached, I placed it back into the frame (don’t forget to clean your glass front and back) and reattached the back cover. Many of the frames you purchase already have the hardware attached for hanging purposes. I wasn’t as fortunate with this one, but it was pretty easy to attach fasteners and wire. Definitely not a deal breaker!
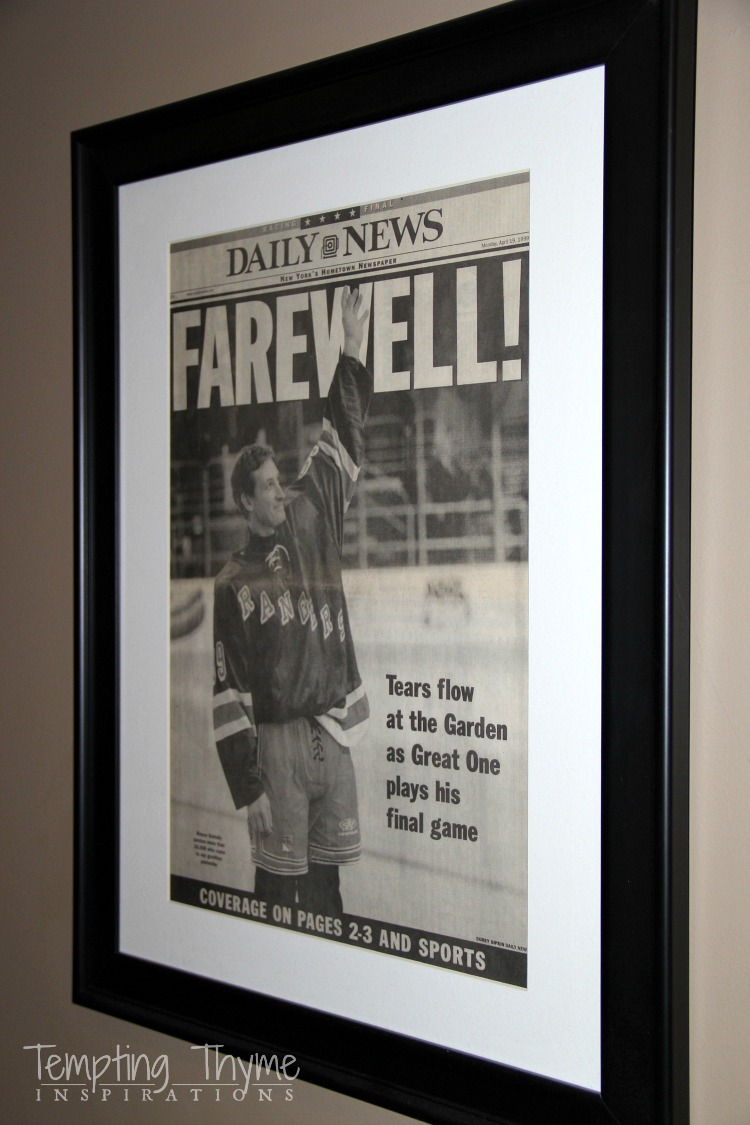
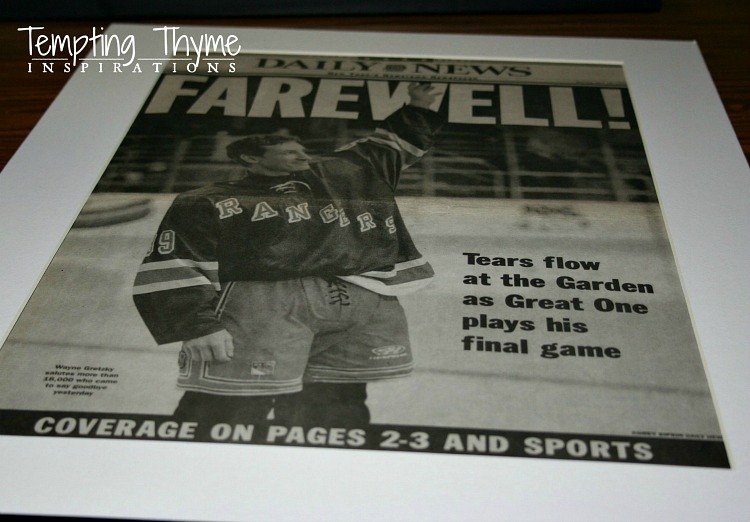
Here is a peek at the finished product…..looks as good as the one with all the quotes doesn’t it?
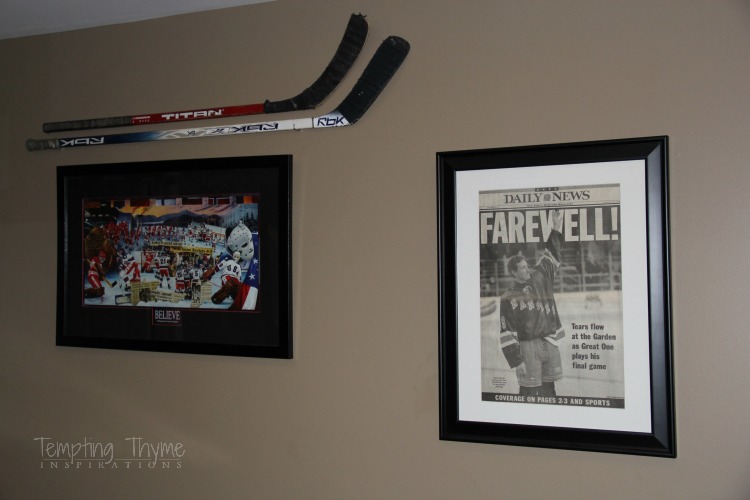 Here is a shot of where we ended up hanging it in our basement. Sorry for the awful shot….the lighting down there is not the greatest! See that picture on the left, that was my birthday present a few years ago. LOL! That was no where near being on my wish list! What is a girl to do? The sticks hanging above just happen to be B and K’s very first sticks they used starting out. So glad I saved them! PRICELESS!
I can’t swear to the cost of the black frame, but with the 50% off I am thinking that it costs less than $20. I do know that the mat cost $8.80. Not bad for them cutting it on site to my specifications! You can see that the “artwork” cost PT .50 cents, but yours will more than likely not be that cheap. 😉
So much better than the $100 + that a professional can charge you, right?!
Even though this was a pretty simple assemble, I thought it would be wise to give you a few more tips and tricks when you are framing your artwork:
1. Spacers- Mats are not appropriate for all “artwork”, sometimes it is much better to let the piece stand alone and speak for itself. If this is the case, then you will want to add a little spacer to the edges of the frame. These spacers are not very big, generally little plastic dots, and you could probably use felt circles or tabs also.
Mats act as a spacer, so you do not need both. The reason for a mat or spacer? They provide a space between the artwork and the glass. You don’t want it touching any part of the glass as condensation (I learned the hard way ions ago), and dust can get in there and build up, making the artwork stick to the glass…..destroying it when you go to switch it out. Take it from me….who has lost many prized photos from condensation…..add a spacer if you are not matting your photo or artwork!
2. Measuring…measure, and measure again- Just like everything else DIY…..measure twice before making a cut. This will save on making any mistakes when you, or someone you are paying, cut your mat! I measured this newspaper article a few time; both for the outside cut, and the inside mount. I then asked the sales associate at Hobby Lobby to measure it, verifying my measurements. When she was done cutting the mat, I laid it out on the table and measured it again…..even placing it over the article to make sure it still “fit”!!
3. Artwork Placement and Glass- There are a few options in the glass covering your artwork (unless you buy an all in one frame like I did). Regular glass, non-glare glass and UV glass. I tend to go with the regular glass, as the only time you would be choosing non-glare is when you are placing your artwork on a wall that gets direct sunlight….and if you are doing that you should be choosing the UV glass instead. BTW—If I had a choice I wouldn’t place the art in direct sunlight, as that could harm it in the long run by fading it!
4. Tape- I used archival double sided tape to attach this piece, but the professionals advise using something like Filmoplast or Lineco. For this project, I felt that my scrapbooking tape would be sufficient as it is acid free so it won’t start to eat away at the “art” in the long run. I also made a copy of the newspaper article, as I know that the article will deteriorate and yellow over time…I chose not to use it as I wanted this piece to be authentic…..but can always swap it out down the road! I would never use regular masking or scotch tape, as it can lose its adhesiveness over time, become brittle AND it contains acid in it!
5. Hanging- Make sure you choose durable hanging accessories to hold your artwork (if it is being placed on the wall). I have been using wire lately, but there are many different “weights” of wire. If you don’t have the proper wire weight on hand, you can always double or triple up the wire so that it distributes the load (the weight of the frame and glass) more evenly. To hold the wire I use the single and double strap hangers. They are easier for me to work with and you can purchase them anywhere.
6. Do not hang your artwork to high- I am at fault at doing this many, many times! =( We are supposed to hang our pictures at eye level, and the average persons eye level is only 4 1/2 feet from the ground!
7. Save the cardboard corners- Save those cardboard protective hinges that are on the corners of your frames when you purchase them. You can reuse them when you are storing the artwork or moving. Don’t want to be a pack rat for the odd chance you might move in the future? Wrap your frames in bed sheets or bath towels. They will protect your frames from getting scratched in the move, and in the off-chance that the glass breaks they will keep the shards of glass contained.
8. Protect your walls- Use felt squares on the bottom corners of your frame. This will protect your walls if someone like me bumps into the artwork and it “shifts”. The felt squares act as a buffer!
9. Check out your local thrift shop! There is so much art already framed and matted at your local thrift shop. I purchased this frame at a store uptown, thinking that it was going to be the perfect size for my Wayne Gretsky project. My plan was to unscrew the mounting brackets, take off the paper backing, remove the art and mount in the newspaper article. Unfortunately, the inside opening was not large enough to show the entire article…. but I am honestly not that disappointed. I am intrigued by this lady getting ready to get in the bathtub. Even though it is not distasteful, I did add circles to 2 areas!! The best part about thrift shopping? The cost! This picture only set me back $19.99!! Show me where you can buy a large frame, double mats, glass and hanging gear for that price! Deal of the century……IF you measure your project first, instead of just eyeballing it and thinking it would work! 😉
My mental mistake equals new artwork for my house…..
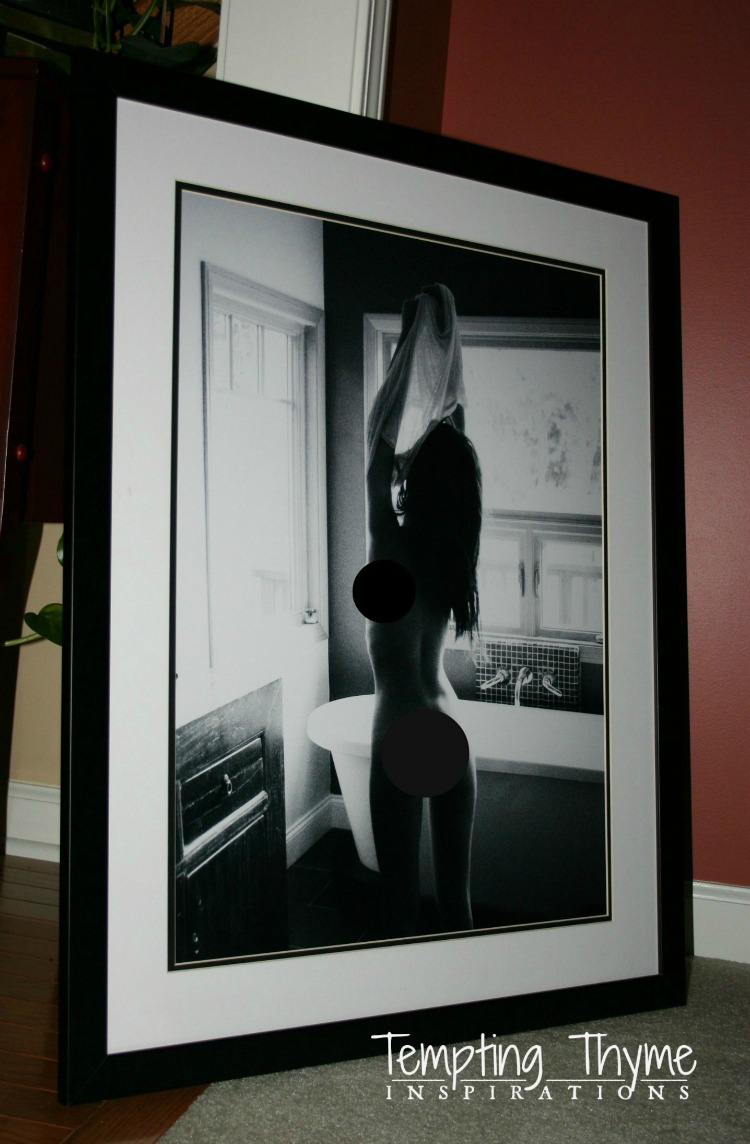
You may have noticed her hanging in our hallway when I revealed the hardwood floors. I don’t think my family is mortified, but I have definitely had many questions about her when friends come over. If you look up when you come in our front door, you can definitely see her! 😉
That’s all my brain can think of at the moment!! Do you have any tips and tricks that I forgot to mention?????