
I took a little detour from my 2014 Goals by swapping out the existing curtain hardware for this amazing magnetic curtain rod. Why the change? This curtain happens to be one of the first things you see as you enter the front door, and it was looking a little droopy and depressed!
I either didn’t know that these magnetic rods were available 13 years ago, or I was too cheap to investigate. I would like to think that they didn’t exist (or couldn’t hold much weight), as I found this one at Walmart for under $7.
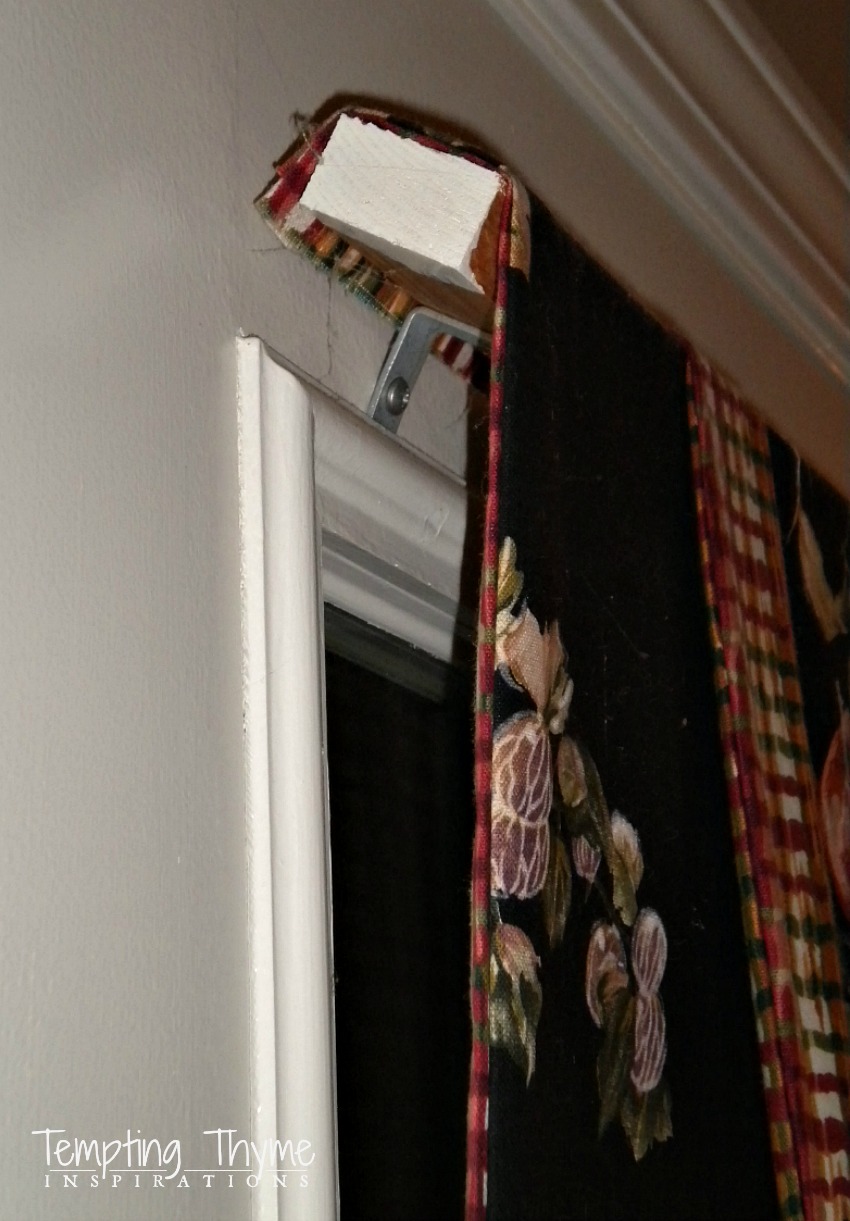
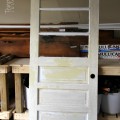
As you can see, I originally anchored this curtain with a 1×2 board with some L brackets. I have done a few curtains in the boys bedrooms using this same method, and it worked great…..but with this door, it did not. =(
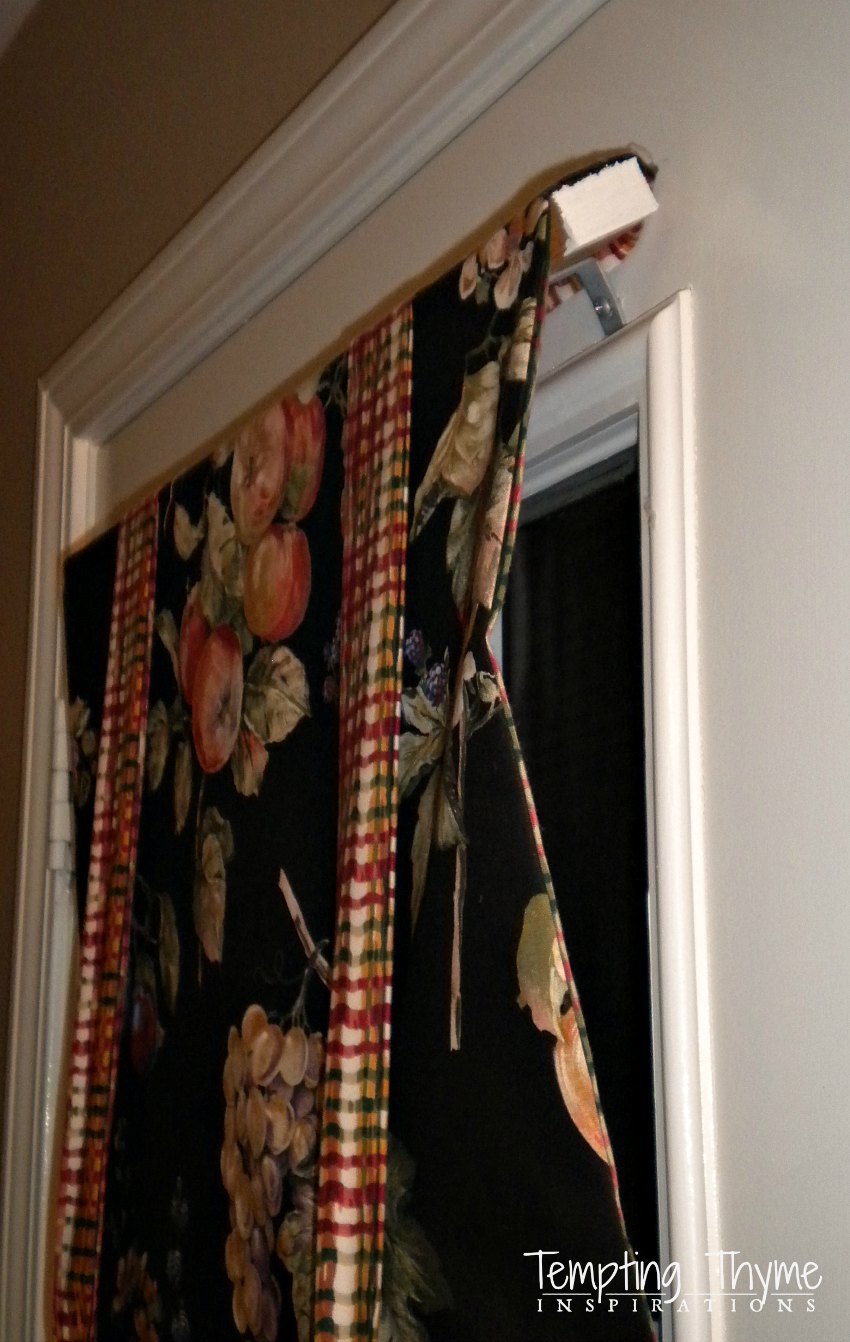
Doesn’t it look like the curtain is ready to pull itself right out of the door? It’s not, but it looks like it will at any moment. I was tired of looking at it, but was not ready to change it all out. Not yet anyway! My brain cannot handle a total color scheme makeover. Yes, the fabric is looking tired, but my brain is already too full with thoughts and ideas swirling around, and it absolutely cannot fit anything else in it. A family room makeover will just have to wait until 2015 …. or even 2016. See PT, I can be realistic….sometimes! =)
I was inspired at my in laws house at Christmas. Their back door had a café curtain across it using 2 magnetic curtain rods, one at the top and the other at the bottom. Maybe this style is not actually a café curtain, more of a half door panel, but it is the only way I can describe it right now. After going through that door countless times, I took a hard look at it. Even tested the strength out a little by trying to pull one off of the door. When it gave little resistance a little light bulb went off in my head. It truly is amazing when that happens….don’t you agree?
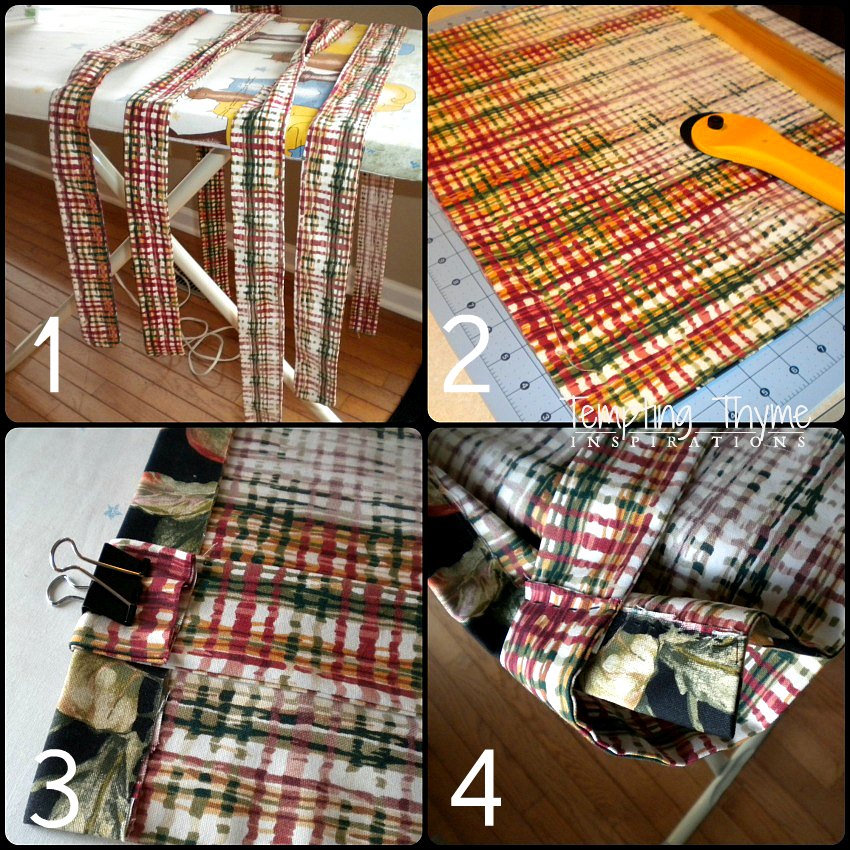
Not the greatest picture, but I wanted to show you how long the panel is when not rolled up and tied. I unscrewed the L brackets and then pulled the staples out of the 1 x 2 board. Yep, that is all that was holding the fabric to the boards ….. staples from one of my favorite ‘tools’….. the staple gun!

I spread the panel out on the floor to measure how much I wanted to cut off of it, and of course my trusty helper jumped right in! LOL!
I was a little concerned that the weight of the fabric would be too much for the magnetic rod. I ended up cutting off 6 inches from the top. Can you see where the fabric has faded from the sun? Do I like it? No! But it will be facing the outside again …. so no one will notice it. Remember, a couple of year’s from now = total color scheme makeover! As long as the faded section isn’t facing the inside, I am totally fine with it!
Here are the basic steps I took to convert the curtain hardware:
1. As I was cutting 6 inches from the panel, I also decided to cut 6 inches from the 4 sashes. After trimming them down, they received a solid ironing to flatten out 13 years of use!
2. Here is another shot of the panel getting trimmed. I used a cutting mat and one of those rolling cutters. No idea the name of it, but it happens to be one of my Mom’s favorite quilting tools. She told me these cutters are a must for any sewing wannabe. You can really see the sun damage in this shot.
3. I needed to create a pocket to hold the magnetic rod. Once I had the appropriate width measured out, lined up the sashes where I wanted them to go (I had 4….. 2 on the front and 2 on the back), I basically paper clipped it all together deciding how I was going to permanently attach it all.
4. I ended up doing a crude stitching job. I originally wanted to just use stitch witchery, but it was not sealing together with the hot iron. Instead I used double thread and quickly stitched it all together. I know that if you look closely you will see the black stitches in places, but who is honestly going to stick their nose up there to have a gander at it???
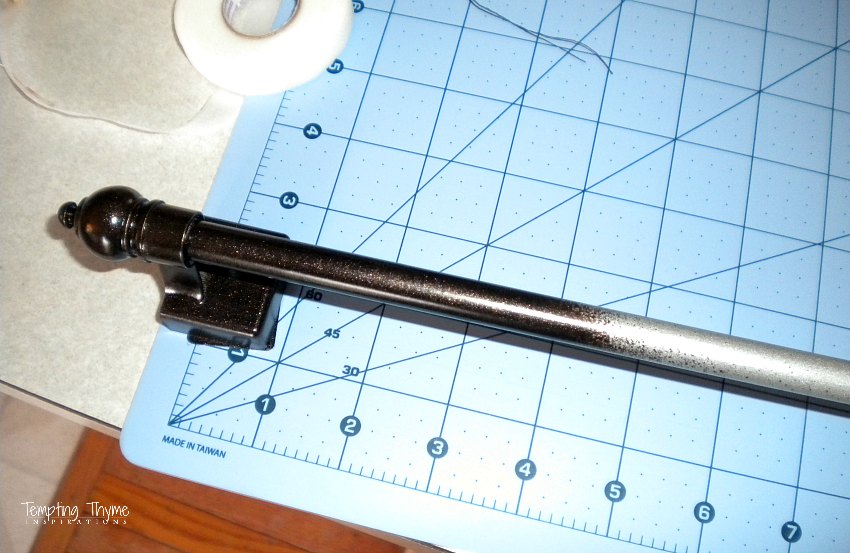
I couldn’t find any dark magnetic rods, so I just bought the silver one and spray painted the ends a Bronze Metallic (I already had it on hand). Remember, I used this same spray for this ceiling fixture!!

Little glitch when I assembled everything together! The weight of the assembled curtain was too much for the magnetic rod…. it kept sliding down the door. BUMMER!! Hallelujah I kept my cool! I ended up taking out the dowel rod, and gently rolled up the bottom without it. I tried to make it look as ‘circular’ as possible. I think it worked!
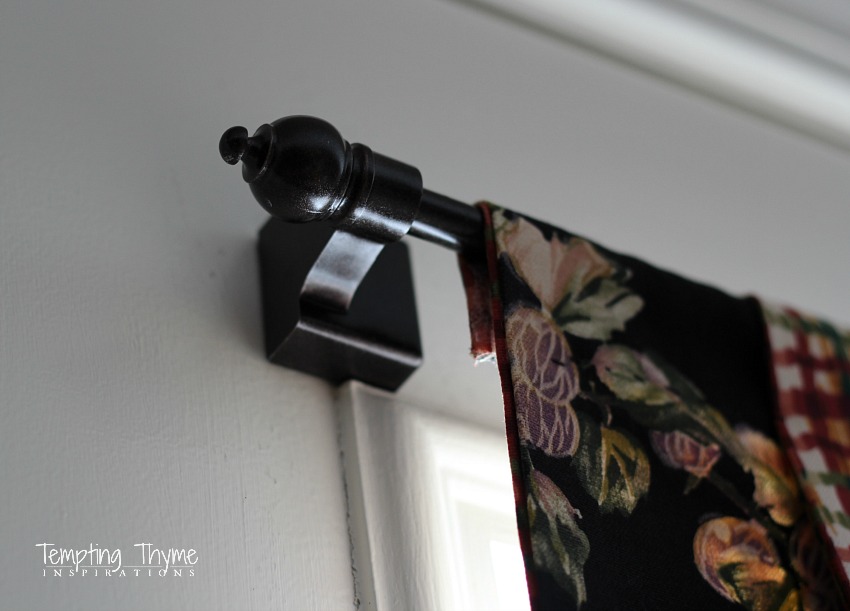
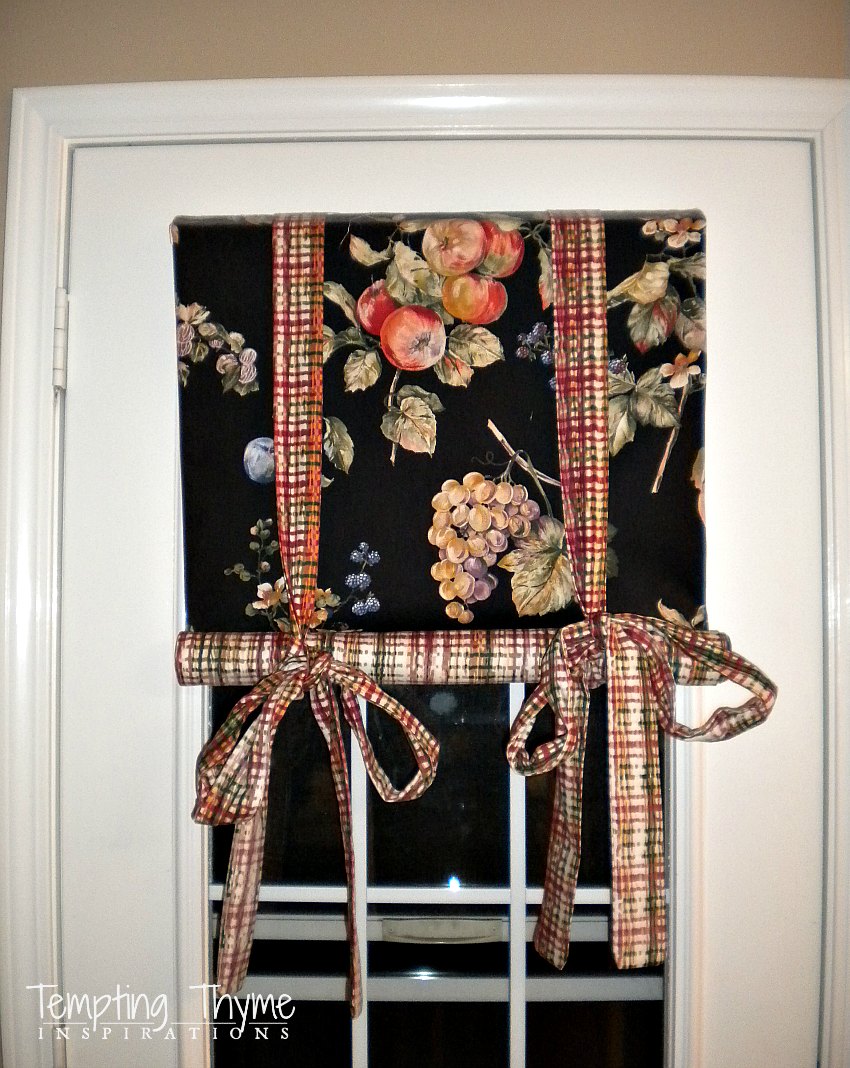
Here is a close up of the finished curtain panel. I am loving the color of the magnetic rod. I wonder why they don’t make them this color? Remember….I asked you not to get your nose up there to see the black stitches!! =)

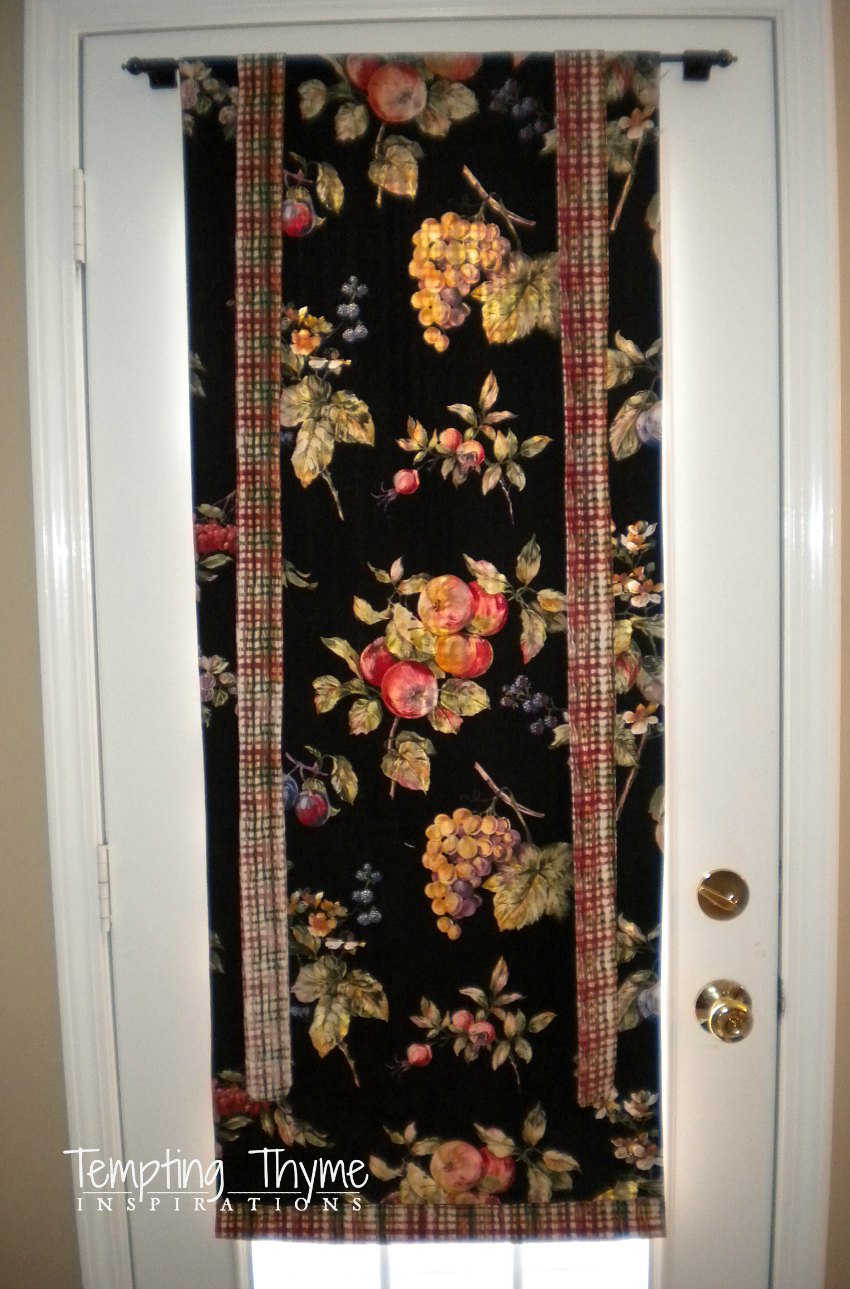
Here is the finished product! Don’t you think this makes a better presentation as you walk in the door? More welcoming? Sometimes I hold my breath as we open and close the door, but so far it is staying put. Twenty more months to go!!!
Do you have any magnetic curtain rods in your house? They are not limited to metal doors. You could also use them on the side of a refrigerator or dishwashers for hand towels!!
Until next time…….
Shaunna

Very cute! I didn’t know they even had magnetic curtian rods.
Susie (The Esthetic Goddess) recently posted…Did You Know….
I am glad I am not alone!