
Once upon a time, I saved some gorgeous doors from having an unlikely meet up with the garbage man…….Rumpke. These doors were off of K’s first chest of drawers, and saw quite the beating from my young man! I believe they call these a wardrobe, but I happen to call it an entertainment center that happened to have 3 drawers.
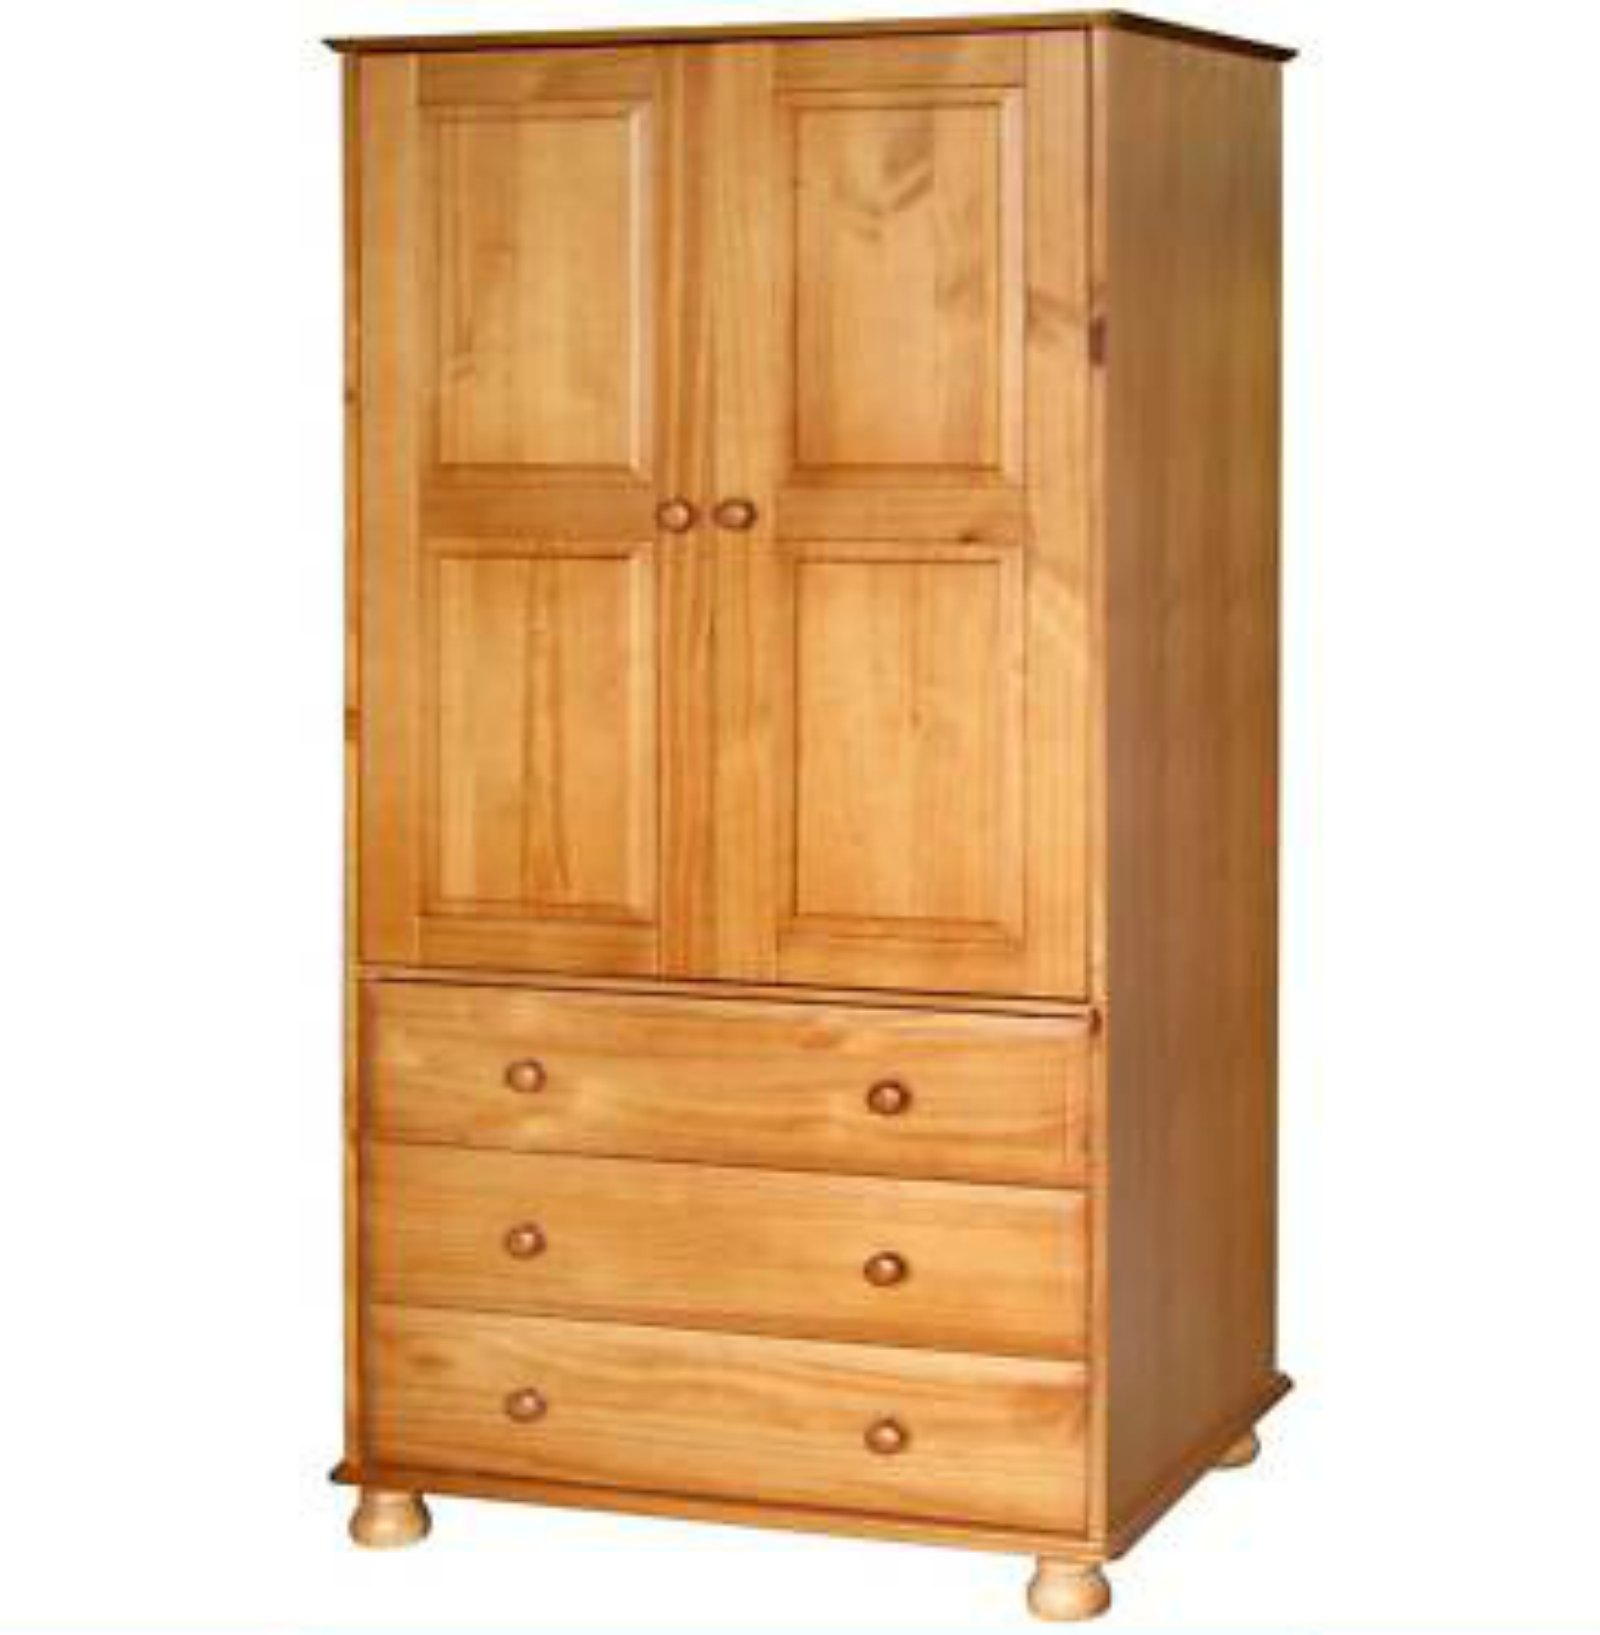
This is not the actual wardrobe in his room. It is just one I happened to find online to give you all a visual of what I am trying to describe! Sometimes the right words or descriptions totally allude me, and it seems like it is happening to me more and more lately. {sigh} Visuals always work in a pinch when the brain shuts down, making thinking and writing intelligently impossible. Right? In your visualization, please replace the doors with 2 beautiful shutters.
I knew that we were going to have to get rid of it when the drawers kept falling apart, and it was a real struggle getting them to open and close. I started disassembling it, setting aside the hardware, sides, the 4 ‘feet’ and the shutter doors. I am sure you can all guess that PT just about through a fit when I said I wanted to save these items, as I just knew I could use them for ‘something’ in the future. I can just see him rolling his eyes when he reads this post. LOL! Then again, I don’t know if he ever reads them! Hmm!
Labeling the hardware, and lining everything up along the wall in the storage room, I had visions of using the shutters as a Christmas card holder, or a place to put pretty little note cards or photos in my office. The possibilities are endless….

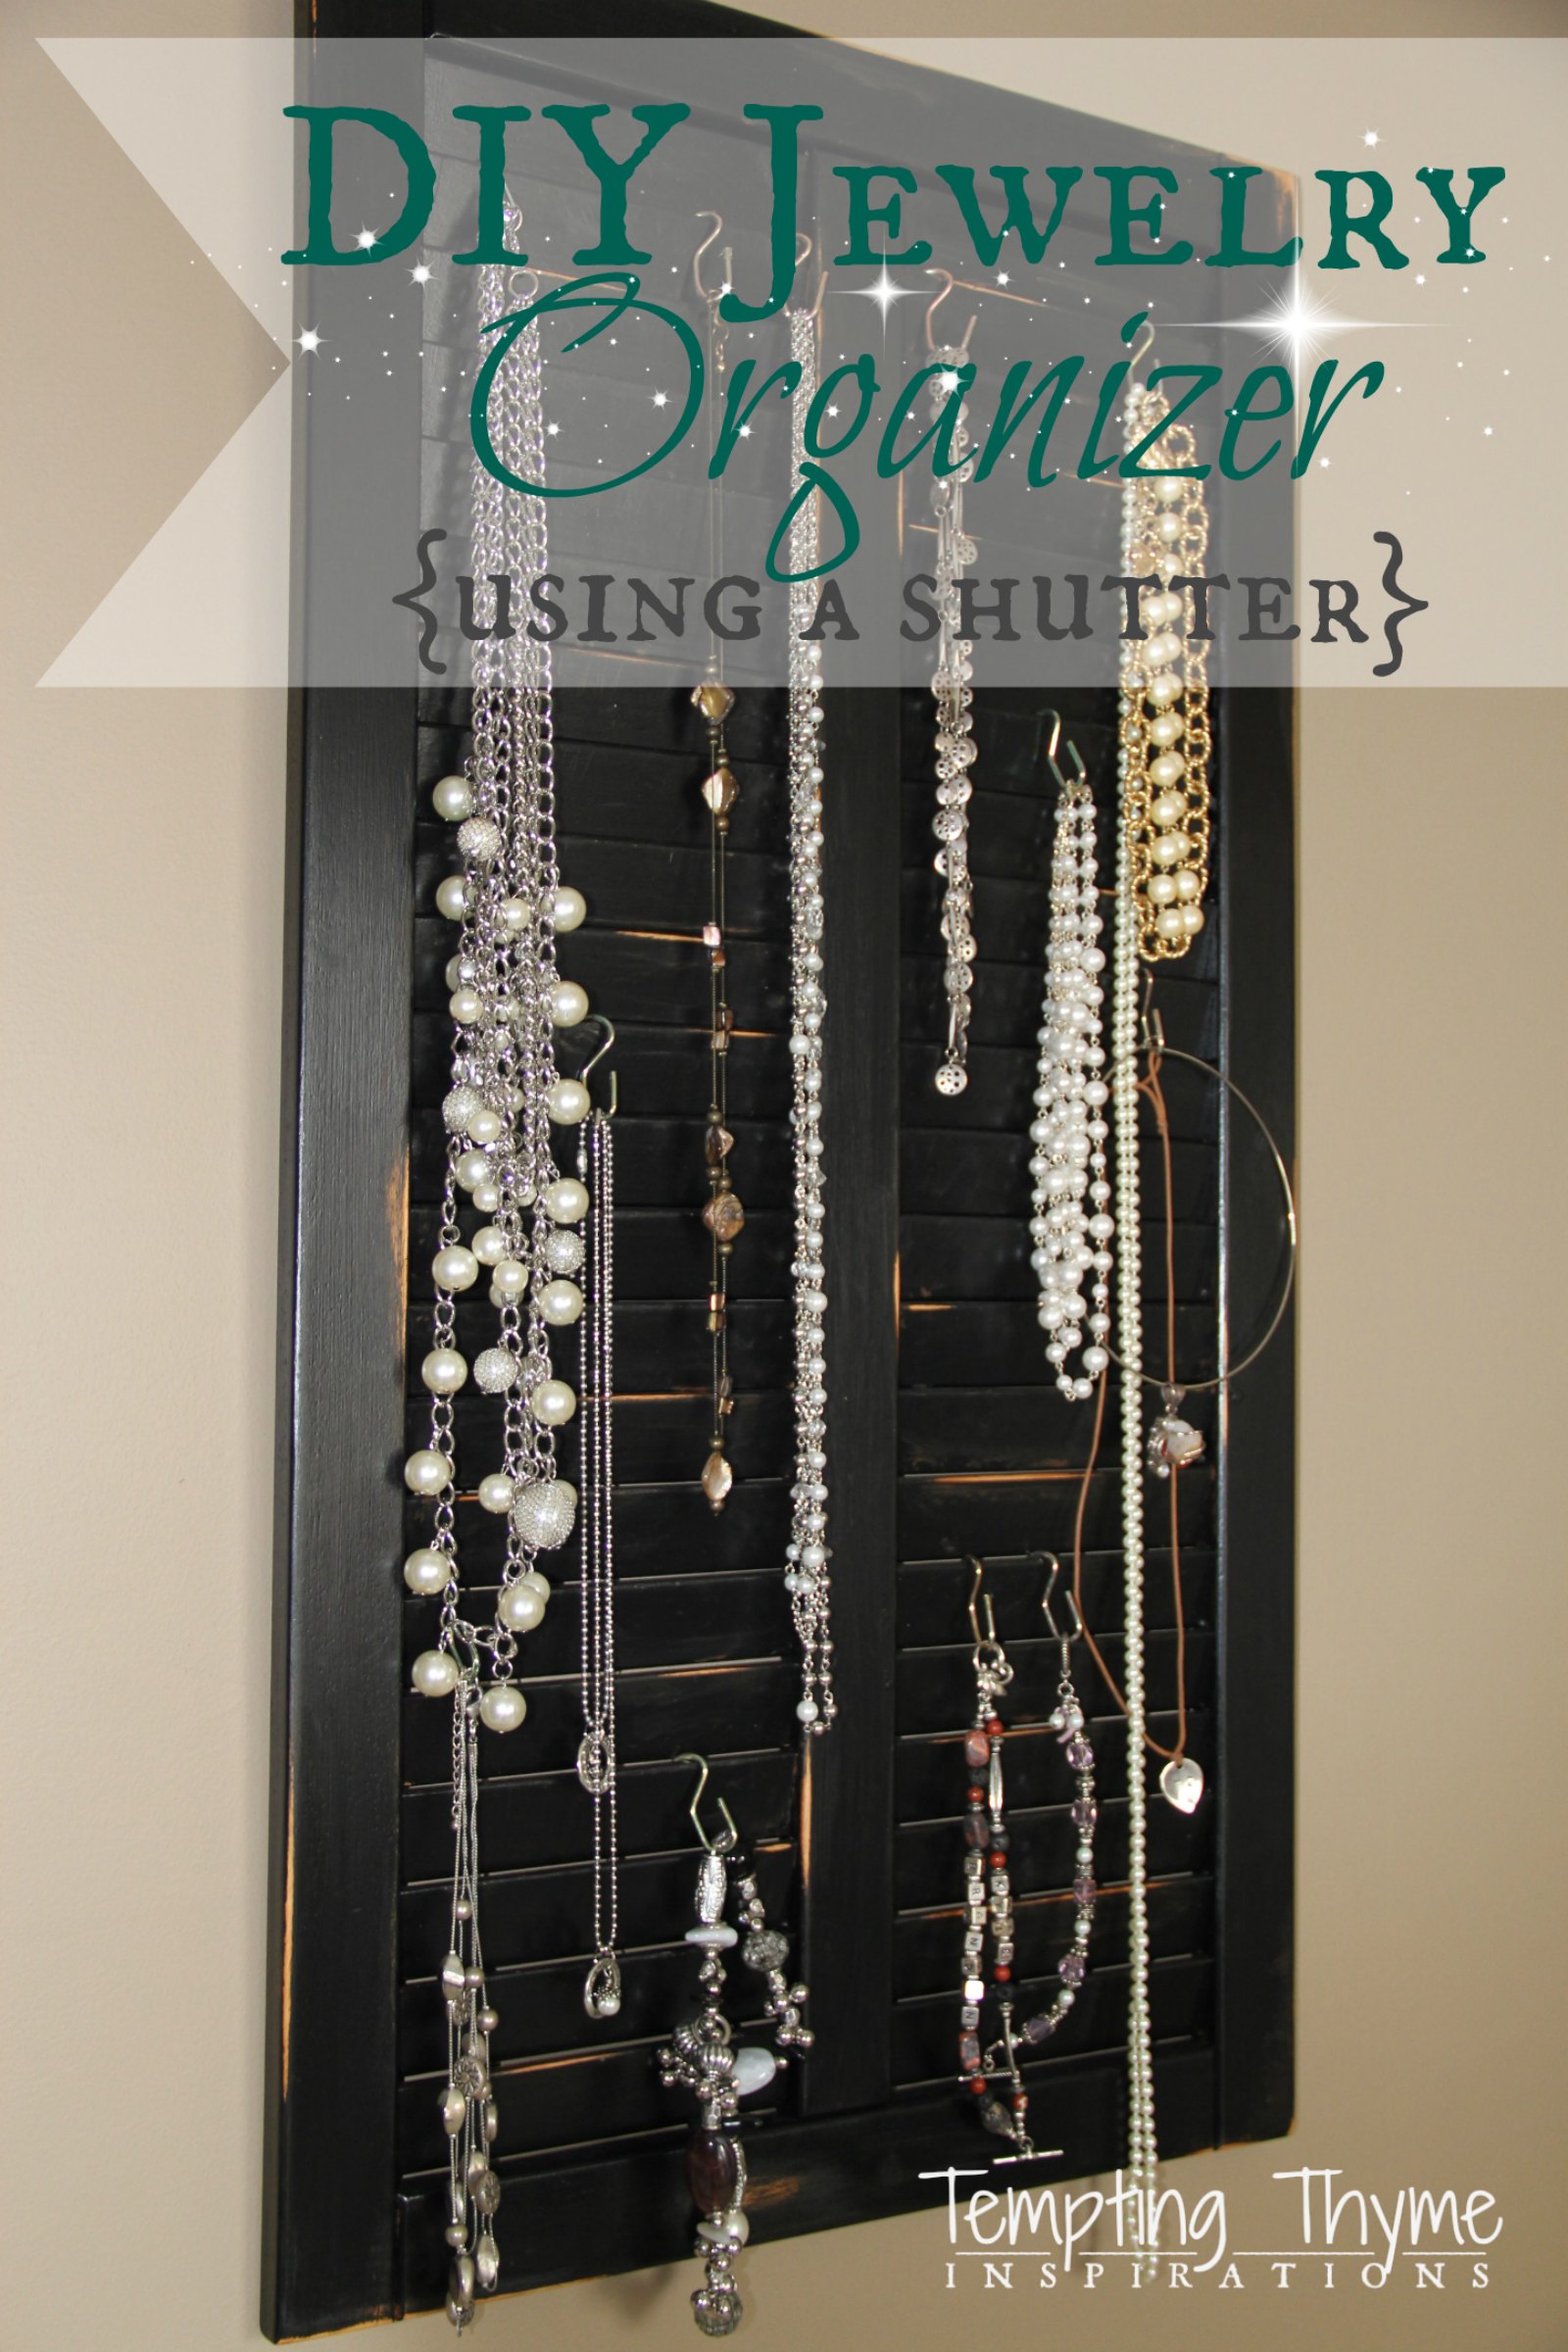
I finally pulled the doors out of the storage room last year! It was about time they got their chance to shine again. Here are the few very easy steps I took to ‘Upcycle’ these great shutter doors, turning them into a great jewelry organizer:
1. As they were stained, I had to do a little bit of sanding so that the paint would adhere to the wood. If I hadn’t done this, then the paint would have ‘slid’ off of the protective finish.
2. After sanding lightly, and removing all of the dust, I set out to paint them my favorite color…..black. You knew that about me, right? I gave them each 2 coats of black enamel paint.
3. As I wanted them to look distressed, I sanded down areas that I wanted to look scuffed up, as well as some of the corners. I took it even further and used a hammer to bang it up a little. Don’t be afraid, they will hold up, and it is a great way to release some tension and anger!
4. Once I was happy, I took a little bit of stain and went over the raw areas where the paint had been sanded off, or where it came off because of the beating it received. I let the stain soak in for about 5 minutes and then gently wiped off any excess with an old rag.
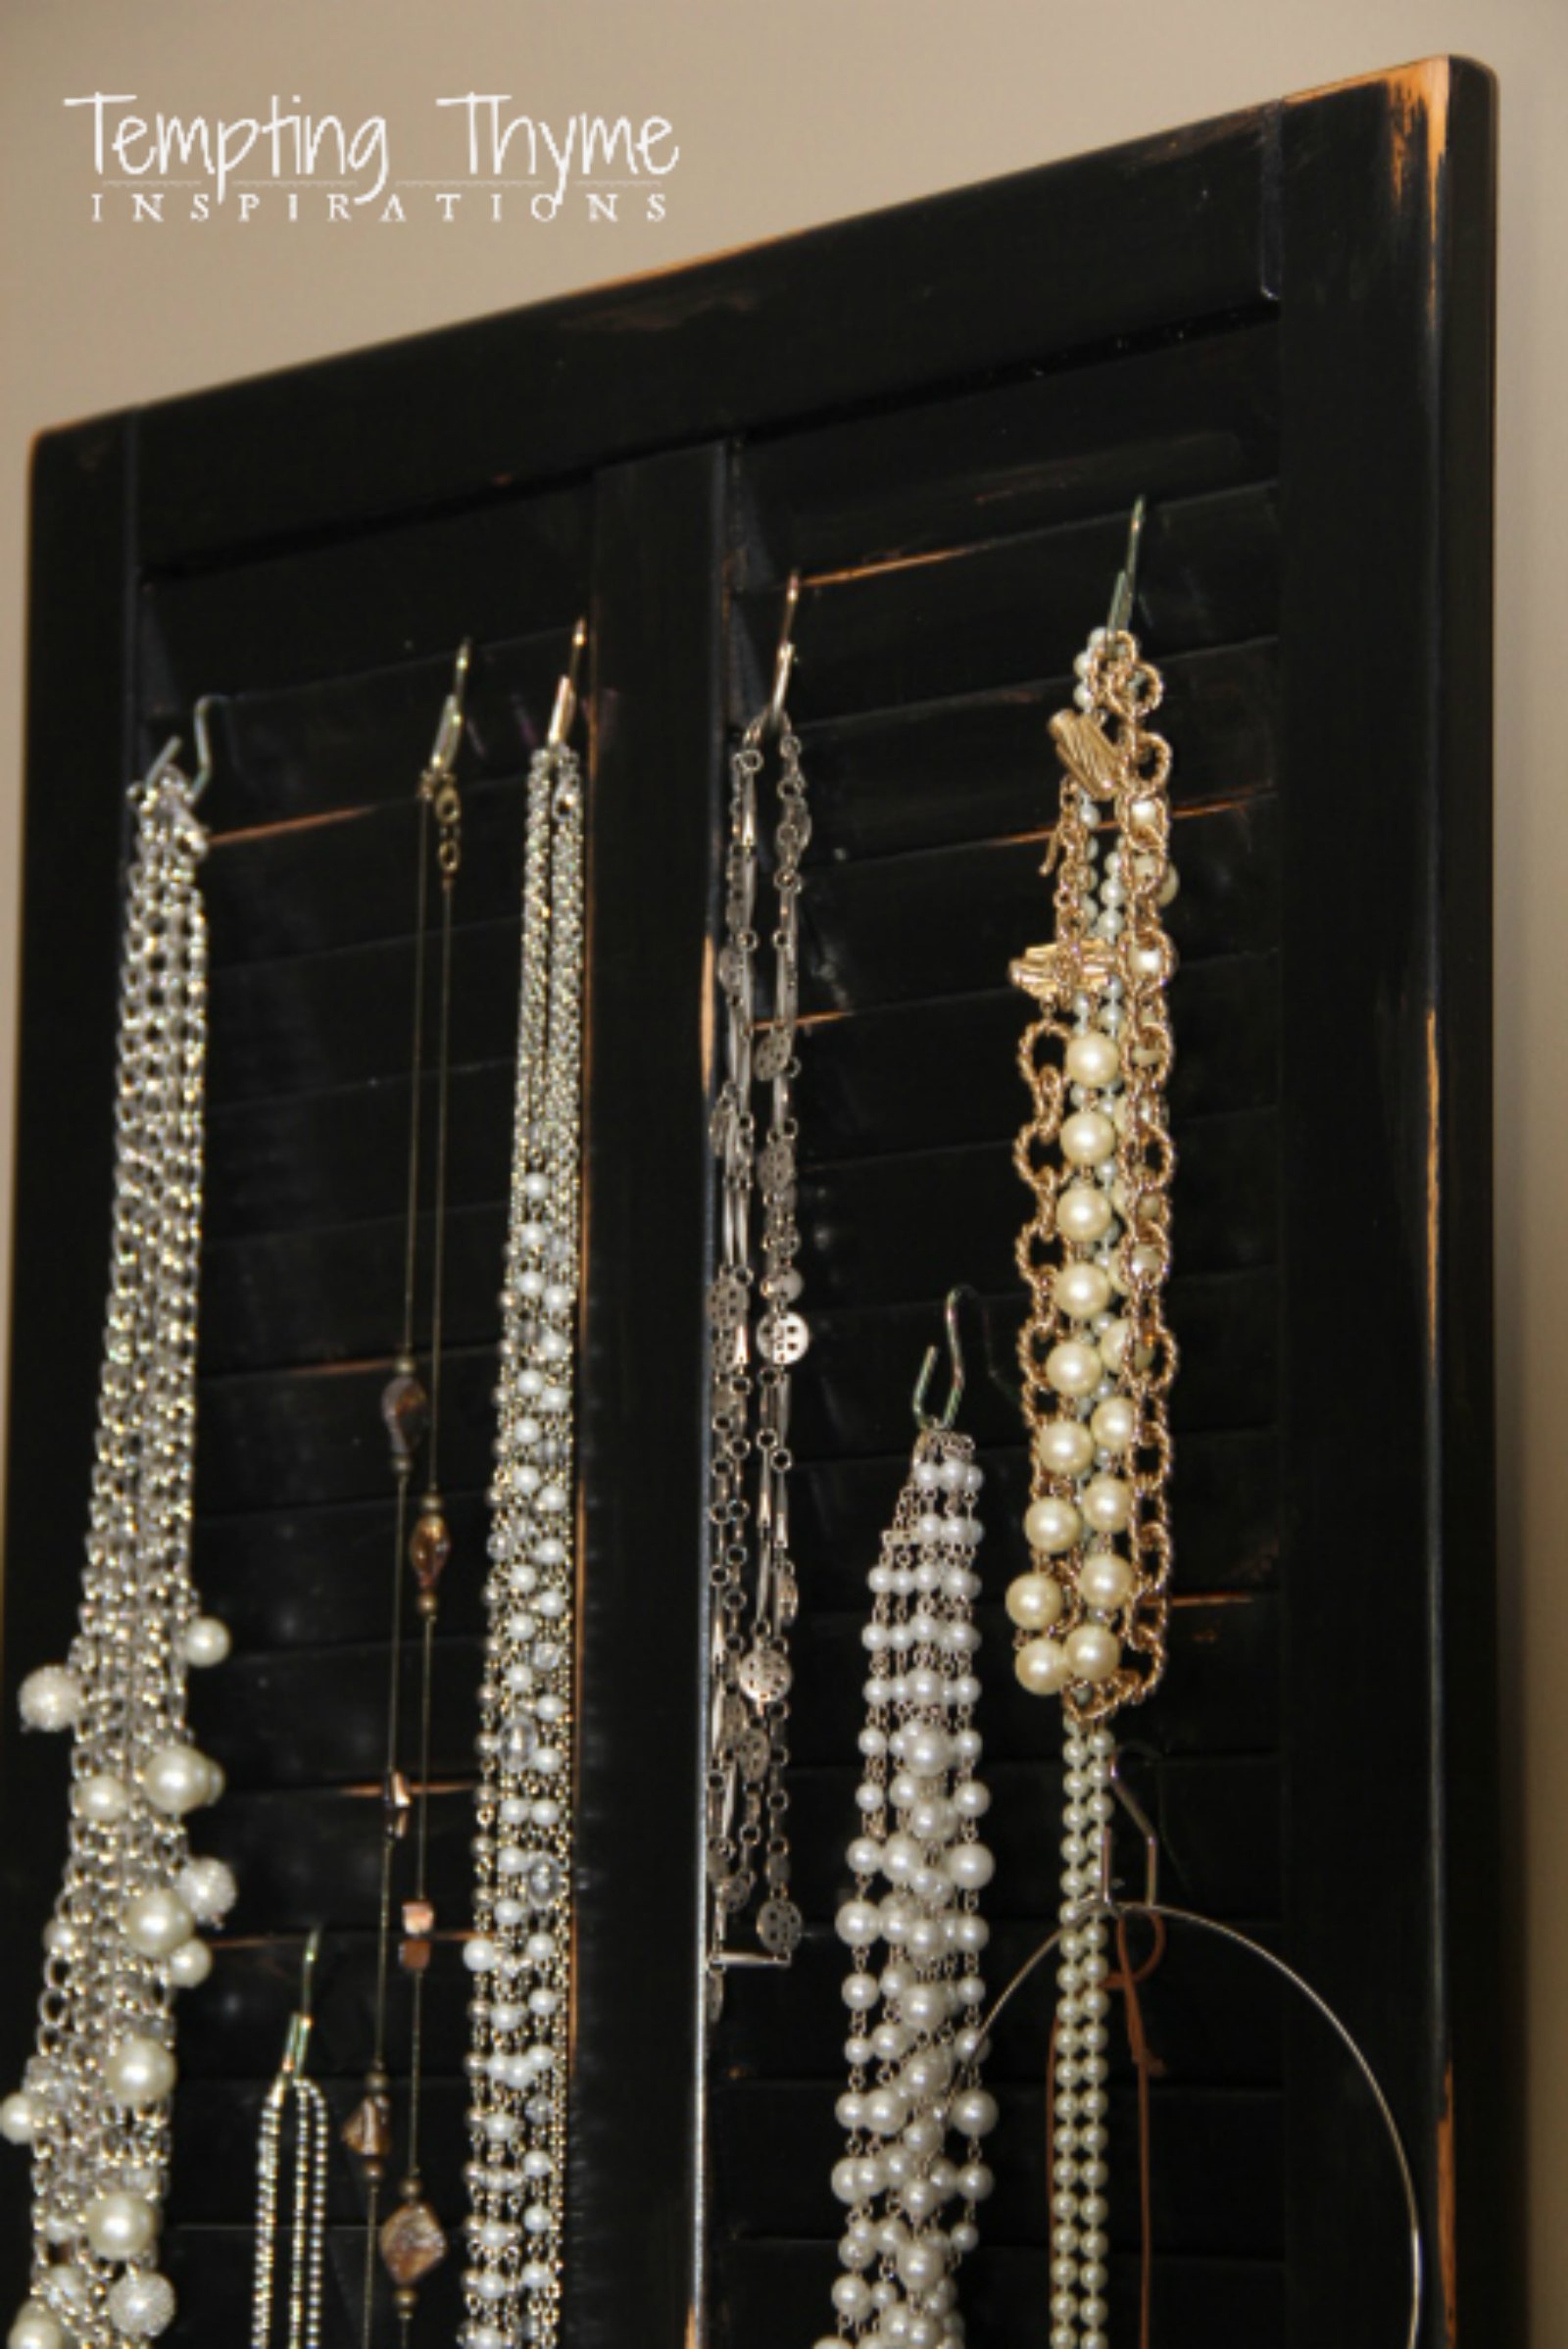
5. Let your pieces dry completely, at least 24 hours. As I wanted to be able to use this for other projects in the future, I didn’t want to put a bunch of holes into it by using cup hangers or nails. Instead, I used flowerpot hooks ( S-hooks) to hold the jewelry. One end hooks right into the louvered slats, and the other end holds all of the jewelry.
6. Attach a picture hanger on the back, and you are ready to get all of your jewelry organized and looking pretty.
What did I do with the other door? Only one is being displayed! Thank you for asking! The 2nd door is being used as a backdrop for 3 of my favorite framed sunset photos. I will show you a picture soon! You are going to love it! If you happen to have a ton of jewelry….use them both to store your jewelry. There is no right or wrong! It is your creative inspiration that needs to take flight. Okay, that is a little corny, but you get it.
You may not be so lucky as to have some old shutters hanging around, or even a wardrobe that is falling apart, but that shouldn’t stop you. Keep your eyes open while driving down the street. You may spot some laying next to the garbage can, or someone could be selling some real cheap at a garage sale.
Until next time,
Shaunna
Other cool DIY projects you will not want to miss:
How to make coasters {tutorial}
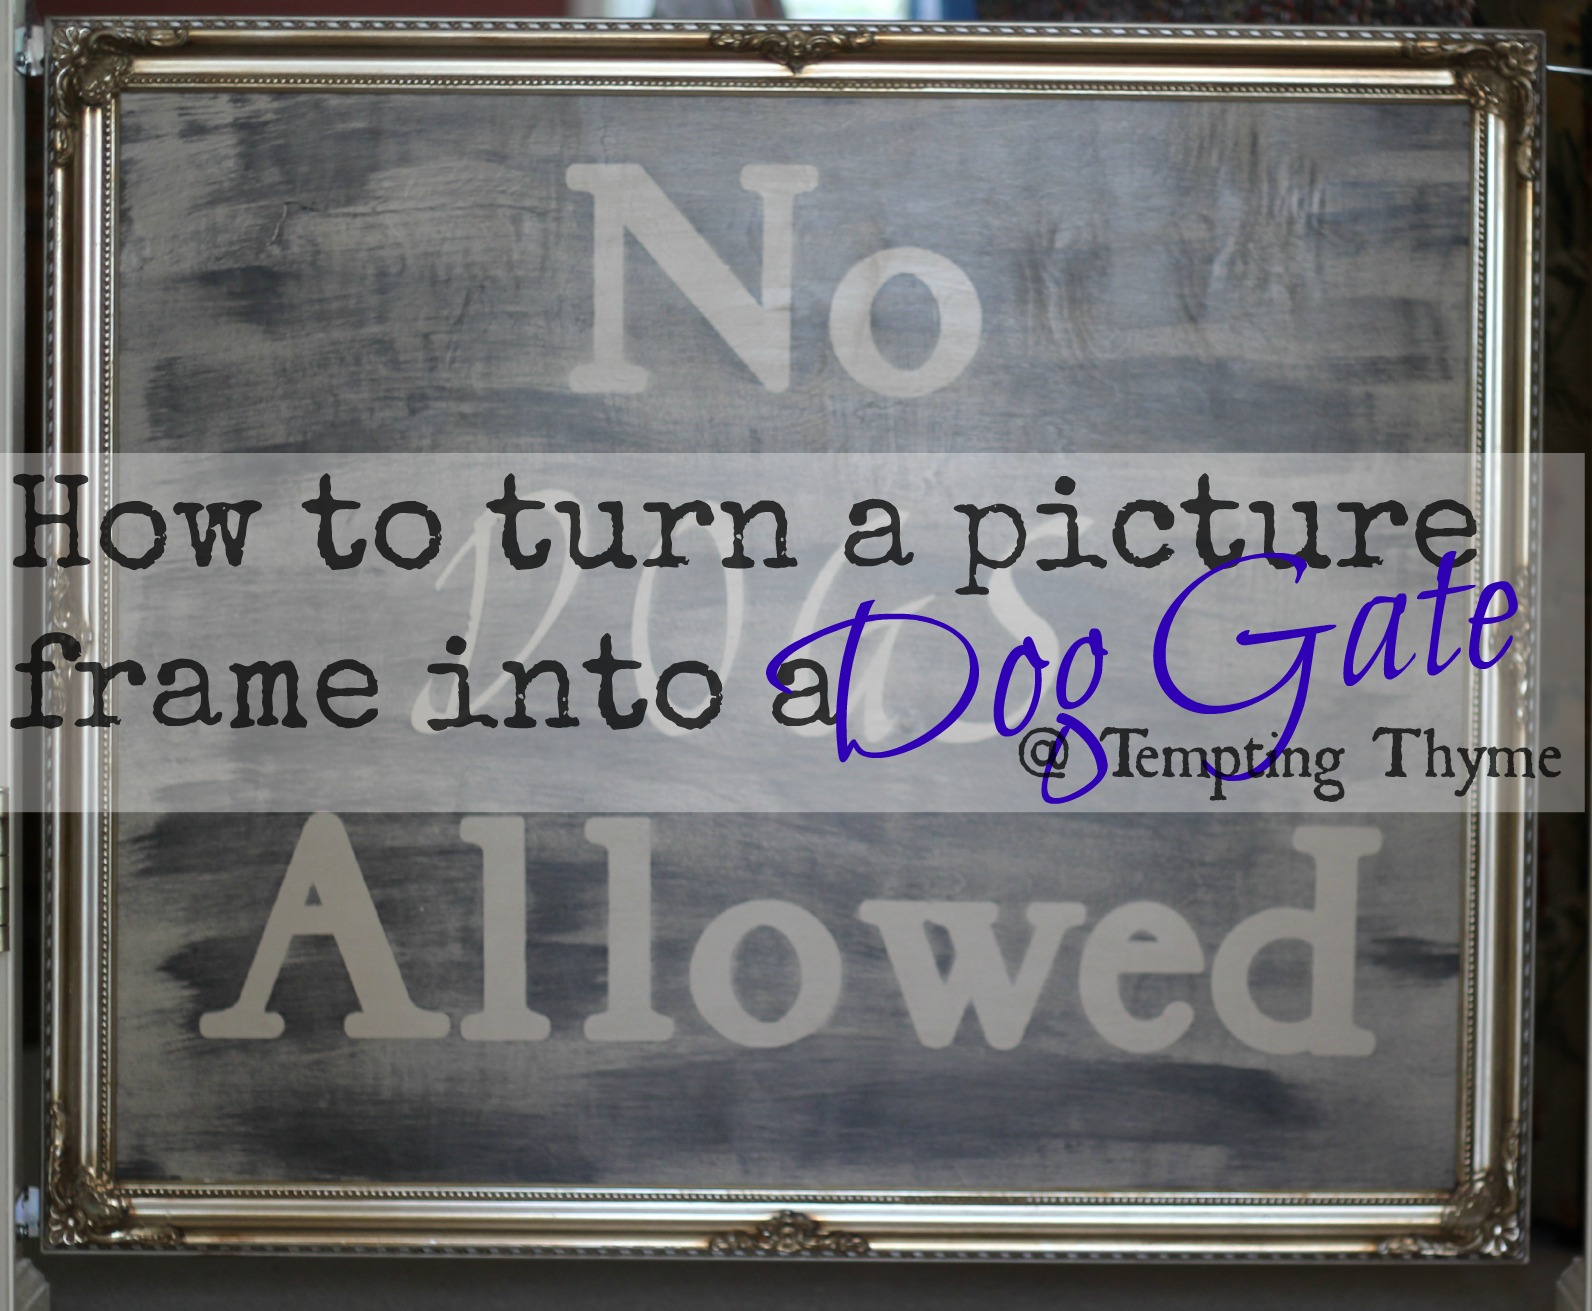
DIY Dog Gate {using an old picture frame}
How to paint an ugly light fixture
Pingback: Goodwill Upcycle: Bedroom Nightstand | anahikristian
Pingback: Turning coins into beautiful jewelry {DIY Momento} | anahikristian